Wet patches, peeling paint, and musty smells rarely appear by chance. They are symptoms of water movement—and understanding that movement is the only reliable way to achieve a lasting fix. In this in-depth guide, you will learn the science behind moisture in buildings, the most common causes of damp walls, and proven strategies to prevent and cure the problem without guesswork.
Quick Answer: The Three Big Pathways That Make Walls Wet
Water reaches walls by only a few physical pathways. Nearly every case of damp can be traced to one (or a combination) of these:
- Liquid water intrusion (driving rain, roof or plumbing leaks, groundwater pressure) that penetrates or wicks through building materials.
- Capillary rise (often called rising damp) where moisture travels up from the ground through tiny pores in masonry due to suction forces.
- Condensation when warm, moisture-laden air meets a cold surface, dropping water out of the air at the dew point on (or inside) the wall.
Everything else—like poor ventilation, missing flashings, failed sealants, or inadequate drainage—usually feeds into one of these three pathways.
Wall moisture–where it comes from
To solve damp walls, you must map the moisture source, the path it travels, and where it accumulates. The phrase Wall moisture–where it comes from sums up a core building-science truth: water problems are supply-and-transport problems. Cut the supply or break the transport path, and the symptom disappears.
- Supply: rain, plumbing leaks, groundwater, indoor humidity from living activities, or construction moisture trapped in new materials.
- Transport: gravity flow, wind-driven rain, capillary suction, air leakage carrying water vapor, or vapor diffusion through materials.
- Accumulation: cold surfaces, vapor-impermeable coatings, thermal bridges, and hidden cavities that slow drying.
When investigating, always ask: What feeds the water? How is it moving? What stops it from drying?
The Physics Made Simple: How Moisture Moves in and Through Walls
1) Liquid Flow and Wind-Driven Rain
Rainwater can be forced into joints, cracks, and porous claddings by wind pressure. Once inside, gravity and surface tension help water move downward and sideways along materials, often showing up as stains or peeling finishes far from the actual entry point.
2) Capillary Action (Suction)
Porous materials like brick, block, and mortar have tiny tubes (capillaries) that actively pull water upward or horizontally. This explains why a masonry wall can get wet at mid-height even if the ground is the original source. Without a functional damp proof course (DPC) or proper detailing, capillarity can keep feeding moisture indefinitely.
3) Air Leakage Carrying Water Vapor
Warm air holds more water vapor than cold air. When air leaks through gaps around outlets, baseboards, top plates, or window perimeters, it carries moisture with it. If that humid air hits a cold surface inside the wall assembly, condensation can occur out of sight, eventually telegraphing as damp patches, mold, or decayed materials.
4) Vapor Diffusion
Even without air leaks, water vapor can slowly pass through materials from higher vapor pressure to lower. Diffusion is usually a minor transport mechanism compared to air leakage, but in continuously humid spaces (like indoor pools, bathrooms, or kitchens) it can still matter—especially if finishes create a vapor trap that blocks drying.
5) Thermal Bridges and Dew Point
Any cold spot in a wall—like a steel lintel, concrete beam, or uninsulated corner—lowers the surface temperature. If that temperature drops below the dew point of the indoor air, moisture condenses. You see this as dark, damp zones or mold crescents behind furniture or at ceiling perimeters, especially in winter.
Common Sources of Damp Walls (By Category)
Exterior Water Sources
- Defective gutters and downspouts: Clogged or undersized systems dump water near foundations, driving moisture into walls and basements.
- Negative grading and poor drainage: Soil sloping toward the house or missing splash blocks concentrates water at the base of walls.
- Cracked render or mortar joints: Hairline fissures admit wind-driven rain; in cavity walls, missing or blocked weep holes trap water.
- Failed flashings and sealants: Around windows, doors, balconies, parapets, and roof-to-wall junctions, small failures yield big leaks with each storm.
- Roof leaks: Penetrations (vents, chimneys), damaged shingles, or aging membranes route water behind interior finishes.
Ground and Structural Sources
- Rising damp: Absent, bridged, or failed DPC allows moisture to wick from the soil up through masonry, bringing hygroscopic salts that attract additional humidity.
- Hydrostatic pressure: In basements, groundwater pushes against walls; micro-cracks and joints leak unless exterior waterproofing or drainage relieves the pressure.
- Capillary breaks missing: Slabs without a damp proof membrane (DPM) can feed moisture up into interior partition walls and finishes.
Interior and Occupant Sources
- Condensation from indoor humidity: Showers, cooking, drying laundry indoors, aquariums, or many plants raise relative humidity.
- Inadequate ventilation: Low air changes per hour and no exhaust in kitchens and bathrooms keep moisture trapped.
- Plumbing leaks: Pinholes, failing fittings, and slow leaks wet wall cavities. Even small drips cause chronic damp if unnoticed.
- Construction moisture: New concrete, plaster, and timber can hold significant water. Sealing surfaces too early can trap it.
- Thermostat setbacks: Allowing surfaces to cool in winter increases the chance of dew point condensation when humidity spikes.
How to Diagnose the Real Cause (Before You Spend a Dime)
Successful fixes start with correct diagnosis. Use this practical sequence to pinpoint the moisture source:
Step 1: Document When and Where
- Timing: Only after rain? During cold mornings? After showers or cooking? Season-dependent clues are invaluable.
- Location: Near the floor (suspect rising damp), near windows and corners (condensation/thermal bridge), or mid-wall (penetrating damp or internal leak).
- Pattern: Sharp-edged stains suggest liquid leaks. Fuzzy, diffuse darkening suggests vapor condensation.
Step 2: Look for Visual and Tactile Indicators
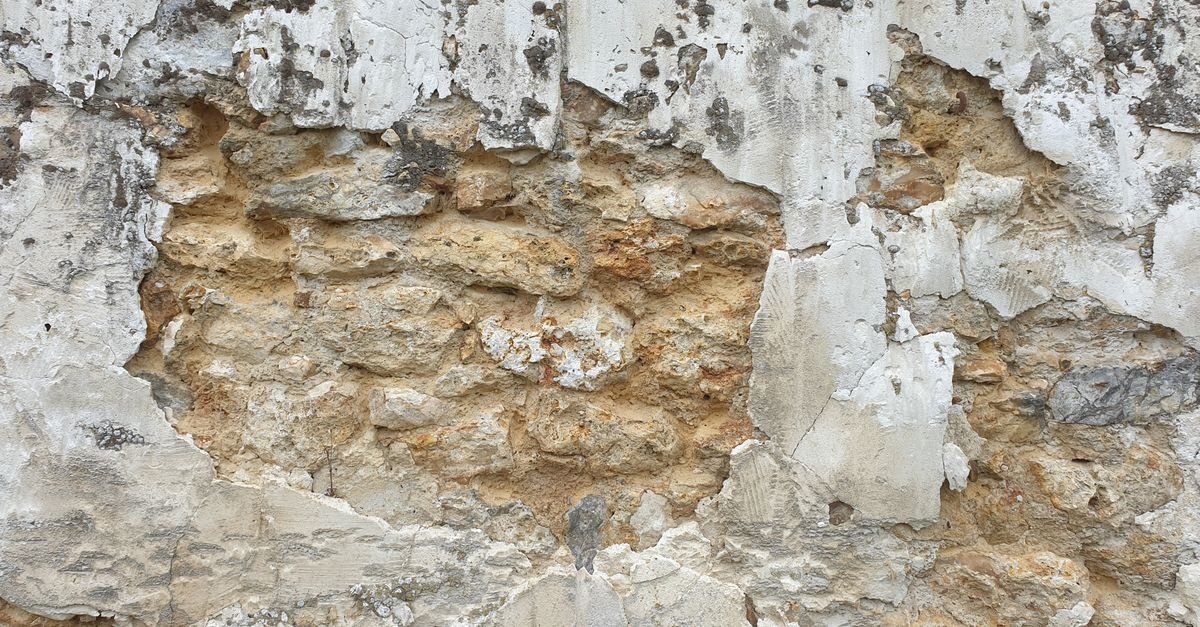
- Efflorescence: White, powdery salts on masonry indicate liquid water movement and evaporation.
- Blistering or peeling paint: Often from vapor pressure building behind impermeable coatings.
- Musty odor and mold: Persistent humidity in cavities or on surfaces, commonly at thermal bridges.
- Tide marks: Horizontal staining or salt bands a foot or two above the floor strongly suggest rising damp or splashback.
Step 3: Measure, Don’t Guess
- Moisture meter: Use both pin and pinless meters. Take comparative readings (wet vs. dry areas, inside vs. outside walls).
- Thermal imaging: Find cold spots and hidden moisture patterns after a heating or cooling cycle.
- Hygrometer: Track indoor relative humidity (target 40–55% in most climates). Log RH and temperature for a week.
- Calcium carbide or in-situ RH tests (for slabs and masonry): Consider professional testing to confirm moisture content and drying potential.
Step 4: Probe the Building Envelope
- Exterior scan: Check gutters, downspouts, grading, weep holes, flashing terminations, sealants, and siding transitions.
- Roof inspection: Look for cracked tiles, missing shingles, flashing gaps, and clogged valleys.
- Plumbing audit: Inspect accessible runs, shut-offs, traps, and valves. Dye tests for toilets; pressure tests if needed.
- Ventilation performance: Test bath and kitchen exhaust with a tissue test or anemometer; confirm outdoor termination.
Pro tip: If damp worsens in winter at exterior corners and behind large furniture, suspect condensation and thermal bridging. If damp surges after storms or when snow melts, suspect rain or groundwater.
Room-by-Room: Typical Damp Wall Scenarios
Basements and Cellars
Below-grade walls battle hydrostatic pressure and limited drying potential. Common issues include efflorescence, flaking paint, and damp lines at floor level. Interior-only “waterproof” paints rarely stop bulk water long-term without exterior drainage improvements like perimeter drains and proper grading.
Bathrooms
Steamy showers spike RH; if the fan is weak or not vented outdoors, condensation forms on the coolest surfaces—often exterior walls or tile grout lines. Leaks in supply or waste lines inside the wall also create chronic damp.
Kitchens and Laundries
Cooking and drying clothes add liters of moisture daily. Poor hood capture rates or ventless dryers overload walls with humidity, encouraging condensation around thermal bridges and cabinets.
Bedrooms and Living Areas
Nighttime breathing in closed rooms can raise RH enough to reach dew point on cold walls and windows. Large wardrobes against outside walls trap cool air, encouraging mold crescents.
Attics and Top-Floor Flats
Roof leaks and wind-driven snow can wet party walls or gable ends. Inadequate insulation or ventilation causes ice dams and condensation, eventually showing as stains on upper walls and ceilings.
Climate Matters: Why Causes Differ by Region
- Cold climates: Interior humidity condenses on cold exterior walls and window reveals. Air sealing and insulation continuity are key.
- Hot-humid climates: Outdoor air is moist. If cooled interior walls are leaky to outdoor air, condensation forms inside walls (inward vapor drive). Avoid interior polyethylene; prioritize exterior-continuous insulation and controlled ventilation.
- Mixed climates: Seasonal reversals complicate vapor control. Favor assemblies that can dry in at least one safe direction and use smart vapor retarders.
- Coastal and windy zones: Wind-driven rain is severe; rely on rain screens, robust flashings, and dedicated drainage/ventilation cavities.
How to Stop Damp Walls: A Prioritized, Permanent Fix Strategy
Think in layers: manage water at the source, then control transport, then ensure safe drying. Start with exterior defenses, address interior sources, and backstop with targeted treatments.
1) Control Liquid Water Outside First
- Gutters and downspouts: Clean, size correctly, and extend outlets at least 2–3 m from the foundation. Add splash blocks or leaders.
- Grading: Slope soil away from the building (minimum 5% for 3 m). Rework landscaping that traps water against walls.
- Cladding maintenance: Repoint open mortar joints, repair cracked render, replace failed sealants with high-quality, compatible products.
- Flashings and weeps: Verify through-wall flashings at openings. Ensure cavity walls have unobstructed weep holes/vents to drain moisture.
- Roof integrity: Repair leaks, secure underlayments, and check penetrations. In snow regions, address ice dam risk with air sealing and insulation at the attic plane.
2) Break Capillary and Groundwater Pathways
- Damp proof course (DPC): If missing or bridged, reinstate. Options include physical DPC insertion (specialist) or chemical injection creams where appropriate.
- Perimeter drainage: Install or repair French drains with filter fabric and washed stone. Tie downspouts into solid drains to daylight.
- Basement waterproofing: Favor exterior, positive-side membranes with drainage boards. Interior negative-side coatings alone are a last resort when excavation is not feasible.
- Capillary breaks: Under new slabs, use a polyethylene DPM over well-graded, compacted stone. Retrofit interior capillary breaks at sill plates if needed.
3) Fix Indoor Moisture Loads and Ventilation
- Ventilate right: Duct bath and kitchen fans outdoors, not into attics or cavities. Target 50–80 L/s capture for range hoods when cooking.
- Continuous ventilation: In tight homes, use HRV/ERV to maintain healthy RH (40–55%) and limit condensation risks.
- Dehumidification: Use as a control measure in basements and shoulder seasons. Dehumidifiers are a supplement, not a cure for liquid leaks.
- Behavioral tweaks: Lids on pots, shorter showers, line-dry outside when possible, and space furniture away from exterior walls.
4) Insulate, Air Seal, and Manage Vapor Wisely
- Air sealing: Seal cracks, outlets, and top/bottom plates to reduce moist air leakage into walls. Use compatible sealants and gaskets.
- Thermal continuity: Add continuous exterior insulation where feasible to warm interior surfaces and minimize thermal bridges.
- Vapor control: Use smart vapor retarders in mixed climates. Avoid interior polyethylene in air-conditioned, hot-humid regions.
- Finish selection: Choose vapor-open paints and plasters where drying is needed. Avoid impermeable coatings that trap moisture.
5) Address Plumbing and Internal Leaks
- Pressure tests: If damp is localized and persistent in one zone, pressure-test lines and inspect with a borescope.
- Replace aging components: Old valves, corroded pipes, and worn seals are frequent culprits for chronic, low-flow leaks.
- Appliance drains and pans: Confirm proper discharge and add leak detectors under washers and water heaters.
6) Remediate Damage and Prevent Mold Return
- Dry thoroughly: After correcting the source, use air movement, dehumidification, and controlled heat until materials reach safe moisture levels.
- Remove contaminated materials: Cut out and replace moldy drywall, wet insulation, and decayed trim. Clean remaining surfaces with detergent, not just bleach.
- Salt-contaminated plaster: In rising damp cases, remove salt-laden finishes and re-plaster with breathable, salt-resisting systems.
What Not to Do: Common Pitfalls
- Painting over damp with “waterproof” coatings only: Without eliminating the source, coatings can blister and trap moisture, worsening damage.
- Blocking ventilation: Sealing trickle vents or shutting off fans pushes humidity into hidden cavities.
- Adding interior polyethylene indiscriminately: In cooling seasons or hot-humid climates, interior vapor barriers can trigger interstitial condensation.
- Ignoring exterior grading and gutters: Many basement damp problems trace back to these basic, low-cost fixes.
- Relying on dehumidifiers alone: They manage air moisture but cannot counter liquid leaks or capillary suction.
Secondary Clues That Refine Your Diagnosis
- Efflorescence without mold: More typical of liquid water transport in mineral materials, not high-RH condensation on organic surfaces.
- Black mold crescents at cold edges: Scream “thermal bridge and condensation,” not necessarily leaks.
- Tide marks with crumbly plaster: Often rising damp with salts. Investigate DPC and exterior ground levels.
- Localized bulging paint beneath a window: Suspect failed sill flashing or sealant joints admitting rain.
- Intermittent damp after long showers: Vents are inadequate or not ducted outside; check fan run-on time and flow.
Old vs. New Buildings: Different Risks, Different Fixes
Traditional Solid Masonry
These assemblies were designed to get wet and dry. Breathable lime mortars and plasters allowed safe drying. Replacing them with dense cement mortars and impermeable paints often traps moisture and drives damage. Restoring vapor-open materials and capillary breaks returns the building to its intended behavior.
Cavity Walls and Modern Construction
Cavity walls rely on a drainage plane, weep holes, and continuous flashings. Thermal bridges at lintels, slab edges, and balconies become prime condensation sites if insulation is discontinuous. Verify the cavity can drain and dry, and upgrade insulation continuity where possible.
Timber-Framed Walls
Moisture must be kept off structural wood. Air leaks that carry humid air into cold sheathing can lead to hidden mold and decay. Air sealing, correct vapor control, and rain-screen claddings are essential.
Maintenance Checklist to Keep Walls Dry
- Seasonally: Clean gutters, test downspouts, check grading, inspect caulking and flashings, confirm weep holes are open.
- Annually: Inspect roof penetrations, repoint minor mortar cracks, service exhaust fans, and test their airflow.
- After severe weather: Scan ceilings and walls under roof and window areas; use a moisture meter for suspicious zones.
- Ongoing: Monitor indoor RH with a hygrometer; keep it between 40–55% to reduce condensation risks.
Cost-Savvy Order of Operations
Before jumping to expensive solutions, sequence repairs from outside-in and low-cost to high-impact:
- Clean and extend gutters/downspouts; fix grading.
- Restore sealants, pointing, and flashings at obvious defects.
- Boost ventilation (verify bath/kitchen exhaust to exterior) and manage indoor RH.
- Air seal key leakage points; add targeted insulation to remove thermal bridges.
- Address DPC or perimeter drainage if ground moisture is implicated.
- Only then consider interior waterproofing or major facade repairs as needed.
FAQs
Is rising damp real?
Yes. Capillary rise in porous masonry is a well-documented phenomenon. However, many “rising damp” diagnoses are actually condensation or splashback. Confirm with salt analysis, moisture profiling, and inspection of DPC continuity.
Will a dehumidifier fix wet walls?
It can reduce condensation and help drying, but it will not stop liquid water intrusion or capillary rise. Always fix the source first.
Can I just paint with a waterproof product?
Not if liquid water or ground moisture is present. These coatings can trap moisture and cause blistering, peeling, or spalling. Solve the cause, then choose a finish compatible with safe drying.
How do I know if condensation is the issue?
If damp worsens in cold weather, at corners or behind furniture, and improves with ventilation and heating, condensation and thermal bridging are likely. Measure RH and surface temperatures to confirm.
When should I call a professional?
Persistent damp without clear external cause, suspected structural leaks, significant mold, hydrostatic pressure, or heritage buildings merit specialist assessment with instruments and envelope expertise.
Case Study Snapshots
1) The Phantom Window Leak
A living room wall showed staining below a window only after storms. The cause was a tiny gap at the head flashing that funneled water into the cavity, exiting mid-wall. Fixing the flashing and adding proper end dams stopped the problem—no repainting needed beyond touch-up.
2) The Winter Mold Arc
Bedroom mold crescents formed each winter behind a wardrobe on an outside wall. Diagnosis: thermal bridge and stagnant air. Solution: space the wardrobe 5–7 cm off the wall, improve room ventilation, and add exterior insulation during a facade upgrade. No further growth occurred.
3) The Basement “Humidity” That Wasn’t
Efflorescence and peeling paint persisted despite dehumidifiers. Investigation found downspouts discharging at the foundation and negative grading. Correcting drainage reduced wall moisture readings by over 50% in four weeks, eliminating the visible damp.
Bringing It All Together
Moisture problems feel complex because water can move in multiple ways—and it is invisible until damage appears. But the rules are simple once you understand them. Most damp walls trace back to a manageable set of causes: exterior liquid leaks, ground moisture via capillarity, or indoor humidity causing condensation. By asking the right questions—supply, transport, accumulation—you can chart a clear path to a durable solution.
If a single idea should stick, let it be this: you do not need to live with damp walls. Tackle the fundamentals—drainage, rain control, air sealing, ventilation, and smart materials—and your walls will dry out and stay that way.