You do not need fancy equipment or a contractor visit to uncover where your home leaks comfort and cash. With a few common tools and a structured plan, you can complete a thorough DIY assessment in two days and line up targeted fixes for measurable savings. This guide explains a practical, step-by-step approach to a home energy audit–how to perform it safely and effectively, with clear checklists, simple measurements, and smart prioritization. By Sunday night, you will know where your watts and dollars go and how to win them back.
Why a DIY Audit This Weekend Pays Off
A systematic home walkthrough can reveal dozens of quick wins and long-term opportunities. Here is why setting aside a weekend is worth it:
- Immediate savings: Simple air sealing, thermostat tweaks, and LED swaps can cut 5 to 15 percent from bills within days.
- Comfort: Eliminating drafts and improving insulation levels stabilizes temperatures and reduces hot or cold spots.
- Health and safety: A careful look at ventilation, moisture, and combustion appliances reduces risks from carbon monoxide and mold.
- Longevity: Cleaner filters, sealed ducts, and balanced humidity help HVAC and building components last longer.
- Carbon footprint: Lower usage means lower emissions, often at the lowest cost per ton avoided.
What You Will Need
Gather basic tools and data before you start. The right preparation makes your audit faster, safer, and more accurate.
Core tools
- Flashlight or headlamp
- Notebook or phone for photos and notes
- Measuring tape
- Smoke pencil or incense stick for draft detection; if using incense, avoid use near gas appliances or open flames
- Infrared thermometer or a smartphone thermal camera add-on if available
- Non-contact voltage tester for basic safety when near panels and outlets
- Ladder and work gloves
- Utility knife and straightedge for weatherstripping and foam projects
- Power meter plug, often called a plug load meter or Kill A Watt type device
- Low cost hygrometer to spot humidity issues
Supplies for quick fixes
- Weatherstripping for doors and operable windows
- Silicone or acrylic latex caulk for small cracks and gaps
- Expanding foam for larger penetrations around pipes and wires
- Door sweep for exterior doors
- Foam gaskets for outlet and switch plates on exterior walls
- Foil tape and mastic for duct sealing
- Pipe insulation for hot water lines
Data to gather
- Last 12 months of utility bills for electricity and any delivered fuels like gas, oil, or propane
- Thermostat schedules and setpoints
- Equipment nameplates or model numbers for HVAC, water heater, refrigerator, and major appliances
Safety essentials: Wear eye protection in attics and crawlspaces, use a dust mask or respirator around insulation, keep someone at home when you are in confined spaces, and never use open flames to test for drafts. Install or test carbon monoxide alarms if you have gas or oil appliances.
The Three-Part Weekend Plan
This plan balances momentum with accuracy: Friday prep, Saturday building shell and insulation, Sunday systems and savings plan. It gives you a complete framework for a home energy audit–how to perform it in realistic, bite-sized steps.
Friday Evening: Prep and Baseline
- Collect your utility bills and log monthly kWh and therms or gallons. Note highest and lowest months. Calculate average daily use for summer and winter to see seasonal patterns.
- Create a simple log: a column for location, issue found, severity low to high, estimated cost to fix, and expected savings or comfort benefit. This becomes your action plan later.
- Check the forecast: A breezy or cool morning is ideal for finding drafts, while a sunny afternoon can help with thermal camera contrasts.
- Stage tools and supplies by area: attic kit, basement kit, and living area kit. Clear access to attic hatches, mechanical room, and major appliances.
Saturday Morning: Air Leaks and the Building Shell
Air sealing is the fastest path to savings and comfort. Warm or cool air sneaks through cracks, and your HVAC chases it. Start here.
DIY depressurization method for finding leaks:
- Close all exterior doors and windows.
- Turn on all exhaust fans in kitchen and baths for 10 to 15 minutes to slightly depressurize the house.
- Walk the perimeter with a smoke pencil or incense. Wherever smoke wavers or is drawn, you likely have a leak.
Key leak locations to inspect:
- Exterior doors and weatherstripping; look for daylight and feel for drafts
- Window frames and sashes, especially older single pane or double hung units
- Baseboards on exterior walls
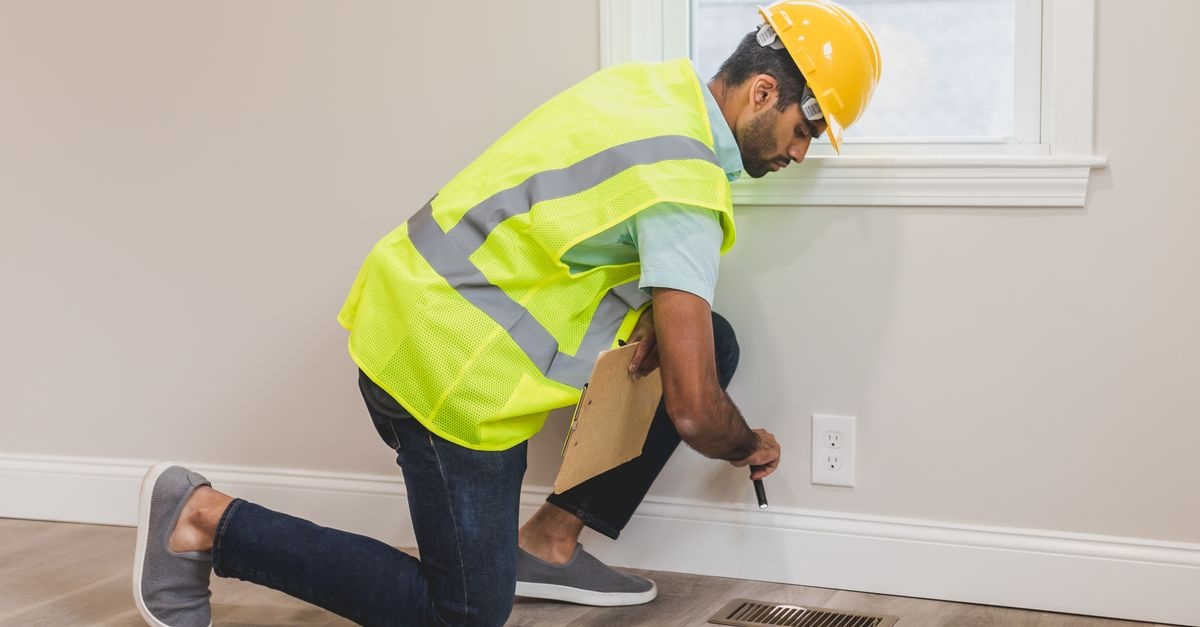
- Electrical outlets and switch plates on outside walls
- Attic hatches, pull-down stairs, and knee walls
- Plumbing and electrical penetrations: under sinks, around vent stacks, behind tubs and showers on exterior walls
- Fireplace dampers and around the firebox; ensure damper closes tightly when not in use
- Rim joist and sill plate in basements or crawlspaces
- Duct connections in unconditioned spaces
What to do on the spot:
- Apply appropriate weatherstripping to doors and operable windows that leak.
- Use caulk for stationary cracks under a quarter inch at trim, casing, and siding penetrations.
- Seal larger holes around pipes and wires with fire safe expanding foam where code allows.
- Add foam gaskets behind outlet and switch covers on exterior walls.
- Install a door sweep where thresholds leak. Adjust strike plates and hinges if needed for a tight seal.
Document each fix and any remaining gaps that need different materials or a pro. Mark the severity so you can prioritize later.
Saturday Afternoon: Insulation and Heat Flow
Air sealing and insulation work together. Seal first, then insulate. Insulation slows heat flow; it does not stop air movement. Improving R-values in the right places can slash heating and cooling demand.
Attic:
- Measure insulation depth in several spots. Typical targets are R 38 to R 60 in many climates. If you see joists or uneven coverage, you need more.
- Look for dark streaks or dust trails in insulation. These often signal air leakage paths at top plates and penetrations.
- Check for baffles at soffit vents to keep insulation out of eaves and maintain ventilation.
- Inspect the attic hatch. It should be gasketed and insulated with rigid foam or a prefabricated cover.
Walls:
- Use an infrared thermometer or thermal camera during a temperature difference to scan walls. Cold or hot stripes can indicate missing insulation in stud bays.
- Outlet box peek: carefully remove an outlet cover on an exterior wall to see if there is any insulation. Do not touch wiring; use a flashlight to look for fiberglass or cellulose behind the box.
- If walls are uninsulated, note the areas for dense pack cellulose as a high impact upgrade to consider later.
Basement and crawlspace:
- Inspect rim joists; these often leak and lack insulation. Air seal cracks, then insulate with rigid foam sealed at edges.
- Check crawlspace ground vapor control. A sealed, continuous ground cover reduces moisture and supports insulation performance.
- Identify bare hot water and heating pipes for insulation.
Ducts:
- Feel for leaks while the fan runs. Seal with mastic or foil tape rated for ducts. Do not use cloth duct tape.
- Insulate supply and return ducts in unconditioned spaces to R 6 or higher if accessible.
Windows and doors:
- Add interior storms or films for single pane windows as a budget upgrade.
- Use heavy drapes at night in winter and reflective blinds in summer to manage heat loss and solar gain.
Sunday Morning: HVAC, Water Heating, Lighting, and Plug Loads
Now shift from the shell to the systems. Your goal is to tune, measure, and schedule for efficient operation.
HVAC:
- Replace or clean filters. Mark a recurring reminder every 1 to 3 months depending on usage.
- Record model numbers and nameplate ratings like AFUE for furnaces or SEER and HSPF for heat pumps.
- Verify thermostat schedules. Use setbacks at night and away periods where comfort allows. A smart thermostat can automate this.
- Ensure supply registers and returns are unblocked. Vacuum dust from grilles and coils where accessible.
- Listen for duct noise or temperature imbalances; these may signal leaks or flow issues.
Water heating:
- Set tank temperature to about 120 F or 49 C to reduce losses and scald risk.
- Insulate first 2 meters of hot water pipes leaving the tank. Consider an insulating jacket for older non condensing tanks.
- Install low flow showerheads and aerators with good spray quality to cut hot water use.
- Check for drips and running toilets. Fix leaks promptly.
Appliances:
- Refrigerator: check door seals with a paper slip test. Clean condenser coils. Set fridge around 37 to 40 F and freezer near 0 F.
- Laundry: wash with cold when possible. Clean dryer lint trap and vent. Consider a heat pump dryer at replacement time.
- Dishwasher: use eco or air dry settings. Run only full loads.
Lighting:
- Map bulbs by room. Replace remaining incandescent or halogen with ENERGY STAR rated LEDs. Choose 2700 to 3000 K for warm light, 4000 K plus for task areas.
- Right size brightness using lumens, not watts.
- Use occupancy sensors or smart schedules in low traffic spaces.
Electronics and plug loads:
- Identify always on devices like cable boxes, game consoles, voice assistants, and chargers.
- Use a plug power meter to measure standby and active draw. Put entertainment clusters on advanced power strips that cut standby power when the TV turns off.
- Create sleep schedules for computers and consoles. Disable bright screensavers that waste power.
Ventilation and indoor air quality:
- Test bath fans: a tissue should hold to the grille when the fan is on. If not, clean or replace.
- Run bath fans for at least 20 minutes after showers. Use timers.
- Verify CO and smoke alarms are present and functional, especially if you have gas appliances or an attached garage.
Sunday Afternoon: Calculate Savings and Prioritize
Turn findings into an action plan. Not every fix is equal; some deliver quick payback, others provide comfort or safety wins, and a few are strategic long term moves.
Quick wins, often under one hour each:
- Weatherstrip a leaky door or add a sweep
- Install LED bulbs in high use fixtures
- Adjust water heater to 120 F and insulate exposed hot lines
- Seal obvious duct leaks in accessible areas
- Program thermostat schedules for setback savings
Medium upgrades:
- Attic air sealing and top up insulation to target R values
- Rim joist air sealing and insulation
- Interior storm windows or window films for older windows
- Advanced power strips and smart plugs for standby savings
Strategic investments:
- Heat pump HVAC retrofit at equipment end of life
- Heat pump water heater in appropriate spaces
- Comprehensive wall insulation in uninsulated homes
- High performance windows if major envelope work is planned
- Rooftop solar after efficiency steps lower your load
Simple payback estimate: divide upgrade cost by annual savings. Prioritize the lowest payback first, while weighing comfort, health, and maintenance benefits. For example, a 75 dollar LED retrofit saving 60 dollars per year has a 1.25 year payback.
Hands-On Checklists and How-To Details
Air Sealing: The Highest ROI Task
Seal from the top and bottom of the house first, then the middle, to interrupt stack effect. Focus on:
- Attic penetrations: seal around can lights rated for insulation contact, bath fan housings, plumbing stacks, and electrical chases.
- Rim joist and sill plate: foam small gaps, then install rigid foam panels sealed at edges.
- Chimney chases: use fire rated materials and respect clearances to combustibles.
Weatherstripping a Door
- Close the door on a strip of paper. If you can pull it out easily, the seal is weak.
- Choose compression or V strip weatherstripping that matches your door type.
- Cut to length, align carefully, and fasten. Adjust the strike plate if needed to ensure uniform contact.
- Add a sweep at the bottom and adjust the threshold to close gaps without dragging.
Sealing Ducts You Can Reach
- Run the fan. Feel for leaks at joints, seams, and takeoffs.
- Clean surfaces, then apply mastic with a brush. For small gaps, foil tape rated for duct use can work.
- Insulate ducts in unconditioned spaces after sealing.
Simple Window Improvements
- Use rope caulk in winter for seasonally sealing unused windows.
- Apply clear interior film kits for single pane or leaky units.
- Add cellular shades or lined curtains for nighttime insulation.
Build an Attic Hatch Insulation Cover
- Cut rigid foam panels to hatch dimensions.
- Glue up a lightweight box 20 to 30 centimeters tall to sit over the opening on the attic side.
- Tape seams and add adhesive weatherstripping at the contact surface. The cover should be easy to lift but airtight when closed.
Use a Power Meter to Find Hidden Loads
Plug in meters demystify standby and active usage to help you right size your fixes.
Step-by-step measurement
- Pick a target device like a dehumidifier, cable box, or gaming console.
- Plug the meter into the wall, then the device into the meter.
- Record watts at idle and during use. Let it run for a typical day if the meter tallies kWh.
- Calculate annual cost: annual kWh times your electricity rate.
- Decide: schedule off times, use a smart strip, or replace with an efficient model.
Example: A cable box drawing 18 watts 24 hours a day uses roughly 158 kWh per year. At 20 cents per kWh, that is about 32 dollars annually. Put it on a smart strip that powers down when the TV is off and you may cut that by half or more.
Regional and Seasonal Tips
- Cold climates: focus on attic air sealing and insulation, rim joists, and high efficiency heating. Manage humidity to avoid condensation.
- Hot humid climates: air seal to block moist air, shade windows, prioritize duct sealing and attic insulation, and ensure controlled mechanical ventilation.
- Hot dry climates: shade and reflective roofs matter; evaporative coolers can be efficient if water is available.
- Shoulder seasons: great for envelope projects and measuring baseline loads without heating or cooling running.
When to Call a Pro
A professional brings diagnostic tools and safety testing that go beyond DIY. Consider a pro assessment when you need:
- Blower door testing to quantify air leakage and guide sealing by zone
- Infrared thermography under controlled pressure to map hidden air and insulation problems
- Combustion safety testing for gas or oil equipment to avoid backdrafting and CO risks
- Duct leakage testing with a duct blaster to verify sealing success
Ask for a written scope, modeled savings, and available rebates. Many utilities subsidize audits and upgrades, making them excellent value after your DIY work identifies the priorities.
Common Mistakes to Avoid
- Adding insulation before air sealing; this traps problems and reduces gains.
- Blocking attic ventilation with insulation; always maintain clear soffit-to-ridge airflow.
- Using the wrong sealants; do not use cloth duct tape or flammable foam near heat sources.
- Overtightening the house without planning for ventilation in tight homes. Balance efficiency with fresh air needs.
- Ignoring moisture. Fix bulk water and humidity issues first.
Template: Your DIY Home Energy Report
Turn your notes into a clear plan. Copy this structure into a doc or spreadsheet and paste your observations.
- Home summary: year built, size, climate, primary heating and cooling, water heating
- Utility baseline: average kWh per month, seasonal highs and lows, gas or oil usage
- Findings by area:
- Envelope: leaks found, insulation levels, windows
- HVAC: filter status, thermostat settings, duct condition
- Water heating: temperature, pipe insulation, fixtures
- Lighting: LED opportunities
- Appliances and plug loads: standby and active draws
- Ventilation and IAQ: fans, alarms, moisture notes
- Recommended actions: cost, estimated savings, payback, comfort or safety notes
- Incentives: utility rebates, tax credits, and local programs to offset costs
- Schedule: what to do this week, this month, and this year
FAQ: Quick Answers While You Work
- How long does a DIY audit take? The walkthroughs take 6 to 8 hours total, with extra time for fixes.
- What saves the most? Air sealing and attic insulation often top the list, followed by duct sealing and HVAC tune ups.
- Is a thermal camera required? Useful but optional. An infrared thermometer and your hands can find many issues.
- What about old windows? Air seal first. Interior storms or films can rival window replacement savings at a fraction of the cost.
- Can I do this in an apartment? Yes, focus on plug loads, lighting, window treatments, and draft stops you can remove when moving.
Putting It All Together
You just learned the essentials of a home energy audit–how to perform it with simple tools, a focused plan, and prioritized action. By tackling air leaks, insulation, HVAC and water heating tune ups, lighting upgrades, and hidden plug loads, you can trim bills, boost comfort, and protect your home. Keep your report updated as you implement fixes, retest problem spots after each round, and stack the savings with rebates and smart scheduling. Do the right work in the right order and this weekend will pay dividends for years.
Appendix: Detailed Step Timeline
Use this as your quick reference while moving through the house.
Friday Evening, 60 to 90 minutes
- Gather 12 months of bills and compute seasonal averages
- Set up your log and labels for rooms and systems
- Stage safety gear, flashlight, smoke source, and ladder
Saturday Morning, 3 hours
- DIY depressurization and draft hunt
- Seal small leaks you can fix immediately
- List materials needed for lingering gaps
Saturday Afternoon, 3 hours
- Inspect attic insulation and baffles; plan hatch cover
- Scan walls with IR or spot check at outlets
- Check rim joist, crawlspace, and ducts; mark insulation and sealing needs
Sunday Morning, 3 to 4 hours
- HVAC filter, thermostat, and duct inspection
- Water heater temperature and pipe insulation
- Appliance settings and coil cleaning
- Lighting inventory and LED plan
- Plug load measurements with power meter
Sunday Afternoon, 2 hours
- Estimate savings and paybacks
- Draft your action plan with dates and budgets
- Search and note rebates for LEDs, insulation, heat pumps, or audits
Pro Tips to Stretch Savings Further
- Track: Keep a monthly energy log. Celebrate step downs.
- Automate: Smart plugs, sensors, and thermostat learning cut waste quietly.
- Bundle: Combine air sealing and insulation in one project to maximize performance.
- Right-size: After envelope upgrades, your next HVAC system can often be smaller and more efficient.
With this guide, you have a clear, practical path for a DIY home energy audit that fits in a weekend and delivers lasting results. The process is simple: measure, fix low hanging fruit, plan the next steps, and verify. That is the heart of a reliable home energy audit–how to perform it for real world savings.