Permanent formwork—also called lost formwork or stay-in-place shuttering—has transformed how contractors and self-builders deliver concrete floor slabs. By replacing traditional timber or reusable panels with components that remain in the structure, you cut down on labor, speed up schedules, improve safety, and unlock thermal and acoustic benefits. This comprehensive guide shows you—from design prep to final pour—how to plan, build, and quality-check a permanent formwork floor slab with professional confidence.
Why Permanent (Lost) Formwork for Floor Slabs?
Traditional formwork must be erected, struck, cleaned, and stored. Stay-in-place systems eliminate most of that churn while delivering consistent soffits and, depending on the product, integrated insulation or fire performance. For suspended slabs, balconies, garages, and mezzanines, permanent shuttering streamlines work where propping and soffit access are tricky.
- Speed: Fewer components, faster installs, and no stripping of the soffit panels.
- Cost control: Reduced labor hours, fewer crane picks, less rework from damaged form faces.
- Quality: Uniform soffit, predictable cover, neat edge details, and consistent slab thickness.
- Safety: Less time working at height to dismantle formwork; fewer loose panels on site.
- Performance add-ons: Integrated thermal and acoustic layers in some systems, improved fire resistance with mineral composites, and clean void creation.
What Exactly Is Lost Formwork?
Lost formwork is a formwork component that stays embedded in the slab after pouring. Systems vary from ribbed or flat soffit panels to hollow blocks that create voids and reduce concrete volume. The most common families include:
- Metal decking (steel deck): Ribbed or trapezoidal sheeting that acts as formwork and, in composite design, as tensile reinforcement.
- Fiber-cement or calcium-silicate boards: Board soffits fixed to edge angles or joists, remaining in place for fire-rated ceilings.
- EPS/XPS blocks and void formers: Lightweight polystyrene modules that shape ribbed or voided slabs and add insulation.
- Polypropylene or recycled-plastic domes: Modular voided slab systems that cut concrete mass while keeping strength.
- Stay-in-place beam/joist forms: Permanent webs or pans building ribbed slabs spanning between beams or walls.
These elements may be paired with edge angles, starter bars, temporary props, and rebar meshes to create a safe, stiff platform for the pour.
When to Choose a Stay-in-Place System
- Restricted access or height: Where stripping and handling reusable formwork would be costly or unsafe.
- Fast-track programs: Overlapping trades and quick cycles demand fewer steps between pours.
- Thermal or acoustic targets: EPS soffits or mineral boards add performance without extra layers.
- Complex geometry: Curves, openings, and varied depths are easier with modular inserts.
- Composite design: Metal deck slabs with shear studs enhance efficiency and span capacity.
Key Terms You’ll See Throughout
- Cover – Concrete thickness over rebar; essential for durability and fire.
- Spacers/Chairs – Supports ensuring the reinforcement stays at the correct level.
- Propping – Temporary supports holding the formwork and fresh concrete until it gains strength.
- Slump – Fresh concrete workability measure.
- FF/FL – Floor flatness and levelness indices (or local equivalents).
System Selection: A Quick Comparison
Metal Deck Slabs
Pros: Fast, can be composite with shear studs, minimal soffit work, long spans. Cons: Thermal bridging without insulation, acoustics may need topping/underlayment, corrosion protection needed in aggressive environments.
Fiber-Cement Soffit Boards
Pros: Fire-resistant soffit, neat underside finish, good for service cavities. Cons: Requires careful fixing and sealing; edges need robust angles and anchors.
EPS Blocks / Voided Modules
Pros: Reduced concrete volume and weight, thermal benefits, easy handling. Cons: Fire detailing must be correct; solvent exposure and UV need management before pour.
Plastic Domes (Reusable Molds with Permanent Effects)
Pros: Highly efficient two-way slabs, excellent MEP routing zones. Cons: Layout discipline and tying are critical to avoid float or displacement.
Design and Compliance Considerations
Before you choose a product, align with structural design, codes, and the method of construction. Regardless of system, obtain engineering sign-off.
- Codes and Standards: ACI 318/301, Eurocode 2, local fire codes, acoustic regs, and durability exposure classes.
- Loads and spans: Live load, dead load, partitions, equipment, and construction loads (including pump lines and foot traffic during pour).
- Punching shear: Critical near columns/openings. Add shear reinforcement, drop panels, or thicker zones if required.
- Deflection and vibration: Control crack widths and long-term deflection; for composite deck, check stage construction.
- Fire rating: Ensure thickness, cover, and soffit materials meet required minutes rating (e.g., 60/90/120).
- Acoustics: Flanking sound paths, resilient layers, and underlayments may be necessary.
- Durability and cover: Chloride exposure, freeze–thaw, aggressive chemicals—set cover and mix design accordingly.
- Thermal bridges: Balcony and slab-edge details may require thermal break connectors.
Tools and Materials Checklist
- Stay-in-place components: metal deck sheets, fiber-cement boards, EPS blocks, edge angles.
- Fixings: anchors, screws, powder-actuated fasteners where approved, shear studs for composite decks.
- Temporary supports: props, shore towers, head jacks, ledgers, and safe access platforms.
- Reinforcement: rebar mesh, bars, lapped splices/couplers, tie wire, chairs/spacers (non-tip).
- Sealing and detailing: tapes, firestop mastic for board joints, EPS-safe sealants, form tape at edges.
- Concrete and placing gear: pump or chute access, vibrators, screeds, trowels, curing membranes.
- QA/QC tools: cover gauges, levels/lasers, slump cone, thermometers, cylinder molds.
- PPE: fall protection, helmets, eyewear, gloves, hearing protection, dust masks for cutting boards.
How to Build a Lost Formwork for a Floor Slab: A Step-by-Step Walkthrough
Here’s the practical sequence—from layout to final cure—so you can plan the job and communicate it to your crew or subcontractors with clarity.
1) Preconstruction and Layout
- Survey: Verify levels, beam/wall positions, and slab edges. Set control lines with a laser.
- Loads and stages: Confirm propping and pour sequence with the engineer. Record the maximum crew/equipment loads allowed during the pour.
- Deliverables: Shop drawings from the formwork supplier, rebar schedules, and MEP blockout diagrams.
- Access and safety: Edge protection, safe working platforms, and fall arrest are non-negotiable.
2) Install Edge Support and Perimeter Shuttering
Create a continuous, robust perimeter for your system to bear on. For metal deck, fix edge angles to beams/walls; for board or EPS systems, install perimeter angles or trims and any kicker forms.
- Check line and level at the perimeter; deviations here telegraph into the slab flatness.
- Seal gaps at slab edges to prevent grout loss. Use compatible tapes or compressible foam.
- In balconies or exposed edges, integrate thermal break connectors and drip edges early.
3) Place the Permanent Soffit Elements
Follow manufacturer spans and bearing requirements.
- Metal deck: Lay sheets perpendicular to primary supports, side-lap as specified, and fix at supports and intermediate points. Use temporary props where spans exceed unpropped ratings.
- Fiber-cement boards: Pre-cut boards, fix to angles/joists, maintain joint gaps as per datasheet, and back-block large penetrations.
- EPS or plastic void formers: Position modules in a tight grid; tie to support rails or light rebar to prevent float. Avoid solvents and UV exposure; protect until pour.
Tip: Keep all fasteners flush; proud fixings snag rebar and can cause cover loss.
4) Seal Joints, Penetrations, and Edge Conditions
- Use compatible sealants to prevent paste loss through laps or joints.
- Form and seal service sleeves, MEP openings, and box-outs. Clamp sleeves to structure or brace them to avoid displacement.
- At fire-rated assemblies, apply approved firestop systems around penetrations at the soffit board stage.
5) Install Temporary Propping and Backpropping
Even with stay-in-place components, many slabs need propping until the concrete gains sufficient strength.
- Space props per the design. Verify ground or level below can safely carry the cumulative propping load.
- Check verticality and lock pins. Ensure heads bear squarely on soffit or width-spreaders.
- Backprop adjacent spans if specified to control deflection and cracking during staged construction.
6) Set Chairs and Spacers for Correct Cover
- Use non-tip chairs rated for the slab load during construction.
- Ensure minimum cover to match exposure and fire rating (commonly 20–35 mm for interior, more for aggressive exposures—verify your code).
- Place chairs at intervals that prevent mesh sag; double up where workers will walk.
7) Place Reinforcement
Follow the engineer’s schedule and detailing rules.
- Lay bottom mesh or bars; lap splices per code or use mechanical couplers.
- Add top bars over supports, columns, and openings, and any punching shear reinforcement.
- Tie all intersections sufficiently to prevent displacement under foot traffic and vibration.
- Install shear studs through metal deck where composite action is designed; check weld quality.
QA Check: Confirm bar marks, diameters, spacing, and laps; record photos before concrete covers the steel.
8) Fit Embeds, Edge Angles, and Cast-in Items
- Cast-in channels, anchor plates, and sleeve clusters must be braced and dimensionally fixed.
- Form slab recesses (showers, door thresholds) with neat, sealed edges.
- Confirm expansion and control joints positions; pre-form or saw-cut later per spec.
9) Pre-Pour Quality Walk
- Cover survey: Spot-check with a cover meter or physical gauges at multiple locations.
- Soffit integrity: Ensure all joints are sealed, no gaps to drop paste; check fasteners.
- Propping: Signed off by a competent person; document spacing and capacity.
- Cleanliness: Remove sawdust, foam beads, and debris. Blow or vacuum surfaces.
- Access: Confirm pump reach, hose routes, and safe egress.
10) Choose the Right Concrete
Ask your supplier for a mix that suits your method and exposure:
- Strength class: As per design (e.g., C30/37, 4000 psi).
- Slump/workability: Typically S3–S4 for pumped slabs; use superplasticizer rather than extra water.
- Aggregate size: Compatible with cover and rebar spacing; 10–20 mm common for slabs.
- Admixtures: Set control, shrinkage reducers, or air-entrainment if freeze–thaw is a concern.
11) Plan the Pour Sequence
- Divide the slab into bays; pour from the farthest point toward the pump to minimize traffic over fresh areas.
- Maintain balanced loading on the structure; coordinate with engineer for staged pours if needed.
- Assign roles: pump operator, vibrator operators, screed crew, edge/detail crew, QA lead, safety spotters.
12) Place, Consolidate, and Finish
- Slump test the first truck and intermittently thereafter. Reject concrete outside tolerance.
- Discharge: Keep hose low to avoid segregation. Spread uniformly; do not drag rebar.
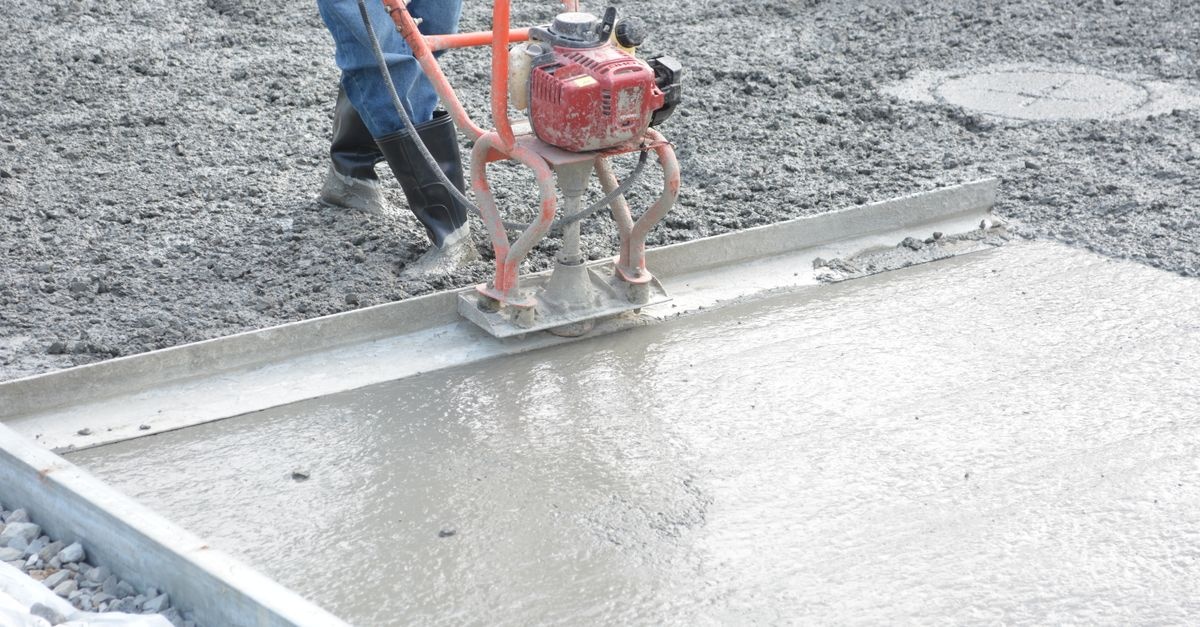
- Vibrate: Use internal vibrators in quick insert-withdrawal motions; overlap zones; avoid over-vibration that causes segregation or formwork uplift.
- Strike: Screed to level lines; check FF/FL or straightedge tolerances.
- Edges and penetrations: Hand-tool around sleeves and edges to ensure full bearing and no honeycombing.
- Finish: Depending on spec, bull-float, trowel, or broom. For adhesives or floor coverings, confirm surface profile requirements.
13) Curing and Early-Age Protection
- Apply curing compound or use wet cure/covering to maintain moisture. This reduces cracking and boosts durability.
- Protect from wind, sun, and rain extremes. Erect temporary windbreaks or shade if necessary.
- Control construction traffic until the slab reaches specified strength for loading.
14) Prop Removal and Backprop Strategy
- Remove props only after engineer approval and when concrete achieves the required strength (often verified by cylinder breaks or maturity meters).
- If staged pours rely on earlier spans, maintain backprops to limit long-term deflection.
15) Post-Pour QA/QC
- Visual inspection: Check soffit for leaks or honeycombs at edges and around penetrations.
- Flatness/levelness: Survey and document; correct issues early if tolerances are tight.
- Strength verification: Review test reports; release loads progressively.
- Cover checks: Random checks with cover meter if required by spec or inspector.
Practical Example: Sequencing a 150 mm Slab on Metal Deck
For a mid-span bay, 3.0–3.5 m deck spans, composite design, and 25 MPa target strength:
- Fix deck to beams at each trough crest; side-lap screws every 900–1200 mm.
- Prop mid-span lines if unpropped capacity is exceeded.
- Install mesh and top bars over beams/columns; fit shear studs.
- Seal ends to avoid grout loss; form pour stops at edges.
- Pour in strips perpendicular to deck ribs; vibrate and level; cure immediately.
Edge, Balcony, and Wet Area Details
- Balconies: Thermal break connectors at the slab edge; slope to drains; drip edges to prevent staining.
- Wet rooms: Pre-formed recesses; water stops at thresholds; compatible waterproofing on cured concrete.
- Service-heavy zones: Back-block soffits under large penetrations; add top/bottom bars around openings.
Fire, Acoustic, and Thermal Performance
- Fire: Check the assembly’s rating with the permanent soffit. Fiber-cement or mineral boards help achieve 60–120 minutes. Maintain specified cover and close gaps.
- Acoustics: Add underlayments, floating screeds, or resilient channels below the soffit to meet impact and airborne sound targets.
- Thermal: EPS soffits reduce heat loss; seal edges to avoid convection paths; treat balcony interfaces as high-risk thermal bridges.
Common Mistakes and How to Avoid Them
- Inadequate sealing: Paste leaks cause honeycombing; always pre-seal joints and laps.
- Wrong cover: Missing or tipping chairs lead to low cover and durability issues; use stable supports and frequent checks.
- Overloading during construction: Stacked rebar bundles or pump lines on unpropped spans can overstress decks; follow load limits.
- Float of EPS or domes: Poor tying allows buoyancy to lift modules; tie adequately and check during vibration.
- Late curing: Delayed curing increases plastic shrinkage cracking; cure immediately after finishing.
- Unplanned penetrations: Field-drilled holes near supports without rebar adjustments weaken slabs; coordinate sleeves early.
Safety Essentials
- Work at height: Edge protection and fall arrest are mandatory.
- Cutting boards or metal deck: Use dust extraction and eye/ear protection; control offcuts.
- Vibration and pumping: Hose handling requires trained operators; secure lines; keep clear of whip hazards.
- Manual handling: EPS is light, but board packs and deck sheets can be awkward—use team lifts or mechanical aids.
Cost and Schedule: What to Expect
Actual figures vary by region and market conditions, but these factors shape overall value:
- Material premium vs. labor savings: Permanent formwork costs more per square meter than timber or reusable panels, but it slashes labor and eliminates stripping cycles.
- Reduced crane time: Lightweight components and fewer picks can shorten tower crane queues.
- Program certainty: Fewer trade interfaces post-pour (no return visit to strip and patch) improves schedule reliability.
- Concrete volume: Voided systems can lower concrete by 15–35%, saving cost and embodied carbon.
Environmental and Sustainability Notes
- Concrete optimization: Voids reduce mass; specify SCMs (e.g., fly ash, slag) where appropriate.
- Recycled content: Choose boards and plastic domes with verified recycled content.
- Lifecycle benefits: Integrated insulation and air-tight soffits cut operational energy use.
Troubleshooting Guide
- Honeycombing at soffit: Increase vibration coverage; check sealing; reduce drop height from pump.
- Sag or ponding: Review propping and deck span limits; confirm concrete stayed within pour rate limits.
- Cracking near columns: Validate rebar congestion relief and correct top-bar detailing; improve curing and joint layout.
- Uneven edges: Reset perimeter level lines; use stiffer pour stops or angle sections.
FAQs
Is permanent formwork suitable for both residential and commercial slabs?
Yes. From houses and small extensions to multi-story offices, stay-in-place options scale well. Metal deck dominates commercial spans; EPS and boards are popular in residential and light commercial builds.
How long before I can remove props?
Only after strength verification and engineer approval. Typical windows range from 3–14 days depending on mix, temperature, and load sequence.
Do I need a vapor barrier?
For ground-bearing slabs, yes—below the slab. For suspended slabs, moisture control focuses on curing and any finish system requirements.
Can I integrate radiant heating?
Yes. Secure pipes to reinforcement at the correct depth. Coordinate zones and manifolds; pressure-test before the pour.
What’s the difference between lost formwork and reusable formwork?
Lost formwork remains part of the structure, reducing labor and improving certain performances; reusable formwork is stripped and reused, which can be cost-effective for large, repetitive work but involves more handling.
A Concise, Field-Ready Checklist
- Shop drawings approved; spans, loads, and propping verified.
- Perimeter angles fixed, levels set, and edges sealed.
- Permanent soffit elements installed per manufacturer guidance.
- Props/backprops in place; access and safety measures installed.
- Chairs placed; reinforcement tied and checked for cover.
- Embeds, sleeves, and joints formed; firestops where required.
- Pre-pour inspection passed; cleanliness confirmed.
- Concrete delivered within spec; slump checked; vibration plan ready.
- Curing applied immediately; early-age protection in place.
- Prop removal only after strength confirmation and sign-off.
Putting It All Together
If you came here wondering how to build a lost formwork for a floor slab without surprises, the answer is to combine good design discipline with methodical site execution. Select the right system for your spans and performance goals, detail edges and penetrations early, verify cover and propping, then pour, consolidate, and cure with care. With permanent formwork, small setup wins compound into major schedule gains and a cleaner, safer site.
Further Pointers for First-Time Users
- Run a pilot bay to validate productivity assumptions, crew sizes, and pour rates.
- Engage the manufacturer’s technical team early for span tables, fixings, and fire/acoustic assurances.
- Document as-built reinforcement and embeds. It will pay off during future fit-out or maintenance.
Conclusion
From careful preparation to a disciplined pour, permanent formwork systems make delivering high-quality slabs more predictable. Whether you choose metal deck, fiber-cement soffits, or EPS/dome void systems, the essentials remain: accurate layout, robust edges and sealing, reliable propping, correct cover, controlled placement, thorough consolidation, and diligent curing. Master these steps and you’ll not only know how to build a lost formwork for a floor slab—you’ll consistently deliver stronger, flatter, safer concrete floors, on schedule and within budget.
Glossary
- Stay-in-place (SIP) formwork: Formwork that remains in the structure after the pour.
- Composite slab: Slab where concrete and steel deck act together structurally via shear connectors.
- Backpropping: Keeping props in previously poured areas to control deflection during subsequent pours.
- Void formers: Inserts that reduce the amount of concrete in a slab, creating ribbed or waffle sections.
Resources and Standards to Consult
- ACI 318 and ACI 301 for concrete design and specifications.
- Eurocode 2 (EN 1992) for concrete structures; EN 1991 for actions on structures.
- Manufacturer installation manuals and span tables for your chosen system.
- Local fire and acoustic regulations for assemblies and penetrations.
Final note: Always coordinate with a licensed structural engineer and your local authority. Site conditions, climate, and codes vary, and professional review protects your schedule, your budget, and your team.