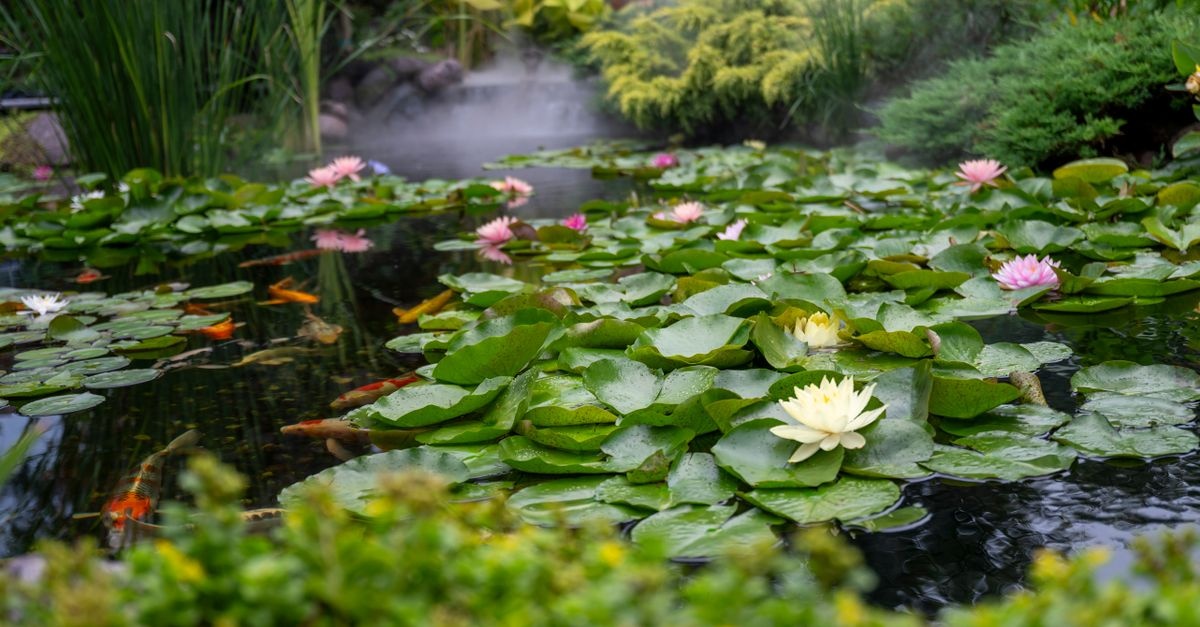
There’s something irresistibly calming about water that rises in a silvery plume and returns in rippling circles. Add a sculptural focal point, soft planting, and night lighting, and your backyard evolves into an outdoor room with presence. If you’re searching for how to build a pond with a central fountain that’s beautiful, durable, and low-maintenance, this full-spectrum guide takes you from inspiration and planning to excavation, plumbing, planting, and ongoing care. Along the way, you’ll learn to size pumps and filters, select nozzles, avoid splash loss, and anchor your showpiece fountain for long-term stability.
Envisioning the Pond: Style, Scale, and Site
Choose the aesthetic: formal, naturalistic, or hybrid
Start your design journey by clarifying the overall mood. A central fountain wants to be seen, heard, and framed—so the style you choose influences basin shape, edging, plants, and spray pattern.
- Formal: Geometric basins (circle, ellipse, rectangle), crisp coping stones, symmetrical planting, and precise spray patterns (umbrella, tiered, trumpet). Perfect for front courtyards and classic gardens.
- Naturalistic: Free-form outline, boulders, gravel beach shelves, and mixed native plants. Pair with softer nozzles (aerating foams, bell sprays) and lower heights to blend with landscape.
- Hybrid: A simple circular pond softened by grasses and iris, with a contemporary bubbler or vase fountain as the centerpiece.
Sketch three variations. Change diameter, fountain height, and edging materials in each. Ask: Where do you want sound to carry? Which views do you want to frame from the deck, kitchen window, or fire pit?
Pick the smartest location
Good siting can halve future maintenance. Before committing to an outline with marking paint or a garden hose, walk your yard and test for these conditions:
- Sun vs. shade: 4–6 hours of sun supports flowering lilies but can promote algae. Filtered light or partial shade eases maintenance.
- Trees: Avoid heavy leaf drop zones; leaves clog skimmers and feed algae. Keep root systems in mind when digging.
- Wind exposure: The higher the spray, the stronger the wind drift and splash loss. Plan windbreaks with hedging or place pond in a calmer pocket.
- Utilities: Identify and mark buried lines. Plan a GFCI-protected outlet within code-compliant distance, and consider a hardwired circuit in conduit for pumps and lights.
- Grade and drainage: Slight slopes are fine; steep slopes may need retaining. Keep runoff (lawn chemicals, silt) from washing into the water feature.
Scale the showpiece
Center fountains are all about proportion. A common rule of thumb is a spray height roughly 1/3 to 1/2 the pond’s smallest width. For a 10 ft (3 m) diameter pond, aim for a 3–5 ft (1–1.5 m) jet. Taller sprays can be thrilling but demand more pump power, cause greater evaporation, and need wider basins to catch splash. When planning how to build a pond with a central fountain for low upkeep, modest height with a wide, graceful pattern is often best.
Budget, Permits, and Safety
Build a realistic budget
Costs vary with size, depth, stonework, and equipment. A DIY build might range from a few hundred dollars for a compact basin with a small pump to several thousand for robust filtration, premium stone, and lighting. Budget line items:
- Liner and underlayment (EPDM is a top choice)
- Pump (efficient, with the head and flow to match your nozzle)
- Fountain nozzle or sculpture (plus valves and unions)
- Filtration (skimmer, biofilter, optional UV clarifier, or bog filter)
- Plumbing (flexible PVC or kink-free tubing, check valve, ball valve, unions)
- Electrical (GFCI outlet, conduit, transformer for low-voltage lights)
- Edging stone, gravel, and decorative rock
- Plants and fish (if desired)
- Lighting (submersible spots or fountain-mounted LEDs)
Permits and code compliance
Check local regulations. Some municipalities treat permanent ponds over a set depth like pools (fencing or safety covers may be required). Electrical work must meet code with GFCI protection and proper bonding/grounding where applicable. If you’re trenching for power, run buried conduit at the specified depth and use an outdoor-rated junction box. If in doubt, consult a licensed electrician.
Safety for families and pets
- Depth: Keep deep zones central; use shelves and gentle entries near edges.
- Surfaces: Choose non-slip coping. Avoid slick algae buildup with regular maintenance.
- Barriers: Discreet fencing, hedging, or low garden rails can protect kids without spoiling the view.
- Electrical: Use drip loops, weatherproof connections, and GFCI. Never handle pump equipment while standing in water.
Design Fundamentals: Depths, Flow, and Filtration
Depth zones and shelves
Thoughtful depth zoning turns a simple basin into a thriving ecosystem and frames your centerpiece fountain beautifully:
- Shallow shelf (6–12 in / 15–30 cm): Marginal plants (iris, pickerel rush), easy access, and habitat for amphibians.
- Planting shelf (12–18 in / 30–45 cm): Great for baskets of lilies and lotuses (check cultivar needs).
- Deep zone (24–36 in / 60–90 cm): Thermal refuge for fish, stable water during heat waves; consider deeper if you keep koi in cold climates.
Step shelves in from the edge like terraces. This supports edging stone and provides stable ledges for potted aquatics.
Hydraulics 101: pump, head, and flow
The heartbeat of any central fountain is the pump. Getting the math right is central to how to build a pond with a central fountain that looks elegant and stays efficient.
- Pond volume: For a rough circle, Volume (gallons) ≈ 7.48 × Area (sq ft) × Average Depth (ft). Area = π × r².
- Turnover rate: For ornamental ponds, aim to circulate the full volume every 1–2 hours if filtered, 2–4 hours for minimal fish and strong plant loads.
- Head height: The vertical lift plus friction losses in hose/pipe and fittings. Nozzles also have operating pressures; check manufacturer charts.
- Flow at head: Pump curves show how much water (GPH/LPH) the pump delivers at a given head. Choose a model that hits your nozzle’s sweet spot with a bit of overhead.
As an example: a 10 ft diameter, 2 ft average depth pond is ~1,175 gallons. If your nozzle wants 900 GPH at 6 ft head to reach a 3.5 ft spray, select a pump rated ~1,200–1,500 GPH at that head to account for losses and valve adjustment. Use a ball valve to fine-tune flow at startup.
Filtration options
Even if you’re not keeping fish, circulation and filtration keep water clear:
- Skimmer: Pulls in surface debris and houses the pump in a dry chamber; ideal if leaves are an issue.
- Mechanical + Biological filter: Sponges or brushes trap solids; bio media foster beneficial bacteria to process ammonia and nitrites.
- UV clarifier: Zaps green-water algae; plumb inline for clarity during peak sun seasons.
- Bog filter: A planted gravel bed where water is distributed through perforated pipes; superb natural polishing, especially in naturalistic designs.
A practical approach: skimmer for debris, biofilter for stability, optional UV for polish. Keep maintenance easy to reach.
Materials and Tools
Liner and underlayment
- EPDM rubber liner (45 mil): Flexible, durable, fish-safe, easy to shape around shelves and curves.
- PVC liner: Cheaper but less durable; can get brittle with UV over time.
- Concrete: Best for formal basins or custom shapes; more costly and requires expansion joints and waterproofing.
- Underlayment: Nonwoven geotextile protects liner from rocks and roots; add sand base for extra cushion.
Plumbing essentials
- Flexible PVC or kink-free tubing sized to pump outlet for minimal friction loss.
- Check valve to prevent backflow when the pump stops.
- Ball valve for flow control and tuning spray height.
- Unions for easy pump removal and winterization.
- Bulkhead fittings or cable glands for watertight penetrations when needed.
Electrical and lighting
- GFCI outlet with in-use cover, proper gauge wiring, and conduit.
- Low-voltage transformer for submersible LEDs and path lights.
- Timers/Smart controls for variable schedules and energy savings.
Edging and finishes
- Stone coping: Flat flagstones, cut limestone, or granite for formal rims.
- Boulders and river rock for naturalistic edges and planting pockets.
- Aquatic planting baskets, aquatic soil, and pea gravel top-dress.
Tools checklist
- Spade, trenching shovel, wheelbarrow
- Laser level or string line with level
- Tamper, rake, utility knife (for liner)
- PVC cement/primer (if using rigid PVC), hose clamps
- Rubber mallet, masonry chisel (for coping)
Step-by-Step: From Sketch to Splash
1) Outline and excavation
Mark your pond with rope or a garden hose. Adjust curves until you love the view from main seating areas. Spray paint the final outline. Plan a central pad for the fountain—either a stable plinth on the pond floor or an independent pedestal that rises slightly above the bottom to ensure a level mount.
- Dig shelves first: 12–18 in deep ledges for plants and stone support; then step down to the deep zone.
- Keep edges level: Use a laser or line level; even on slopes, the waterline must be level all around.
- Remove roots and sharp stones. Taper inside corners for easier liner drape.
2) Base prep and underlayment
Rake the soil smooth, compact lightly, and add a soft sand layer (1–2 in). Install geotextile underlayment across the whole basin and up the sides to protect the liner. Add extra pads under anticipated high-pressure points (fountain base, heavy boulders).
3) Liner installation
Unfold and center the EPDM liner with generous overlap (at least 12–18 in beyond the rim). Warm sun helps the liner relax. Starting at the deepest point, gently press the liner into contours, forming broad folds rather than tight creases. Avoid stretching.
- Water assist: Add a few inches of water to seat the liner while smoothing folds outward.
- Edge management: Leave extra liner at the rim for coping; do not trim yet.
4) Fountain base or pedestal
A showpiece fountain needs a rock-solid, level footing. Options:
- Submerged pad: Pour a small concrete pad on compacted gravel at the pond bottom. Embed a threaded anchor or set a level slab for the fountain mount. Account for frost depth in cold climates.
- Freestanding pedestal: For sculptures or urns, a column or pedestal can be set before liner (with sleeve) or after, using a base plate that spreads weight without puncturing. Protect the liner with additional underlayment and rubber pads.
Plan hose routing through a discreet channel under or beside the pedestal. If penetrating liner, use a proper bulkhead fitting—but most DIYers prefer to avoid penetrations below the waterline by routing over the liner and hiding the hose with rockwork.
5) Plumbing the fountain
Dry-fit your pump, check valve, ball valve, and unions outside the pond first. Then place the pump in a pump vault, skimmer, or on a stable pad off the bottom (to avoid sucking sediment). Route the hose to the fountain’s inlet.
- Check valve near the pump prevents back-siphon.
- Union fittings make winter removal painless.
- Flow control (ball valve) lets you tweak spray height and texture.
- Strainer/intake screen reduces clogging; clean easily.
Attach the nozzle (umbrella, bell, trumpet, foam jet, multi-tier) per manufacturer specs. Level is crucial: a bell nozzle rewards perfect leveling with symmetrical sheets; even a few millimeters off shows.
6) Edging and coping
With plumbing placed and liner seated, finish the rim:
- Formal coping: Mortar-set stone on a compacted base or concrete collar; tuck liner under the coping lip and sandwich with a compression strip where appropriate.
- Naturalistic edge: Fold liner back and secure with boulders and river rock. Create gravel beaches for wildlife access. Keep the top course level to maintain an even waterline.
7) Fill, test, and trim
Begin filling slowly. As the water rises, continue smoothing the liner and adjusting folds. Once near full, power the pump and check for leaks at unions and fittings. Observe the spray at different flow settings to find your ideal height and pattern. Only after you’re satisfied, trim excess liner—leave several inches tucked behind the coping for future adjustments.
8) Dial in the fountain
- Spray height: Keep splash within the basin. Windy sites may need slightly reduced height or a pattern with larger droplet size.
- Sound character: Taller, narrow jets sound sharper; wide bells and foams are softer. Adjust until it matches your garden’s vibe.
- Night lighting: Add fountain-mounted LED rings or submersible spots at 15–30° angles for sparkle without glare.
Planting and Stocking the Pond
Right plants, right depths
Plants elevate a fountain pond from decorative to ecological. Try this layered approach:
- Marginals (6–12 in depth): Iris, pickerel rush, cattail cultivars, marsh marigold; their vertical lines echo the fountain jet.
- Floaters: Water hyacinth (check local regulations), water lettuce, frogbit for shade and nutrient uptake.
- Submerged oxygenators: Hornwort, anacharis—great for water quality.
- Water lilies (12–24 in depth): Pads soften reflections and reduce algae by shading.
Use aquatic planting baskets and top-dress with pea gravel to keep soil in place against fountain currents.
Fish or no fish?
Goldfish and shubunkins suit small-to-medium ponds; koi need more volume, depth, and filtration. If you keep fish:
- Bio-load: Avoid overstocking. Stable, lightly stocked ponds are clearer and healthier.
- Aeration: Your fountain adds oxygen but may not reach deep zones; consider an air stone in summer or winter.
- Predator protection: Provide caves or plant cover, especially in heron territory.
Lighting and Aesthetic Finishing
Fountain and underwater lighting
Night magic comes from a few well-placed lights, not many. Combine:
- Submersible spots grazing across the fountain column from low angles.
- Nozzle ring LEDs for uniform illumination of spray patterns.
- Path and step lights to lead the eye and ensure safety.
Keep fixtures shielded to prevent glare. Warm 2700–3000K tones flatter stone and foliage; RGB accents are fun on special occasions.
Maintenance and Seasonal Care
Weekly to monthly routine
- Skim debris, clean pump strainer, and empty skimmer basket as needed.
- Top off water lost to evaporation, especially with tall sprays.
- Test water (ammonia, nitrite, nitrate) if you keep fish; maintain pH and KH for stability.
- Rinse mechanical media with pond water, not tap, to preserve bacteria.
Algae and clarity
Balanced ponds manage algae naturally.
- Shade with lilies and floaters to limit sunlight.
- Nutrient control: Don’t overfeed fish; remove decaying leaves.
- UV clarifier for persistent green water; replace bulbs annually.
- Bog filters excel at long-term clarity through plant uptake.
Winterizing and freeze protection
- Mild climates: Run the fountain at reduced height; monitor for ice ridges that channel water out of the pond.
- Cold climates: Remove or bypass the fountain column; insert unions for easy disassembly. Store nozzles and pump indoors if fully shutting down. Use a de-icer or air stone to keep a small opening for gas exchange if fish overwinter.
- Protect plumbing: Drain lines that could freeze; use check valves and low-point drains smartly.
Troubleshooting common issues
- Spray is lopsided: Re-level nozzle, clear debris, ensure even flow.
- Pump cavitation or low flow: Clean strainer, check for kinks, confirm water level isn’t dropping below intake.
- Excess splash loss: Lower height, change to a wider, heavier-droplet nozzle, or add windbreak planting.
- Cloudy water: Increase filtration, rinse mechanical media, add plants, consider UV.
Eco-Friendly Upgrades
- Rainwater harvesting: Feed top-offs from a rain barrel or cistern with a simple filter screen.
- Solar assist: Use solar to power lighting or a supplemental daytime pump. For the main fountain, grid power remains more reliable, but hybrid systems are improving.
- Native plants and pollinator habitat: Marginals that bloom invite bees and dragonflies (which help with mosquito control).
- Natural mosquito control: Maintain surface movement with your fountain; add Bti dunks as needed (fish-safe).
Case Study: A 10-Foot Garden Pond with a Center Fountain
Design brief
A modest, formal-inspired circular pond framed with limestone coping, a 36–42 in bell nozzle as the centerpiece, evening path lights, and light fish stocking.
Dimensions and volume
- Diameter: 10 ft (3 m)
- Average depth: 24 in (0.6 m) with 12 in shelves and a 30 in center pocket
- Volume: ≈ 1,175 gallons (4,450 L)
Pump and nozzle
- Nozzle: Medium bell, optimal at ~900–1,100 GPH at 6–7 ft head
- Pump: Energy-efficient model rated ~1,500 GPH at 6 ft head (provides adjustment room via ball valve)
- Hose: 1.25 in flexible PVC, minimal elbows to reduce friction
- Valves: Check valve and ball valve; unions for service
Filtration
- Skimmer housing the pump with leaf basket
- Pressurized biofilter with backwash capability
- Inline UV clarifier for spring and peak summer
Materials list (abridged)
- EPDM liner (approx. 18 × 18 ft sheet for depth and edges)
- Geotextile underlayment
- Limestone coping stones
- River rock and gravel for shelves
- Two underwater LED spots and a fountain ring light
Planting palette
- Marginals: Blue flag iris, pickerel weed, soft rush
- Lilies: Two hardy varieties with staggered bloom times
- Oxygenators: Hornwort
Build sequence highlights
Excavate with strict attention to a level rim, set underlayment and liner, pour a small, level pad for the nozzle mount, plumb with unions and a check valve, install coping on a compacted base, and tune the bell nozzle to keep splash within the coping—especially on breezy days.
FAQs
How big should the pond be for a central fountain?
Give the spray room to breathe. A spray height of 1/3–1/2 the pond’s smallest diameter is a reliable starting point. Wider basins catch more splash and reduce water loss.
What’s the best liner for a DIY pond with a centerpiece fountain?
EPDM (45 mil) is the go-to for flexibility and durability. It drapes elegantly around shelves and withstands UV and freeze-thaw cycles.
How do I size the pump?
Start from your desired spray height and the nozzle’s flow/pressure requirements, calculate total dynamic head (vertical lift + friction), then choose a pump that meets or slightly exceeds the needed GPH at that head. Include a ball valve for fine-tuning.
Do I need filtration if I don’t keep fish?
Yes, if you want reliably clear water. A skimmer plus a small biofilter (or a bog filter) manages debris and nutrients. A UV clarifier is a nice-to-have polish.
Can I run the fountain in winter?
In mild climates, yes with caution and lower height. In freezing regions, remove or bypass the fountain and store the nozzle and pump indoors, or keep only an aerator/de-icer running for fish gas exchange.
How to build a pond with a central fountain on a budget?
Keep the basin modest, choose EPDM over concrete, select an efficient mid-range pump, use a simpler nozzle, and edge with local stone. A bog filter can replace pricier pressurized filters while enhancing water quality.
What about noise levels?
Bell and foam nozzles are softer; narrow jets are sharper. Tune flow, height, and distance from seating until the sound complements conversation rather than overwhelms it.
Putting It All Together
Design clarity, proper pump/nozzle matching, and thoughtful construction are the core of how to build a pond with a central fountain that delights for years. Begin with a sketch that respects wind, views, and maintenance. Excavate with precision, protect the liner, and anchor your fountain on a level base. Choose a nozzle whose pattern suits your garden’s style, and pair it with a right-sized pump and simple, service-friendly plumbing. Finish with layered plants, safe edging, and restrained lighting. With these steps, your central showpiece won’t just look spectacular on day one—it will remain the heart of your landscape through every season.
Quick Checklist
- Plan: Style, siting, scale, permits, electrical route
- Design: Depth zones, fountain height, turnover target, filtration path
- Procure: EPDM liner, underlayment, pump, nozzle, valves, unions, hose
- Build: Excavate, level edges, set base/pedestal, install liner and plumbing
- Finish: Edge stone, fill, tune spray, install lighting, plant shelves
- Maintain: Skim, clean, test water, winterize smartly
Ready to go from sketch to splash? With a solid plan and methodical execution, your garden pond and its central fountain will become the signature experience of your outdoor life—tranquil by day, luminous by night, and endlessly compelling in every season.