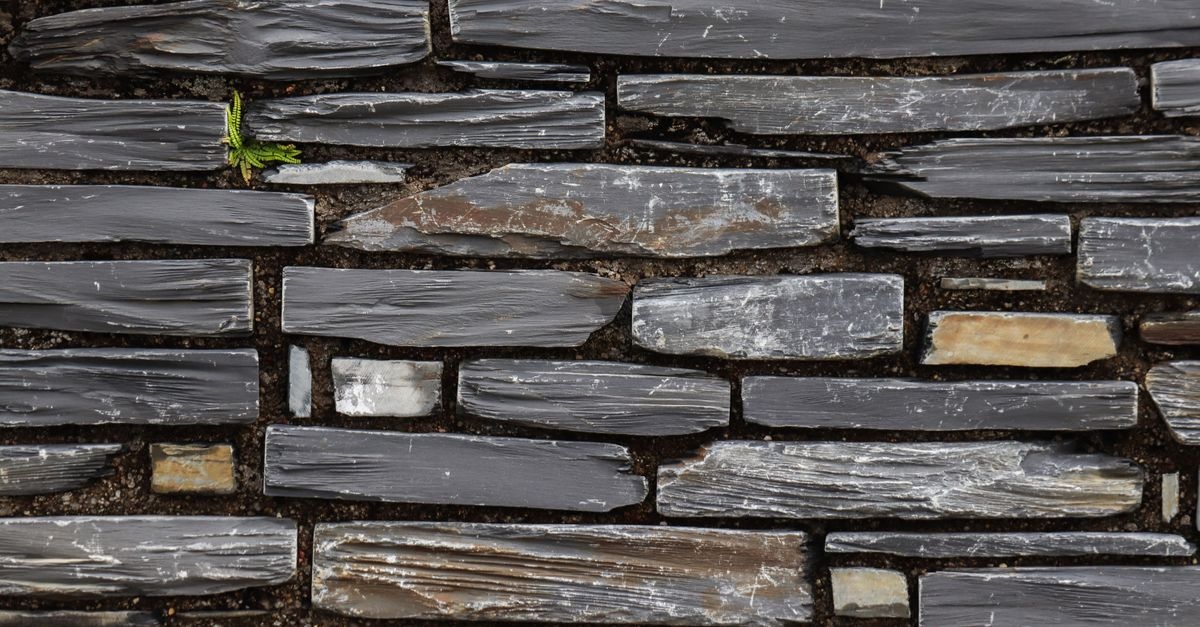
Few weekend projects transform a landscape as dramatically as a handsome stone wall made from split slabs. In this comprehensive tutorial, you will learn how to build a garden wall from split slabs with durable base prep, smart drainage, and clean finishing touches. Whether you are edging a planting bed, defining an outdoor room, or taming a slope with a low retaining wall, the techniques below will help you create a structure that looks great, lasts, and fits your budget.
Why Split Slabs Make Exceptional Garden Walls
Split slabs are masonry units or natural stones cut and split to reveal a textured face. They strike a balance between rustic charm and crisp geometry, making them a favorite for contemporary gardens and classic cottage borders alike. Beyond looks, split slabs offer practical advantages:
- Natural character: The split face adds depth, shadow, and visual interest that poured concrete or smooth blocks often lack.
- Modular convenience: Uniform thickness simplifies stacking, leveling, and capping.
- Durability: Proper base prep and drainage help resist frost heave, settlement, and moisture damage.
- Flexibility: Suitable for straight runs, serpentine curves, or stepped terraces.
- Scalability: Works for low garden edging and, with correct engineering, for taller retaining walls.
Whether you dry-stack or mortar the joints, a slab-built wall can be tailored to your site and style. The key is preparation and a methodical build process.
Before You Start: Safety, Permits, and Project Scope
Check codes and call before you dig
- Permits: Some municipalities require permits for retaining walls above a specific height, often around 600 to 900 mm. Always confirm local rules.
- Utility locates: Contact your local utility marking service to locate buried lines before excavation.
- Property lines and easements: Verify boundaries and setbacks to avoid disputes and rework.
Safety basics
- Wear PPE: gloves, protective eyewear, hearing protection, dust mask or respirator, and steel-toe boots.
- Use safe lifting techniques or team lifts for heavy slabs; consider a dolly for transport.
- Operate saws and grinders with a diamond masonry blade and follow all manufacturer instructions.
Project limits and when to bring in a pro
As a DIYer, you can confidently build low garden walls, planters, and borders. For retaining walls over about 900 to 1200 mm, or if your soil is expansive clay, slopes steeply, or is poorly drained, consult an engineer. Tall retaining walls may require geogrid reinforcement, thicker bases, and specific backfill gradations that go beyond standard DIY.
Design Decisions: Look, Layout, and Longevity
Dry-stack vs. mortared construction
- Dry-stack: Fast, forgiving, and excellent for drainage. Uses adhesive between courses and a cap adhesive at the top. Ideal for garden borders and low retaining tasks.
- Mortared joints: Crisper look, tighter joints, and more rigidity. Requires a concrete footing below frost depth and careful joint tooling. Better for seat walls, formal features, or where code requires a continuous footing.
Wall alignment and batter
- Straight vs. curved: Straight walls are simpler to lay out; curves add elegance and resist tipping when retaining soil.
- Batter: A slight lean back into the retained soil (about 1 to 2 cm per 20 cm of height) improves stability for retaining applications.
Height and thickness
- Low garden edging: often a single or double course.
- Short retaining walls: 2 to 5 courses, depending on slab thickness.
- Remember: wall height influences base depth, drainage needs, and reinforcement.
Style choices
- Random vs. running bond: Mix lengths for a natural look or maintain consistent joints for a modern line.
- Coping: Choose flat capstones for sitting surfaces or textured caps that match the split face.
- Color and texture: Blend shades for depth; keep a consistent face texture for cohesion.
Materials and Tools Checklist
Materials
- Split slabs or split-face stones for the wall body
- Crushed stone base aggregate, 20 mm minus or similar well-graded mix
- Sharp sand or stone screenings for a thin leveling layer
- Landscape fabric or non-woven geotextile to separate soil from base
- Perforated drain pipe with sock for retaining sections
- Clean drainage gravel for behind the wall
- Polymer-modified masonry adhesive for dry-stack courses
- Type S mortar and concrete mix for mortared walls and footings, if chosen
- Capstones or coping slabs
- Geogrid reinforcement for taller retaining walls, as specified
- Edging spikes, stakes, mason line, and marking paint
- Stone sealer suitable for your slab material, optional
Tools
- Shovel, spade, and trenching shovel
- Wheelbarrow and buckets
- Hand tamper and, ideally, a plate compactor
- 2-foot and 4-foot levels; line level
- Mason line, stakes, and a tape measure
- Rubber mallet and dead blow hammer
- Masonry chisel and club hammer
- Angle grinder or wet saw with a diamond blade
- Trowels, jointers, and mortar mixing tub or mixer for mortared builds
- Safety gear: gloves, eye and ear protection, dust mask
Step-by-Step: How to Build a Garden Wall from Split Slabs
Here is the full, field-tested workflow from layout to finishing. Even if you are aiming for a first-time garden border, this process scales to more advanced retaining walls.
1. Layout and Marking
- Sketch your wall to scale, noting changes in grade, curves, and endpoints.
- Transfer your plan to the site with stakes, mason line, and marking paint.
- For curves, use a garden hose to shape, then trace with paint.
- Set your line to the finished face of the wall, not the center, to keep visual control.
Pro tip: Plan for slab lengths. If you know your average unit length, you can reduce tiny end cuts by adjusting the start point now.
2. Excavation
- Dig a trench the length of the wall. Width should be the wall thickness plus at least 15 to 20 cm on each side for working room and base support.
- Depth depends on your climate and build method:
- Dry-stack: base aggregate depth typically 15 to 20 cm for low walls, increasing with height.
- Mortared on footing: excavate below frost depth for the footing, often 60 to 120 cm depending on region.
- Grade the trench with a slight fall away from structures to manage runoff.
3. Soil Separation and Base Installation
- Lay geotextile fabric in the trench and up the sides to keep soil from migrating into the base aggregate.
- Add crushed stone base in 8 to 10 cm lifts. Compact each lift with a plate compactor until it is firm and does not shift under foot.
- Check level front-to-back and along the length often. Correcting base imperfections now prevents headaches later.
- Top with a thin layer, about 1 to 2 cm, of sharp sand or screenings to fine-tune level for the first course.
Key principle: The first course is your foundation. Invest time getting it perfect.
4. Drainage for Retaining Sections
- Place a perforated drain pipe at the base behind the wall, sloped 1 to 2 percent toward a safe discharge point.
- Cover the pipe with clean drainage gravel to a minimum of 20 to 30 cm behind the wall.
- Wrap gravel and pipe with geotextile to prevent fines from clogging the voids.
- As you build, backfill in 15 to 20 cm lifts with gravel near the wall and compacted native soil farther back.
Good drainage prevents hydrostatic pressure and freeze-thaw damage, two common failure points in garden walls.
5. Set the First Course of Slabs
- Start at the lowest point along your line so subsequent courses step up with grade as needed.
- Bed each slab into the sand or screenings. Tap with a rubber mallet to embed and level. Check front-to-back and side-to-side level on every unit.
- Stagger vertical joints to avoid continuous seams. Mix slab lengths to lock courses together.
- Adjust units by shaving high spots in the bedding layer or swapping pieces for better fit.
Do not rush this step. A true, level first course is the single biggest factor for a straight, stable wall.
6. Build Up Additional Courses
- Dry-stack walls: Apply beads of polymer-modified masonry adhesive on the top surface of the course below, set the next course, and tap to bond. Keep bead lines away from the visible face.
- Mortared walls: Butter the slab bed with mortar and maintain joint thickness per design. Tool joints consistently for a clean look.
- Maintain batter for retaining sections by stepping the back of each course slightly inward.
- Periodically pull a mason line along the face and use a long level or straightedge to keep everything plumb and true.
- Backfill and compact in lifts behind the wall as you go, never after full height is reached.
7. Forming Corners, Returns, and Curves
- Inside and outside corners: Alternate the overlap from course to course so the corner ties both directions. If slabs lack corner units, saw or chisel to create neat returns.
- Curves: Use shorter slab lengths and fan joints. A small gap at the back of the curve is fine; keep the front face tight for a smooth line.
- Steps or pillars: Integrate by interlocking slabs where they meet the wall; ensure each element has its own stable base.
8. Install Geogrid for Taller Retaining Walls
If your wall retains soil beyond the typical DIY height threshold, your design may call for geogrid. Installation basics:
- Lay geogrid on top of a course per the engineer or manufacturer schedule, with the strong direction extending back into the slope.
- Pull the grid taut and pin it temporarily. Place the next course to clamp it in place.
- Backfill over the geogrid with specified material and compact before proceeding.
Geogrid turns the wall and backfill into a single reinforced mass, dramatically improving stability.
9. Capping the Wall
- Select capstones that overhang the face slightly, typically 2 to 4 cm, to shed water and protect the courses below.
- Dry-fit caps for consistent reveals. Scribe and saw for neat miters at corners.
- Bond caps with masonry adhesive on dry-stack builds or mortar on traditional builds. Clean squeeze-out immediately.
10. Finishing Touches
- Backfill and grade the soil behind the wall to direct water away.
- Trim and tuck geotextile so it disappears behind the top course or cap.
- Brush joints clean and rinse dust. Apply a breathable stone sealer if your slab material benefits from it.
- Add planting pockets, low-voltage lighting, and mulch to complete the look.
Real-World Tips for Pro-Grade Results
Keep it level and straight
Check level on each piece and pull a string on every course. Over the length of a wall, tiny variances accumulate. Frequent checks keep everything on track.
Compaction is non-negotiable
Compact the base aggregate in thin lifts and compact backfill as you rise. Settlement is the silent killer of garden walls; your compactor is the cure.
Mind the moisture
Wet base or backfill leads to pumping under loads and frost damage. Build on a dry day when possible and protect your trench from rain during pauses in work.
Cut cleanly
Use a diamond blade and water if possible to minimize dust and keep cuts cool. Score deeply and finish with a chisel for a more natural broken edge when desired.
Special Site Conditions
Frost-prone climates
- Increase base depth and ensure excellent drainage.
- Avoid trapping water behind the wall; slope caps and use drip edges.
Clay or poorly draining soils
- Widen the gravel zone behind the wall and use a high-quality non-woven geotextile.
- Consider a secondary drain daylights to a slope or dry well.
Steep slopes
- Terrace into multiple lower walls rather than one tall wall.
- Step the base trench and first course with the terrain.
Estimating Quantities, Cost, and Time
How many slabs do you need
- Calculate wall area: length times average height.
- Divide by the face area of one slab to estimate count. Add 5 to 10 percent for cuts and waste.
Base and backfill volumes
- Base: trench length times width times compacted depth, converted to cubic meters or yards.
- Drainage gravel: length times the thickness of the gravel zone behind the wall times height.
Budget factors
- Material costs: slabs, base stone, gravel, drain components, adhesive or mortar, capstones, sealer.
- Tool rentals: plate compactor and saw can be significant but save time and back strain.
- Contingency: set aside 10 to 15 percent for surprises.
Timeline
- Planning and layout: half day to a full day.
- Excavation and base: one to two days depending on length and soil.
- Stacking and capping: one to three days.
- Finishing: half day.
For a typical weekend warrior, a modest wall may span two to three weekends including breaks for weather and tool rentals.
Common Mistakes and How to Avoid Them
- Skimping on base: Too little or poorly compacted base leads to settlement. Build a solid platform.
- No drainage: Hydrostatic pressure will push over a wall. Always provide a drain path.
- Stacking without staggering: Continuous vertical joints create weak planes. Stagger joints each course.
- Ignoring batter: A vertical retaining face is more prone to tipping; lean it back slightly.
- Building full height, then backfilling: Backfill and compact in layers as you go.
- Uneven first course: Every error multiplies upward. Spend extra time here.
- Cutting corners on cuts: Sloppy cuts draw the eye. Measure twice, cut once, and hide cut edges where possible.
Maintenance for a Long-Lasting Wall
Annual checks
- Inspect for movement, bulges, or open joints after freeze-thaw seasons.
- Clear weep paths and drains of debris.
- Re-adhere or reset any loose caps before water intrusion causes more damage.
Cleaning and sealing
- Use a soft brush and mild detergent for general cleaning.
- Address efflorescence with purpose-made cleaners if needed, following directions carefully.
- Apply a breathable stone sealer appropriate for your material every few years if you prefer enhanced color and stain resistance.
Winter care
- Avoid de-icing salts directly on stone surfaces; choose garden-friendly alternatives when possible.
- Keep caps free of standing water and snow buildup.
Sustainability and Material Choices
- Local stone and slabs: Reduce transport emissions and blend better with regional landscapes.
- Recycled aggregates: Consider recycled crushed concrete for base when meeting gradation specs.
- Permeable backfill: Promote infiltration where appropriate to reduce stormwater runoff.
- Longevity over replacement: A well-built wall lasts, saving resources over time.
Frequently Asked Questions
Do I need a concrete footing for a slab garden wall
For dry-stack walls, a compacted aggregate base is typical and performs very well for low garden walls. For mortared walls, a reinforced concrete footing below the frost line is the traditional approach and may be required by code, especially for seat-height and taller walls.
How tall can I build without engineering
Local rules vary, but many regions allow non-engineered retaining walls up to about 900 to 1200 mm when built to manufacturer or best-practice specs. Low edging and non-retaining walls have more flexibility. When in doubt, consult your building authority and a structural professional.
Mortar or adhesive
Adhesive is fast and adequate for dry-stack garden walls with tight fits. Mortar provides a more formal look and rigidity but requires a proper footing and more skill. Choose based on aesthetics, code, and wall function.
Can I build on clay
Yes, but you must separate your base from clay soils with geotextile and rely on a thick, well-compacted crushed stone base plus robust drainage. Avoid excavating during very wet conditions.
What about building near a fence or property line
Check setback requirements. Leave working space for excavation and compaction. Ensure drainage outfalls do not discharge onto neighboring properties.
How do I curve the wall smoothly
Lay out the curve with a garden hose, use shorter slab lengths, and keep the front face tight while letting gaps widen toward the back. Check the arc from multiple viewpoints to avoid flat spots or kinks.
A Complete Example Build, Start to Finish
Imagine a 7-meter-long, 45-cm-high garden wall edging a perennial bed on gently sloping ground. Here is the condensed playbook you would follow:
- Plan: Confirm no permits needed; call for utility locates. Sketch a slight S-curve for interest.
- Layout: Stake endpoints and set mason line. Trace the S-curve with a hose and paint.
- Excavate: Dig a trench about 40 cm wide and 20 cm deep, stepping the bottom as the grade changes.
- Geotextile: Line the trench and up both sides.
- Base: Install 12 to 15 cm of crushed stone in compacted lifts; top with 1 to 2 cm of screenings.
- Drainage: Since it is not retaining, skip pipe, but still use clean gravel behind the first two courses where the grade rises.
- First course: Start at the low end. Level each slab meticulously; stagger joints.
- Build up: Two more courses with adhesive beads; maintain the curve and check line-of-sight for fairness.
- Caps: Dry-fit for consistent overhang; bond with adhesive; miter corners as needed.
- Finish: Backfill, rake the bed soil, add drip-line irrigation and mulch. Rinse the wall and admire the continuous shadow line across the split faces.
Troubleshooting: If Something Goes Wrong
- Wavy face line: Pull a string and reset out-of-line units. Minor adjustments can be done with a mallet; major ones require lifting and adding or removing bedding material.
- Settled section after first winter: Remove caps and upper courses over the affected area, add and compact more base aggregate, then restack.
- Water weeping through joints: This can be normal after rain. If water pressure seems excessive, verify the pipe slope and that outlets are not clogged.
- Efflorescence: White salts can form as moisture moves through masonry. Use a purpose-made cleaner; avoid acid unless the product and stone specifically allow it.
Putting It All Together
With thoughtful planning, strong fundamentals, and a focus on base, drainage, and clean stacking, you can transform ordinary split slabs into a wall that elevates your entire landscape. You now know how to build a garden wall from split slabs with confidence: stake and mark the path, excavate and compact a proper base, provide a reliable drain path, level the crucial first course, stagger and bond subsequent courses, and finish with protective caps and refined details.
Take your time, keep your tools sharp, and check level and line often. The payoff is a stunning, enduring garden feature that looks custom-crafted and performs season after season.
Quick Recap Checklist
- Confirm codes, call for utility locates, and finalize the design.
- Excavate a wide, level trench and line with geotextile.
- Install and compact crushed stone base in thin lifts.
- Set a perfect first course with level and mason line.
- Provide drainage with pipe and clean gravel where retaining.
- Stagger joints and maintain batter as you stack.
- Backfill and compact in lifts as you go.
- Cap neatly with slight overhang and bond securely.
- Finish with grading, planting, and optional sealing.
Next Steps
Gather your tools, schedule a clear-weather weekend, and start with a small section to dial in your technique. Once you see how satisfying and achievable it is, extend the line, curve it around a bed, or step it up a gentle slope. By following this guide, you will not only master the process but also enjoy the pride of a handcrafted wall that turns split slabs into a signature element of your garden.