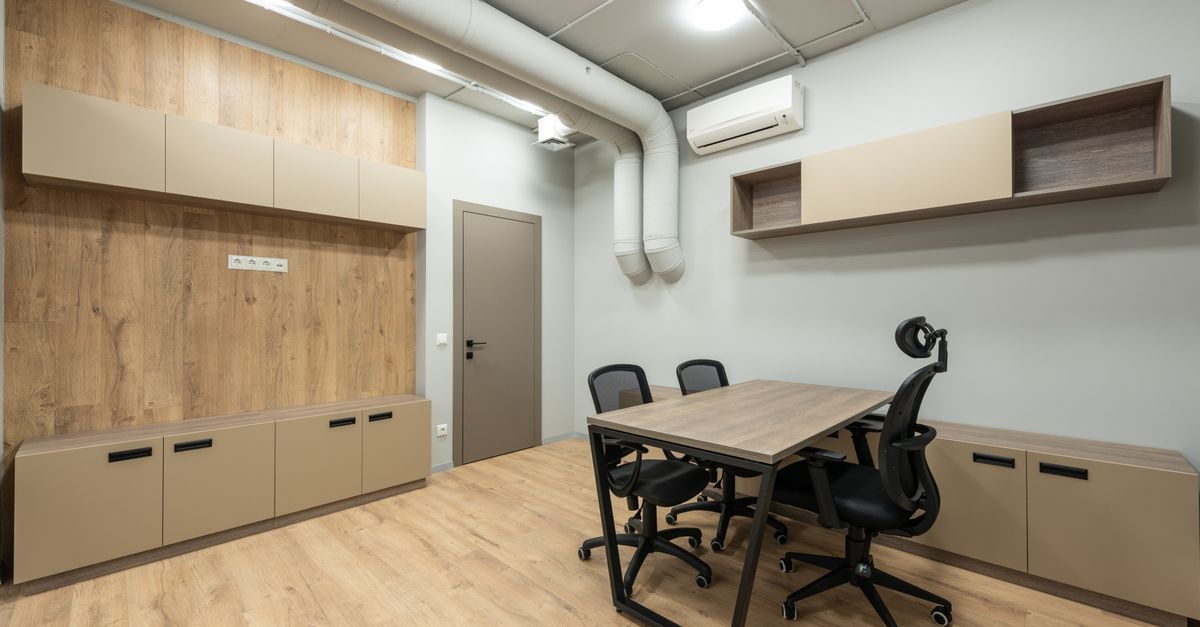
When room echo, comb filtering, and reverberation muddy your audio, the ceiling is usually a prime culprit. Treating it can transform dialog clarity, music definition, and overall comfort. In this comprehensive do-it-yourself guide, you will learn how to plan, prepare, and mount ceiling acoustic panels safely and cleanly, using proven approaches that suit everything from home studios and theaters to offices and classrooms. If you have ever wondered how to install acoustic panels on the ceiling without stress, you are in the right place.
Why the Ceiling Matters More Than You Think
In most rooms, the ceiling is the largest contiguous reflective surface that directly feeds early reflections back to your ears. These reflections create phase interference, smear transients, and inflate reverberation times. By adding absorption above you, you reduce flutter echo, damp comb filtering, and control the crucial first reflection zone. The result is tighter bass perception, clearer midrange, and smooth, non-fatiguing treble. For collaborative spaces, ceiling treatment helps speech intelligibility and reduces distracting noise buildup. For home theaters and studios, it improves imaging and mixes that translate.
- Early reflections: Ceiling reflections arrive within milliseconds of the direct sound, blurring detail.
- Reverberation time: The ceiling is a major contributor to overall decay, especially in hard-surfaced rooms.
- Uniform coverage: Overhead absorption yields even energy reduction across listening positions.
Set Your Goals Before You Drill
Effective treatment starts with a clear intent. Are you taming echo for better meetings, dialing in a critical listening room, or reducing general noise in a busy space? Your goals guide the percentage of coverage, panel thickness, and where to place them.
Quantify the Problem
- Clap test: Clap once and listen for lingering ring or metallic flutter. Long ring implies excessive reverberation.
- Speech clarity: Read a paragraph at normal volume. If words smear or sound boomy, you need mid and low-mid control.
- Measurements: If you have a USB mic and free software, estimate RT60 and identify problematic bands.
Estimate Coverage and Thickness
- Coverage percentage: For general echo control, 15 to 25 percent of ceiling area is a good starting point. For studios and theaters, 25 to 40 percent or targeted early reflection zones plus bass trapping is common.
- Thickness: 2 inch panels deliver strong mid to high absorption. 4 inch panels extend deeper into low mids. Thicker cores or air gaps improve low frequency performance.
- NRC vs real world: NRC summarizes broadband absorption but check detailed frequency charts for the specific product and thickness.
Choose Your Panel Type
- Fabric-wrapped mineral wool or fiberglass: Excellent broadband absorption, predictable data, common in pro installs.
- Acoustic foam: Lightweight and easy to mount, effective at mids and highs; less effective in low mids.
- Hybrid panels: Absorber with reflective or slatted face can balance liveliness and control.
- Custom builds: DIY frames filled with rigid fiberglass or rock mineral wool and wrapped in acoustically transparent fabric are cost-effective.
Confirm a Class A or appropriate fire rating for overhead use, especially in commercial settings. Also consider low VOC materials to keep indoor air healthy.
Pick the Right Mounting Method
There is no single best way to attach absorbers overhead. The ideal method depends on panel construction and your ceiling substrate. Below are proven options presented from lowest-profile to most architectural.
- Direct adhesive bond: Construction adhesive or foam-safe adhesive secures lightweight panels to smooth drywall or concrete. Fast, clean, and low profile.
- Mechanical fasteners: Screws with large washers, impaler clips, or Z-clips create robust, serviceable mounts for framed panels.
- Furring strips and screw-through: Fasten wooden strips to joists, then screw panels to the strips. Great for uncertain substrates or to reduce drilling directly into plaster or concrete.
- Suspended clouds: Eye bolts, aircraft cable, and anchors create floating absorbers, helpful when you want an air gap or design feature.
- Drop ceiling tiles: Swap standard tiles for acoustic tiles or add absorptive backers above the grid.
Safety, Codes, and Prep
Overhead work demands forethought. Treat safety as part of the project, not an afterthought.
Safety Essentials
- Ladder safety: Use a stable ladder on a flat surface. Keep your hips between the rails. Do not overreach.
- PPE: Wear safety glasses. If cutting mineral wool or fiberglass, use gloves, sleeves, and a respirator rated for particulates.
- Weight checks: Verify panel weight and fastener load ratings. Use anchors appropriate for the ceiling material.
- Electrical and fire safety: Do not cover lights, sprinkler heads, or detectors. Maintain code-required clearances.
Tools and Materials Checklist
- Stud finder with metal and AC detection
- Tape measure, carpenter pencil, and chalk line or laser level
- Drill or impact driver; appropriate bits for wood, masonry, or metal
- Anchors: toggle bolts, expansion anchors, or concrete screws as needed
- Construction adhesive compatible with your panels and ceiling
- Putty knife and painter tape
- Large fender washers or panel-specific clips
- Eye bolts, turnbuckles, wire rope, and cable crimps for clouds
- Drop cloths and vacuum
Test Your Substrate
- Drywall over joists: Locate joists for strong screw holds. For hollow zones, use toggles rated for the full load.
- Concrete slab: Use a hammer drill and masonry anchors or tapcon screws. Confirm embed depth and dust extraction.
- Plaster and lath: Aim for joists. If unavoidable, use toggles designed for brittle materials and go slow to prevent cracking.
- Metal deck or beam: Self-drilling screws for light gauge metal or beam clamps for heavier members.
How to Install Acoustic Panels on the Ceiling: A 10 Minute Overview
If you want the short version: create a layout, mark a square grid, find structure, predrill or prep anchors, lift panels into place, then adhere or fasten while maintaining consistent alignment. The details below unpack each step by ceiling type and mounting style so you can choose the best option for your room and skills.
Layout and Design That Work and Look Great
Good layout keeps absorption effective and your ceiling visually coherent. Plan before fastening a single panel.
Map Early Reflections
- Mirror method: Have a helper move a mirror along the ceiling while you sit at the listening position. Mark spots where you see the speakers. These are prime targets for absorption.
- Uniform grid: For offices or open rooms, a regular grid balances aesthetics and diffusion of treated versus untreated areas.
Spacing, Gaps, and Patterns
- Repeating pattern: Equal gaps between panels keep lines straight and calm.
- Air gap trick: Leaving a 2 to 4 inch gap between panel and ceiling increases low frequency absorption. Use clouds or cleats to maintain this distance.
- Accent shapes: Hexagons, circles, or cloud clusters can introduce visual interest without sacrificing performance.
Method 1: Direct Adhesive Mount to Drywall or Concrete
Direct gluing is the cleanest, lowest-profile approach for lightweight foam or fabric-wrapped boards with flat backs. It is quick when the surface is smooth and dust-free.
When to Use
- Panels are light and have flat backs.
- Ceiling is smooth, clean drywall, plaster, or concrete.
- Future removal or repositioning is unlikely.
Adhesive Tips
- Compatibility: Use foam-safe adhesive for foam. Solvent-based products can melt foam. For mineral wool or fiberglass boards, construction adhesive that bonds to painted surfaces works well.
- Low VOC: Prefer low odor, low VOC for indoor work.
- Cure time: Follow manufacturer cure windows. Temporary support may be needed for heavier panels.
Step-by-Step
- Mark layout: Snap a chalk line or laser your grid so panel edges line up.
- Prep surface: Wipe dust with a damp cloth. For concrete, brush away powder. Slightly scuff glossy paint for better adhesion.
- Dry fit: Lift each panel to confirm alignment and fit around fixtures.
- Apply adhesive: Run generous beads in a large M or W pattern and perimeter dabs about 1 inch from edges. For rigid cores, add several quarter-sized buttered spots for compressive grip.
- Press and hold: Lift, align to marks, and press firmly for 30 to 60 seconds. Use a clean board or your forearms to distribute pressure.
- Temporary supports: For heavier units, prop with a 2 by stick padded with a towel, or use painter tape slings until cured.
- Clean up: Wipe any squeeze-out immediately with a damp rag.
Pros: Fast, minimal hardware, low profile. Cons: Removal can damage paint or drywall; repositioning is tough.
Method 2: Mechanical Fastening to Drywall Over Joists
For framed panels or heavier products, screws and clips provide a reliable, serviceable mount. This method balances strength with flexibility if you ever need to move a panel.
Hardware Options
- Fender washers: Large washers distribute load over fabric-wrapped frames. Bite gently to avoid dimples.
- Impaler clips: Stamped metal brackets with spikes that grab rigid fiberglass or mineral wool boards. Use a dab of adhesive on each spike for extra hold.
- Z-clips or cleats: Interlocking aluminum cleats create hidden mounts and easy removal. Install a cleat on the ceiling and a mating cleat on the panel.
Step-by-Step
- Find structure: Use a stud finder to locate joists. Mark centerlines with a pencil.
- Lay out holes: Mark at least two fastener points per panel into framing when possible. For hollow zones, use toggles rated for the panel weight.
- Predrill: Drill pilot holes into joists to prevent splitting and ease driving. For toggles, drill the correct diameter for the folded wing.
- Mount hardware: If using cleats or clips, fasten them square to your layout lines. For washer method, partially drive screws into place to serve as hang points.
- Lift and secure: With help, lift the panel and engage clips or seat over screws. Tighten just until snug to avoid crushing frames.
- Check alignment: Use a level and adjust as needed before final tightening.
Pros: Strong, removable, minimal damage upon removal. Cons: More tools and precision needed; visible heads unless hidden by cleats.
Method 3: Furring Strips for Difficult Substrates
When you cannot confidently fasten into brittle plaster or you want to avoid many holes, mount furring strips to solid structure, then attach panels to the strips.
How It Works
- Lag or screw 1 by 3 or 1 by 4 strips perpendicular to joists at planned rows.
- Drive panel screws into the strips rather than the ceiling itself.
- Paint strips to match the ceiling for a hidden look if small gaps exist.
Step-by-Step
- Locate joists and snap lines.
- Cut strips to length and prepaint if desired.
- Fasten strips to joists with two screws per joist crossing.
- Attach panels using short screws and washers, cleats, or clips into the wood strips.
Pros: Reduces risk to plaster, allows fewer ceiling penetrations, simplifies alignment. Cons: Slightly lowers ceiling, requires more carpentry steps.
Method 4: Suspended Acoustic Clouds
Clouds create an intentional air gap, enhancing low frequency absorption while adding a striking design element. This is ideal over mix positions, conference tables, or dining areas.
Hardware Basics
- Ceiling anchors: Eye bolts into joists, wedge anchors in concrete, or toggles for hollow substrates.
- Wire rope: 1.5 to 2 mm aircraft cable with crimps and thimbles ensures secure suspension.
- Adjusters: Turnbuckles or adjustable grippers fine-tune height and level.
Step-by-Step
- Mark the footprint of the cloud on the ceiling.
- Install anchors in four corners or along a frame, rated well above the total load.
- Fit hangers to the panel using threaded inserts or a light wooden frame on top of the absorber.
- Hang and level, maintaining 2 to 6 inches of air gap depending on your goals and ceiling height.
Pros: Improved low-mid control, adjustable, strong visual statement. Cons: More hardware, careful leveling required, needs ceiling height.
Method 5: Drop Ceiling and T-Grid Solutions
In offices and basements with suspended grids, you can often improve acoustics without any drilling by swapping or augmenting tiles.
- Replace tiles with higher NRC mineral fiber or fiberglass tiles.
- Add backers of absorptive batts above select tiles for improved low mids. Confirm that added weight is within grid and hanger ratings.
- Clouds below grid can hang from the main tees using approved clips when more absorption is needed.
Special Cases: Concrete and Plaster
Concrete Slab Ceilings
- Layout and mark holes through panel cleats or clip rails.
- Hammer drill pilot holes to required depth. Vacuum dust for best anchor grip.
- Set anchors such as sleeve or wedge anchors, or use masonry screws with sufficient embed.
- Attach hardware and then mount panels. Use a helper due to weight and alignment.
Old Plaster and Lath
- Find joists carefully; a deep-sensing stud finder or small pilot holes help verify.
- Use toggles only when joists are not available, and go slow to avoid cracking. A backer strip method can be safer.
- Pre-drill and avoid hammering; vibration can propagate cracks.
Work Around Lights, Sprinklers, and Vents
Do not block or impede services. Maintain safe clearances and airflow.
- Recessed lights: Leave a gap and follow fixture clearance labels. Hot fixtures and insulation do not mix.
- Sprinkler heads: Keep required distances and do not create obstructions that deflect spray patterns.
- HVAC diffusers: Panels can be placed near vents but avoid blocking airflow and consider washable materials in dusty zones.
Acoustic Strategy: Not Just Slapping Panels Overhead
Ceiling absorption is part of a broader plan. Combine it with strategic wall panels and bass control for the best results.
- First reflection control: Ceiling plus side wall absorbers around the listening position sharpen imaging.
- Bass trapping: Corners and soffits handle modal issues the ceiling alone cannot fix.
- Balance: Leave some reflective energy or add diffusers to prevent an overly dead sound.
Detailed Example: 12 by 15 Foot Home Studio
Goal: tighten stereo imaging and reduce flutter while keeping a lively feel.
- Panels: Six 2 by 4 foot, 4 inch thick fabric-wrapped mineral wool boards.
- Layout: Three above the mix position aligned on early reflection points, three staggered mid-room to even decay.
- Mounting: Z-clips into joists for the front cluster; adhesive plus toggles for staggered mid-room pieces.
- Results: Noticeable RT60 reduction from roughly 0.6 s to 0.35 to 0.4 s in mids, improved center image and vocal clarity.
Common Mistakes to Avoid
- Random placement: Guessing often yields uneven results. Use a plan and stick to straight lines.
- Too thin: One inch foam alone may tame only the zing, not the body of the echo. Favor 2 to 4 inch cores or use air gaps.
- Ignoring structure: Failing to locate joists or using undersized anchors risks sagging or failure.
- Covering services: Blocking lights or sensors can be unsafe and violate code.
- All absorption: Overdoing it can make rooms feel dull. Balance with reflective elements or diffusion.
Time, Cost, and Skill Level
- Time: A six panel ceiling can often be completed in half a day with two people.
- Cost: DIY builds may run modest per square foot; commercial panels vary with fabric and core. Add hardware, adhesive, and tool costs.
- Skill: Basic carpentry and layout skills suffice. Concrete or cloud installs require more care and tools.
Care, Cleaning, and Maintenance
- Dusting: Use a soft brush attachment on a vacuum; do not compress the fabric hard.
- Spot cleaning: Mild soap and damp cloth for fabric stains. Test in an inconspicuous area first.
- Checks: Inspect anchors annually, especially on clouds, to confirm tightness and integrity.
Removal and Rental-Friendly Approaches
- Cleats and clips: Leave small screw holes that are easy to patch.
- Grid-based solutions: In drop ceilings, swap tiles rather than altering the space.
- Freestanding clouds: Frame panels into a hanging piece supported from existing beams where permitted.
Avoid relying on temporary strips designed for light wall decor; overhead safety margins need to be higher.
Indoor Air and Sustainability
- Low VOC: Choose adhesives and fabrics with low emissions.
- Recycled content: Many cores and fabrics use recycled fibers. Check certifications.
- End of life: Mechanical mounts simplify panel reuse or relocation.
Troubleshooting Guide
- Panel sag: Increase fasteners, use cleats, or add backer frames. For foam, select higher density products or support edges.
- Adhesive failure: Surfaces may be dusty or incompatible. Clean, scuff glossy paint, and use the correct adhesive with proper cure time.
- Uneven lines: Reestablish a reference line with a laser, loosen and realign if using cleats, or disguise with a continuous trim piece if needed.
- Room sounds too dead: Remove or relocate a few panels, introduce diffusion, or add reflective slats over some absorbers.
FAQ: Practical Answers to Common Questions
How many panels do I need on the ceiling
Start with 15 to 25 percent coverage for general echo control. For critical listening, target first reflections plus additional coverage to reach a balanced RT60 based on room volume.
Can I combine adhesive and clips
Yes. A hybrid method is often ideal: light adhesive dots to prevent rattle plus mechanical clips for safety.
What thickness is best overhead
Two inches is a solid baseline. Four inches or a 2 inch panel hung with a 2 inch air gap improves low-mid absorption.
Is there a difference between absorption and soundproofing
Absorption reduces reflections inside the room. Soundproofing blocks sound transmission between spaces and typically requires mass, isolation, and sealing. Ceiling panels mainly absorb, not isolate.
Will ceiling panels help with noisy neighbors above
Only slightly. To reduce impact or airborne noise from above, you usually need a decoupled ceiling, added mass, damping, and sealing. Overhead absorbers are for in-room control.
Can I install over textured ceilings
Light texture is fine with mechanical fasteners. For adhesive-only installs, scrape or flatten high texture areas or use cleats.
Step-by-Step Recap: From Empty Ceiling to Tuned Sound
- Define goals: Echo control, studio imaging, or speech clarity.
- Measure and plan: Determine coverage, panel size, and thickness.
- Select method: Adhesive, clips, cleats, furring, or clouds based on ceiling type and panel weight.
- Mark layout: Use laser or chalk lines for a clean grid.
- Find structure: Joists, concrete depth, or grid supports.
- Install hardware: Anchors, cleats, or strips as needed.
- Mount panels: Lift, align, and secure. Work with a helper.
- Verify: Check alignment, safety, and clearances around fixtures.
- Evaluate: Listen, measure if possible, and adjust placement only if necessary.
Design Ideas That Elevate the Room
- Staggered banding: Rows of panels with alternating joints create rhythm.
- Perimeter halo: A ring of panels around the room edges leaves the center open, balancing reverberation and visual lightness.
- Color blocking: Use two or three fabric colors to define zones or echo brand identity in offices.
- Integrated lighting: Float clouds with pendant lighting threaded between supports, respecting heat and clearance requirements.
If You Only Remember One Section About How to Install Acoustic Panels on the Ceiling
Plan your grid, pick mounting hardware that matches your ceiling substrate and panel weight, and protect yourself while working overhead. With careful layout and robust fasteners or the correct adhesive, you will get reliable, attractive results and real acoustic gains.
Concrete Example: Fast Adhesive Install for Lightweight Foam
- Clean the ceiling with a damp cloth and let it dry fully.
- Chalk lines for two rows of 2 by 2 foot panels with a consistent 2 inch gap.
- Apply foam-safe adhesive in W patterns on the back of each piece.
- Press in place, hold 30 to 45 seconds, then tape temporary slings for curing.
- Remove tapes after the adhesive sets and check bond at corners.
Concrete Example: Framed Panels With Z-Clips on Drywall
- Mark joists and transfer clip hole locations to ensure at least two screws land in wood.
- Mount ceiling cleats using 2 inch screws to joists and toggles elsewhere as backup.
- Attach mating cleats to the panel frames, ensuring all cleats are perfectly square.
- Lift and hook each panel, tap sideways to seat, and verify tight engagement.
Measurement Tips After Installation
- Phone RTA apps: Play pink noise and look for smoother midrange and reduced combing.
- Clap tests: The bright ring should be shorter and less metallic.
- Listening: Vocals should sit forward with less sibilant smear, and stereo imaging should lock in.
A Note on Fire and Building Codes
- Ratings: Verify that overhead panels meet the required flame spread and smoke development ratings for your occupancy.
- Sprinklers and detectors: Maintain clearances and do not obstruct spray patterns or line of sight to sensors.
- Anchors: Use hardware with published load ratings and build in a safety factor for overhead loads.
Advanced Touches for Power Users
- Slat-faced absorbers: Add slatted wood faces over absorbers to restore some high frequency energy and create diffusion-like scattering.
- Variable acoustics: Mount panels on hinges or sliding tracks so you can open or close coverage for different uses.
- Tuned traps: Combine broadband ceiling treatment with tuned membrane panels elsewhere to target room modes.
Putting It All Together
You now have a complete roadmap for mounting acoustic panels overhead, from choosing materials and planning coverage to selecting the right fasteners or adhesives for your ceiling. If someone asks how to install acoustic panels on the ceiling, you can point them to a process that is safe, repeatable, and adaptable across substrates. With the right layout and a steady hand, you will hear clearer voices, more accurate mixes, and a calmer soundscape in every space you treat.
Final Checklist
- Plan and measure: Coverage, thickness, and first reflection zones.
- Select method: Adhesive, mechanical, strips, or clouds.
- Confirm safety: Anchors, ladder, PPE, and clearances.
- Mark a grid: Chalk or laser for straight lines.
- Install cleanly: Predrill, vacuum dust, and take your time aligning.
- Evaluate: Listen, measure, and fine tune if needed.
Silence from above is not a fantasy. With a methodical approach and a few well-chosen panels, your ceiling becomes an ally instead of an acoustic adversary.
Quick Reference: Key Phrases and Concepts
- How to install acoustic panels on the ceiling
- Ceiling acoustic treatment and first reflection control
- Adhesive versus mechanical mounting
- Suspended acoustic clouds and air gaps
- NRC, thickness, and coverage strategy
- Drywall, concrete, and plaster ceiling considerations
Armed with this guide, you can confidently approach your ceiling treatment project, protect your safety, and reach your acoustic goals with results that both sound and look right.