Blackberries can be exuberant, spiky, and sprawling — or they can be disciplined, upright, and incredibly productive. The difference comes down to how you manage their canes. By guiding growth on a wire trellis, you optimize sunlight, airflow, and harvest convenience while unlocking higher yields and sweeter fruit. If you have ever wondered how to grow blackberries on wire supports without turning your garden into a thicket, you are in the right place.
Tame the Canes: Why Train Blackberries on a Wire Trellis
Left to themselves, blackberry canes tangle, flop, and shade each other. A well-built trellis transforms that chaos into order and performance. Trellising is the difference between hunting for berries in a prickly jungle and strolling along a tidy berry corridor. Beyond comfort, there are tangible agronomic benefits:
- Higher yields and sweetness — Better light exposure increases photosynthesis, improving berry size, color, and natural sugars.
- Cleaner fruit and easier harvests — Berries hang in accessible clusters; fewer get muddy or damaged.
- Improved airflow and disease prevention — Dry leaves and fruit reduce pressure from anthracnose, cane blight, and Botrytis.
- Simpler pruning and training — Organized canes make it easy to remove old wood and tie in new growth.
- Space efficiency — Vertical growing expands production in small gardens and creates neat boundaries along fences or paths.
In short, learning how to grow blackberries on wire supports is one of the most impactful upgrades you can make to your berry patch.
Know Your Canes: Blackberry Growth Habit 101
Blackberries produce two types of canes that determine pruning and training strategy:
- Primocanes — First-year canes that grow vegetatively. In most varieties, they do not fruit until the second year.
- Floricanes — Second-year canes that flower and fruit, then die back after harvest.
Understanding this two-year cycle helps you decide what to keep, what to tip, and what to remove. Equally important is the plant’s growth form:
- Erect — Stout, upright canes that respond well to tipping at about 1.0–1.2 m to encourage side branches. Good for simple two- or three-wire systems.
- Semi-erect — Arching canes that benefit from stronger support and more tying points. Perform nicely on T- or V-trellises.
- Trailing — Long, flexible canes best handled on multi-wire or cross-arm trellises. Often very high yielding.
- Thornless vs thorny — Thornless types are easier to manage near walkways and for family gardens.
Match your trellis to your variety’s habit for training that feels natural, not forced.
Planning Your Wire Trellis: Layout, Orientation, and Design
The right plan avoids rework. Before you sink a single post, map out your space and select a trellis pattern that suits your climate and blackberry type.
Site Selection and Row Orientation
- Sunlight — Choose a full-sun site (6–8+ hours). Morning sun is especially helpful for drying dew.
- Soil — Well-drained, fertile soil with pH 5.5–6.5. Improve poor drainage with raised rows or mounded beds.
- Airflow — Gentle air movement reduces fungal disease. Avoid low frost pockets where spring flowers can be damaged.
- Row orientation — North–south maximizes even sun exposure in most regions; east–west can work if rows are spaced to avoid shade overlap.
Row Spacing and Plant Spacing
- Between rows — 2.4–3.0 m is typical for home gardens; commercial blocks often use 3.0–3.6 m to allow equipment access.
- Within the row — 0.9–1.2 m for erect types; 1.5–2.4 m for semi-erect or trailing forms.
Choose a Trellis Type
Several wire trellis styles work well; select for simplicity, stability, and match to variety.
- Two-wire vertical — Wires at 60–90 cm and 120–150 cm. Simple, cheap, ideal for erect thornless cultivars.
- Three-wire vertical — Adds a top wire at 170–180 cm for taller canes or windier sites.
- T-trellis — Cross-arms at the top wire create a wider canopy; helpful for semi-erect types and to separate primocanes and floricanes on either side.
- V-trellis — Two posts canted outward (or cross-arms angled) create an open V. Excellent light and airflow, and clear separation of fruiting and renewal canes.
- Rotating cross-arm (advanced) — Allows seasonal rotation for even sun and easier harvest. Higher cost, but outstanding fruit quality and labor efficiency.
Materials and Tools Checklist
- Posts — Pressure-treated wood (e.g., 10–12 cm diameter round posts or sturdy 4x4s), metal T-posts for line support, or galvanized steel posts for longevity.
- Wire — Galvanized high-tensile wire, typically 12.5–14 gauge for main lines. Heavier gauge for longer runs.
- End anchors — Earth anchors or deadman anchors; H-braces for long rows or soft soils.
- Tensioners — Ratchet strainers, wire joiners, and gripples for easy tightening.
- Ties and clips — Soft horticultural ties, biodegradable twine, rubber-coated wire, or vine clips.
- Tools — Post driver or auger, shovel, level, fencing pliers, wire cutters, torque handle for tensioners, tape measure, gloves, and safety glasses.
Step-by-Step: Build a Durable Wire Trellis
Here is a straightforward process to create a stable, long-lasting system that can carry lush growth and heavy crops.
1) Set End Posts and Anchors
- Mark the row — Snap a chalk line or stretch a string to keep posts straight.
- Install end posts — Bury at least one-third of post length; deeper in sandy or wet soils. For taller trellises, use longer posts set 60–90 cm deep.
- Brace the ends — Add H-braces (horizontal brace between the end and brace post with a diagonal wire) or angle braces. Strong ends prevent sagging wires.
- Add earth anchors — For long or heavily loaded rows, screw-in anchors behind end posts tethered with high-tensile wire resist pull.
2) Add Line Posts
- Spacing — Place line posts every 4.5–6.0 m; closer for windy areas or taller systems.
- Alignment — Keep posts vertical and in line to avoid wavy wires and weak spots.
3) String and Tension Wires
- Wire heights — Common heights: 60–90 cm (lower), 120–150 cm (mid), and 170–180 cm (top). Match to your cultivar and training plan.
- Attachment — Use staples (for wood) driven at a slight angle; do not pinch the wire tight against the post. For metal posts, use clip fasteners or insulators.
- Join and tension — Connect wire segments with joiners and tighten using ratchet strainers to remove slack, not to guitar-string tightness. Re-tension each spring.
- Safety — Wear eye protection. High-tensile wire under load can snap.
4) Optional: Cross-Arms for T or V Systems
- Cross-arm length — 30–60 cm per side is typical. Longer arms require sturdier posts and braces.
- Angle — For V-systems, angle arms outward 10–20 degrees to open the canopy and reduce cane crowding.
Planting Blackberries at the Trellis
With structure in place, set your plants for long-term success. This section covers variety selection, planting technique, and initial care that pairs perfectly with training on wire supports.
Choose the Right Variety for Your Climate and Trellis
- Cold climates — Select hardy, erect or semi-erect types that withstand winter chill. In very cold zones, consider primocane-fruiting blackberries cut back each winter.
- Warm climates — Trailing and semi-erect thornless varieties thrive; good trellising is essential to hold long canes.
- Thornless picks — Family- and picker-friendly; fewer scratches, easier tying and pruning.
- Flavor focus — Look for varieties noted for high Brix (sugar) and aromatic complexity if you want dessert-quality fruit.
Soil Preparation and Planting Steps
- Amend soil — Work in compost, aged manure, and a balanced organic fertilizer to boost fertility. Target pH 5.5–6.5.
- Drainage — If water stands after rain, create raised rows 15–30 cm high to protect roots.
- Planting depth — Set crowns at the same depth they grew in the nursery. Spread roots horizontally.
- Spacing — Position plants per your variety’s habit (erect closer, trailing wider). Keep rows generous for airflow.
- Water in — Thoroughly water after planting to settle soil around roots.
- Mulch — Add 5–8 cm of organic mulch (wood chips, straw) to conserve moisture and suppress weeds.
How to Grow Blackberries on Wire Supports: A Season-by-Season Training Plan
Training is a rhythm. You will tip, tie, and prune at specific times to guide growth and keep the canopy balanced. Here is a timeline that works for most home growers and small plots.
Year 1: Establish Roots and a Framework
- Spring — Plant young crowns and allow primocanes to grow. Once canes reach about 90–120 cm, tip the growing tips by 2–5 cm to encourage lateral branching on erect types.
- Summer — Begin tying flexible canes to the lower or mid wires. Space ties every 30–45 cm with a gentle figure-eight to prevent chafing.
- Late summer — Continue to tip laterals at 30–45 cm to build fruiting wood for next year on erect cultivars.
- Fall — Reduce irrigation as plants go dormant. Keep weeds down and mulch refreshed.
- Winter (dormant) — Minimal pruning this first year beyond removing any dead or damaged canes.
Year 2: Shape the Fruit Wall
- Early spring — Identify last year’s canes (now floricanes) vs new primocanes. Arrange floricanes neatly along mid and top wires for fruiting.
- Late spring — As primocanes emerge, direct them to the lower wire or to the opposite side of a V-trellis. Keep fruiting and renewal wood separated.
- Summer — After harvest on floricanes, remove them at ground level. Keep only healthy, well-spaced primocanes (6–10 per plant), and tip as needed.
- Winter — Prune laterals on floricanes to 20–30 cm, each with 6–10 buds, depending on vigor. Thin excess primocanes to avoid congestion.
Year 3 and Onward: Maintain Balance for Peak Yields
- Each spring — Tie in floricanes first for a tidy fruiting wall. Space canes so clusters do not overlap heavily.
- Throughout summer — Keep tying primocanes as they lengthen. Tip erect primocanes when they reach your target height. Remove weak or diseased shoots.
- Post-harvest — Cut spent floricanes to the ground immediately to reduce disease carryover and to free space.
- Dormant season — Finalize pruning: set lateral length, thin to the best canes, and check wire tension and post stability.
Training Patterns That Work
- Fan training — Spread floricanes like a fan across two or three wires; tie at multiple points for support.
- Side separation — On a V-trellis, tie fruiting canes on one side and renewal primocanes on the other; this keeps harvest paths open.
- Tip-and-tie — For erect types, tip early, then tie laterals horizontally or gently angled to fill the wire space.
Pruning Essentials: Clarity Beats Clutter
Pruning blackberries is about clarity: remove what is finished, preserve what will fruit, and keep future growth healthy.
- Remove floricanes after fruiting — Spent canes die naturally and harbor disease. Cut flush at ground level.
- Thin primocanes — Retain the strongest 6–10 per plant, depending on vigor and trellis capacity; cull the rest early.
- Shorten laterals — In winter, cut laterals back to 20–30 cm with several buds to focus energy into quality fruit.
- Tip primocanes — Tip once they reach desired height to promote branching and a manageable canopy.
- Disinfect tools — Wipe blades with alcohol between plants to reduce disease spread.
Ties, Clips, and Knots: Gentle Support That Lasts
Good ties hold canes without cutting into bark. Use materials that flex and weather well.
- Soft, stretchable ties — Rubberized wire, silicone bands, or cloth ties cushion movement.
- Figure-eight method — Cross the tie between the wire and cane so they do not rub directly.
- Clip systems — Reusable vine clips speed up tying and are ideal for large plantings.
- Spacing — Add a tie every 30–45 cm along long canes; more in windy locations.
Water and Nutrition for Trellised Blackberries
Vertical growth adds foliage and fruiting wood, so your irrigation and fertility plan must keep pace.
Irrigation
- Drip lines — Place one or two drip lines along the row with emitters near each plant. Aim for consistent moisture, especially from bud break through harvest.
- Mulch synergy — A 5–8 cm mulch layer reduces evaporation and keeps roots cool.
- Deep, infrequent watering — Encourage deeper roots. Avoid frequent shallow sips.
Fertility
- Soil test first — Apply nutrients based on actual need. Over-fertilization can create soft growth that breaks on the trellis.
- Balanced NPK — Split applications: light nitrogen at bud break and again after fruit set; do not push late-season nitrogen that delays hardening off.
- Organic matter — Annual compost top-dressing supports microbial life and steady feeding.
- Micronutrients — If tests show deficiencies (e.g., iron in high-pH soils), correct early in the season.
Weed Management and Mulching Beneath the Wires
A clean row reduces pests, disease, and competition for water.
- Mulch strategy — Wood chips, pine needles, or straw. Renew annually.
- Landscape fabric — Useful for new plantings; cut X-slits for plants. Cover with mulch for UV protection.
- Hand weeding — Remove weeds early before they root around crowns and trellis bases.
- Avoid tilling close — Blackberry roots are shallow; tillage can damage them and stir up weed seeds.
Pest and Disease: How Trellising Helps (and What to Watch)
Training on wire supports naturally reduces several problems, but vigilance matters.
- Fungal diseases — Better airflow and sun exposure help prevent anthracnose, cane blight, and gray mold. Prune out infected wood promptly.
- Insect pests — Spotted wing drosophila (SWD) targets ripe berries. Pick promptly, chill fruit quickly, and consider fine netting as needed.
- Cane borers — Look for wilted tips and swellings on canes; prune out affected sections well below damage.
- Birds — Ripe berries are irresistible. Use bird netting supported above wires or reflective deterrents.
- Rodents and rabbits — Mulch carefully and use guards if gnawing occurs near crowns.
Harvesting: Bigger, Sweeter, and Easier
Trellised plants deliver fruit that is not only abundant but also a joy to pick.
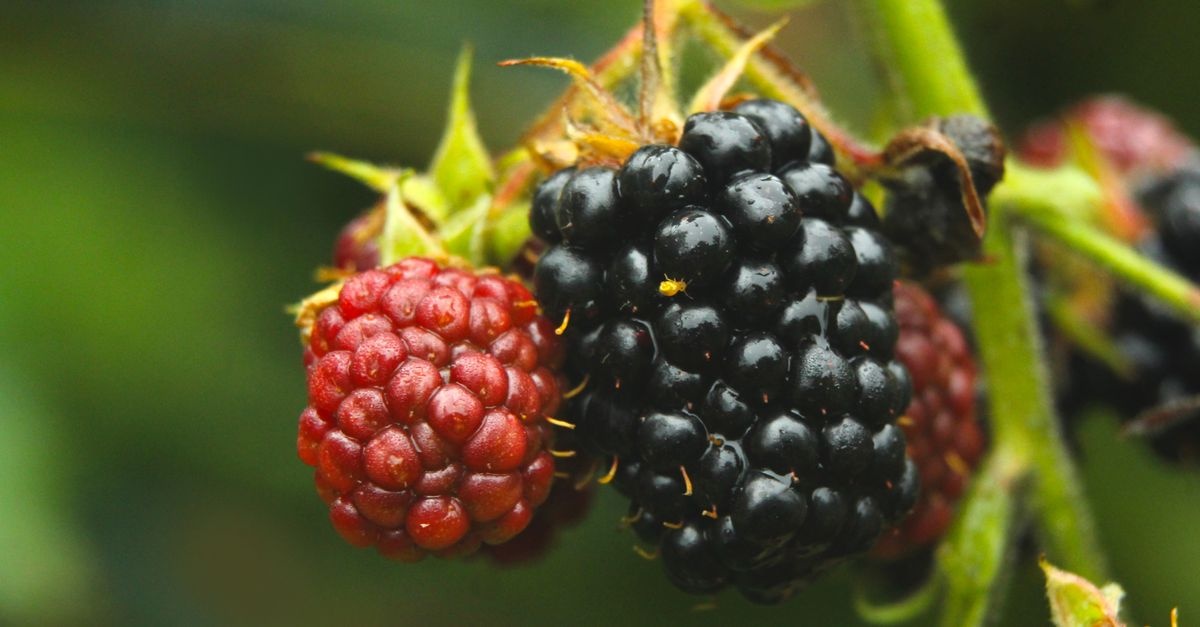
- Color and feel — Harvest when berries are fully black, dull to slightly glossy, and detach with a gentle tug. If they resist, give them another day.
- Frequency — Pick every 1–3 days at peak. Morning harvests keep fruit cooler and firmer.
- Taste and Brix — Enhanced sun exposure on trellises increases sweetness. Expect elevated Brix readings compared to untamed thickets.
- Handling — Use shallow containers; avoid stacking to prevent crushing.
Troubleshooting: Common Trellis and Cane Problems
- Sagging wires — Re-tension with ratchets each spring; check end braces and anchors. For long spans, add a mid-post.
- Wind damage — Increase tie frequency and use heavier gauge wire. Consider windbreaks if exposure is severe.
- Canes breaking at ties — Switch to softer, wider ties and a figure-eight wrap to reduce abrasion.
- Overcrowding — Thin primocanes earlier. In winter, shorten laterals to maintain light penetration.
- Disease carryover — Remove spent floricanes immediately after harvest; sanitize pruners between plants.
Advanced Trellising: Systems That Maximize Light and Labor
For enthusiasts and small farms, advanced systems can boost fruit size and picking speed.
- Rotating cross-arm — Canes trained on hinged cross-arms are rotated seasonally for optimal sun and ergonomic picking. Higher initial cost, lower ongoing labor.
- Shift-trellis concepts — Separate fruiting and renewal zones even more distinctly, simplifying pruning and spray coverage.
- Primocane-fruiting blackberries — In cold zones, mow all canes to the ground in winter; train only current-season primocanes for a late-summer-to-fall crop. This resets disease pressure annually.
Seasonal Calendar: A Quick Reference
- Late winter — Dormant pruning; shorten laterals; thin primocanes; check and tighten wires.
- Spring — Tie floricanes for fruiting; direct new primocanes to renewal side; fertilize lightly; start drip irrigation.
- Early summer — Tip primocanes at target height; maintain weed-free mulched strips.
- Mid to late summer — Harvest; remove spent floricanes; monitor for SWD; irrigate consistently.
- Fall — Reduce water; clean debris; refresh mulch; protect young plants if winters are harsh.
Costs, Time, and DIY Tips
- Budget — Expect modest costs for posts, wire, and ties. Wood posts are economical; galvanized components last longer.
- Time investment — One weekend builds a small trellis; seasonal tying and pruning are light once habits form.
- DIY shortcuts — Pre-drill cross-arms, stage ties on a carabiner, and use a portable caddy for pliers and clips to speed work.
Eco-Smart Practices for Healthier Canes and Soils
- Mulch and compost — Feed soil life to reduce synthetic inputs.
- Integrated pest management — Monitor, set thresholds, and use targeted controls only when necessary.
- Water conservation — Drip irrigation, timed watering, and mulch keep usage low.
- Habitat — Flowering strips near rows support beneficial insects and pollinators for better fruit set.
Putting It All Together: A Simple Blueprint
If you are synthesizing how to grow blackberries on wire supports into one actionable plan, use this blueprint:
- Build a two- or three-wire trellis with solid end braces; set wires at roughly 75 cm, 120–150 cm, and 175 cm.
- Plant high-quality, climate-suited varieties on 0.9–2.4 m spacing based on growth habit.
- Train floricanes neatly onto mid and top wires; direct primocanes to the lower wire or opposite side of a V.
- Tip primocanes at desired height and shorten laterals in winter to 20–30 cm.
- Remove spent floricanes immediately post-harvest to reduce disease and open space.
- Feed and water consistently with drip irrigation and compost-driven fertility.
FAQs
How many canes should I keep per plant?
Typically 6–10 strong primocanes, adjusted to variety vigor and trellis capacity. Thin early to prevent crowding.
Do I need a top wire for erect thornless types?
A two-wire system often suffices, but a top wire improves stability in windy sites or for vigorous cultivars.
Can I convert an existing fence into a blackberry trellis?
Yes. Add high-tensile wires at the right heights and ensure posts and end braces can handle the load.
What if my soil is heavy clay?
Build raised rows, amend with compost, and ensure drip irrigation does not oversaturate the root zone.
Is netting compatible with wire trellises?
Absolutely. Drape netting over top wires or add lightweight hoops to keep net off the fruiting zone.
Conclusion: A Sweeter Way to Grow
With a sturdy wire trellis and clear training routine, blackberries become one of the most rewarding fruits to grow. You will harvest earlier, pick faster, and enjoy bigger, sweeter berries from a tidy, healthy planting. Whether you choose a simple vertical system or a V-style that separates fruiting and renewal canes, the principles remain the same: keep canes organized, encourage light and airflow, and refresh the canopy each season. Mastering how to grow blackberries on wire supports turns a once-ornery bramble into a graceful, productive wall of fruit — a triumph of good design and steady hands.
Next Steps
- Sketch your trellis layout and choose a system that matches your variety and space.
- Source posts, wire, and ties; build sturdy end braces first.
- Plant healthy crowns, mulch well, and start training canes this season.
Tame the canes now, and your future self — basket in hand — will thank you at harvest.