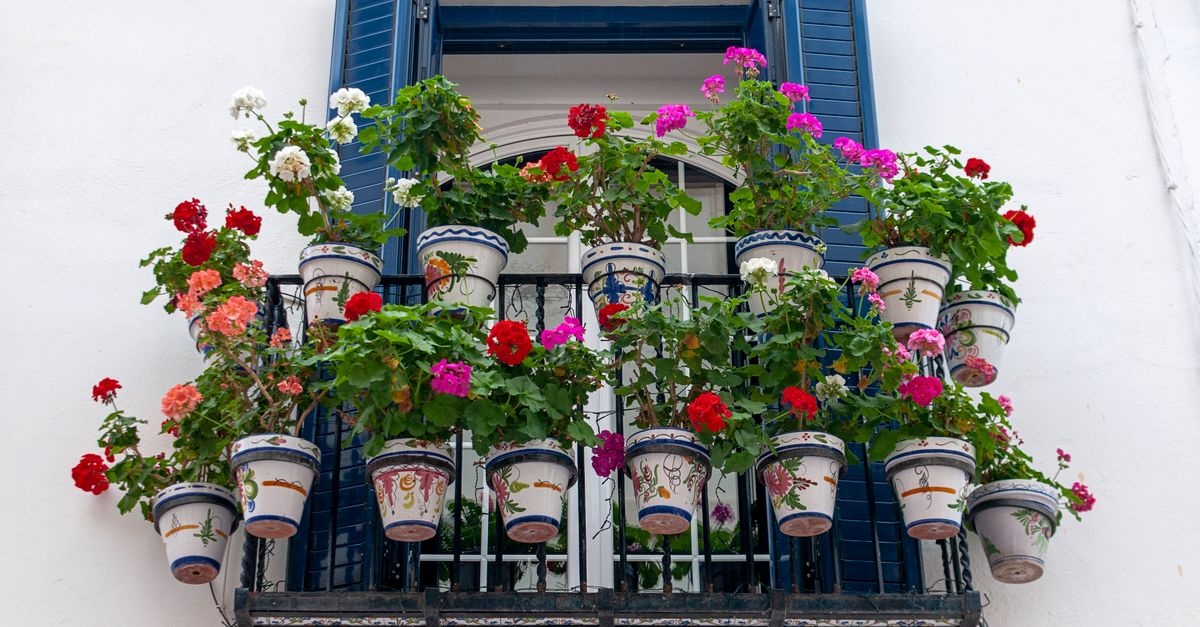
If you have a small balcony and a big dream of greenery, you are in the right place. This guide delivers practical, foolproof layouts that transform compact outdoor spaces into relaxing oases—without complicated tools or years of gardening experience. You will learn the core principles behind a reliable beginner balcony garden layout, how to assess your microclimate, pick plants that actually thrive, and follow step-by-step blueprints tailored to different balcony sizes, orientations, and lifestyles.
Why Foolproof Layouts Work (Even If You Are Brand New)
A great layout for a first balcony should remove guesswork. It prioritizes safety, sunlight, airflow, access for watering, and repeatable patterns that scale from mini herb corners to fully styled retreats. The best beginner-friendly balcony layout builds from these essentials:
- Safety first: Mind weight limits, railing integrity, and wind. Lightweight containers and low-profile plantings keep your setup secure.
- Sun-smart placement: Tall plants to the back or sides, low growers near the front, and heat lovers where light is strongest.
- Vertical focus: Wall, railing, and hanging options maximize greenery without stealing floor space.
- Clear pathways: Leave at least one uncluttered, foot-wide strip to move, water, and harvest.
- Easy care: Self-watering planters, grouped watering zones, and resilient plants mean fewer headaches.
- Multi-use zones: A tiny seat or foldable table turns your garden into a daily retreat.
Build around these principles and your beginner balcony garden layout will stay tidy, healthy, and inviting through the seasons.
Step 1: Measure and Assess Your Balcony Microclimate
Before buying anything, spend one or two days becoming a balcony detective. A small investment in observation makes every decision easier.
How to map your space
- Measure dimensions: Width, depth, and railing height. Note door swing and any vents or AC units.
- Orientation: South and west get the most sun, east gets gentle morning light, north is shadier in many regions.
- Sun hours: Track direct sun in two-hour increments. Many edibles need 6+ hours; ferns and hostas prefer 2–4 hours or bright shade.
- Wind exposure: Higher floors and corner units are windier. Check for gusts and swirling currents.
- Water access: Is there a nearby faucet, or will you carry water? Plan accordingly with self-watering containers or a lightweight can.
- Drainage path: Find where water runs. Use saucers or trays to protect neighbors and surfaces.
- Weight limits: Consult building guidelines or your landlord. Favor lightweight materials and avoid overloading one area.
- Rules and privacy: HOA or rental policies may limit drilling or railing planters. Choose no-drill solutions when needed.
Write these observations down. Your notes will shape a layout that fits your exact balcony and climate—an anchor of a dependable beginner balcony garden layout.
Step 2: Containers and Growing Medium That Make Plants Thrive
Great plants start with smart containers and the right potting mix. This is the backbone of successful container gardening for beginners.
Choose the right containers
- Materials: Resin, plastic, and fiberglass are light and durable. Avoid heavy ceramic unless weight is not an issue.
- Sizing: Deeper pots (at least 10–12 inches) for tomatoes, peppers, and shrubs. Shallow bowls (6–8 inches) for herbs and greens.
- Self-watering planters (sub-irrigated): Built-in reservoirs reduce watering frequency and stress.
- Railing planters and window boxes: Great for low-profile greens and trailing flowers—ensure secure, load-rated brackets.
- Vertical systems: Ladder shelves, pocket planters, and stackable towers multiply space without crowding floors.
- No-drill setups: Use freestanding trellises, tension rods, or over-rail hooks if drilling is restricted.
Potting mix that works on balconies
Balconies heat up fast and dry out quickly, so you need a mix that holds moisture yet drains well. Try this reliable blend:
- Base: 60 percent high-quality peat-free potting mix or coco coir-based mix
- Aeration: 20 percent perlite or pumice
- Nutrients: 10–20 percent finished compost or worm castings
- Optional: A small dose of slow-release organic fertilizer granules
Skip gravel at the pot’s bottom—it does not improve drainage in containers and can create perched water. Ensure your pots have proper drainage holes and use saucers to protect surfaces.
Step 3: Plants That Actually Fit Your Conditions
Pick plants for your light, wind, and maintenance style. Mixing edibles and ornamentals gives beauty and function while keeping your beginner balcony garden layout lively.
Full sun (6+ hours)
- Edibles: Cherry tomatoes, peppers, strawberries, bush beans, basil, thyme, oregano, rosemary
- Flowers: Marigolds, zinnias, petunias, calibrachoa, nasturtiums (edible blooms)
- Drought-tolerant: Lavender, sedum, trailing portulaca
Partial sun or bright shade (3–5 hours)
- Edibles: Lettuce, arugula, spinach, chard, parsley, cilantro, mint (in its own container)
- Flowers and foliage: Heuchera, impatiens, begonias, coleus, coral bells
Shade (0–2 hours of direct sun, bright indirect light)
- Foliage: Ferns, hosta (dwarf varieties do well in pots), aspidistra, fatsia
- Accent: Ivy (managed), sweet woodruff, caladium in warm seasons
Wind-tolerant picks for higher floors
- Compact shrubs: Dwarf rosemary, dwarf bamboo alternatives like nandina domestica (in mild climates), dwarf pittosporum
- Low-profile edibles: Chard, dwarf tomatoes, chilies, oregano, thyme
- Trailing flowers close to rails: Lobelia, bacopa, trailing verbena
Safety note: If you have pets or children, cross-check plant toxicity. Opt for pet-safe options like thyme, rosemary, basil, marigolds, and many lettuces. Avoid lilies, sago palm, foxglove, and oleander.
Step 4: Foolproof Balcony Layout Blueprints
Use these ready-to-plant blueprints as your reliable path from empty deck to thriving garden. Each one is a complete, beginner-friendly balcony layout with a shopping list, placement guide, and care notes.
Blueprint A: The Narrow 5 by 8 ft Edible Oasis (South or East Light)
Goal: Everyday herbs, salad greens, and a couple of compact fruiting stars—plus room for a small bistro setup.
Why it works: Vertical trellis at the far end anchors height; mid-height containers create a soft screen; railing planters add color and extra salad space without blocking movement.
- Shopping list:
- 1 freestanding trellis 5–6 ft tall with two 12–14 inch planters
- 2 self-watering planters (24–30 inches long) for greens and herbs
- 2 railing planters for trailing flowers or additional greens
- 1 foldable bistro table and 2 chairs (or a single compact chair)
- Quality potting mix, slow-release fertilizer, saucers
- Plants: cherry tomato (dwarf), chili pepper, basil, thyme, oregano, parsley, arugula, lettuce mix, nasturtiums or trailing petunias
- Placement:
- Place the trellis at the sunniest far end against the wall. Tomato and chili in the deeper pots at the base.
- Line one side with the two long planters: fill with salad greens at the front, herbs at the back.
- Clip railing planters along the opposite rail for trailing color and extra lettuce.
- Keep a 12–16 inch clear walkway from door to end.
- Set the foldable bistro near the door-side for quick access.
- Care notes:
- Water deeply when the top inch of soil is dry; more often during heat waves.
- Harvest greens regularly to encourage fresh growth; pinch basil tops to keep it bushy.
- Fertilize lightly every 3–4 weeks in summer.
- Upgrades:
- Add solar string lights along the rail for evening ambience.
- Use a capillary mat beneath grouped pots to stretch time between waterings.
Blueprint B: Micro Balcony 3 by 6 ft Vertical Herb Bar (Any Orientation)
Goal: Maximum flavor in minimal space, zero drilling, swift watering.
Why it works: Height over footprint; a ladder shelf concentrates care in one compact zone while railing planters keep the perimeter green without crowding.
- Shopping list:
- 1 narrow ladder shelf (3–4 tiers)
- 3 small self-watering pots for thirsty herbs (basil, mint, parsley)
- 3 medium pots for Mediterranean herbs (thyme, oregano, rosemary)
- 1–2 railing planters for cut-and-come-again lettuces or trailing flowers
- Lightweight watering can and drip tray
- Placement:
- Ladder shelf to the side wall nearest the door for quick access.
- Thirsty herbs at mid-level (easiest to water), woody herbs on top (more sun, more airflow), trailing or compact herbs on lower tiers.
- Railing planters opposite the shelf with lettuces or color pops.
- Care notes:
- Group herbs by water needs; mint in its own container.
- Feed lightly every 4–6 weeks; do not overfertilize woody herbs.
- Upgrades:
- Swap top shelf for a low-profile grow box if you have strong midday sun.
- Add a small outdoor stool that tucks under the shelf for a tasting perch.
Blueprint C: Shady Sanctuary 6 by 8 ft North-Facing (Low Light)
Goal: Lush texture, calming greens, low maintenance—perfect for reading or morning tea.
Why it works: Foliage layers bring depth in low light; reflective surfaces bounce brightness; a storage bench doubles as seating and tool stash.
- Shopping list:
- 1 storage bench (water-resistant)
- 3–4 medium planters for ferns, hosta, heuchera
- 1 tall planter with aspidistra or dwarf fatsia as a focal point
- 2 hanging planters with ivy or trailing bacopa (shade-tolerant)
- Outdoor mirror or light-colored wall art (secured safely)
- Coir-based potting mix with extra perlite for airflow
- Placement:
- Bench along the darkest wall; tall focal plant on one end to frame the seat.
- Group ferns and hosta near the corners for a woodland look.
- Hang two trailing planters near the rail to draw the eye outward.
- Add a light-hued outdoor rug to visually open the floor.
- Care notes:
- Water when the top 1–2 inches are dry; shade plants still need consistent moisture.
- Remove spent fronds and rotate pots monthly for even growth.
- Upgrades:
- Solar lanterns or warm string lights for evening glow.
- Moss poles or a mini trellis for shade-tolerant climbers like jasmine (varies by climate).
Blueprint D: Windwise Edibles on a High-Rise 4 by 10 ft (West Light)
Goal: Productive yet protected garden for breezy balconies.
Why it works: A breathable windbreak tames gusts without turning into a sail; low, wide planters reduce toppling; sturdy, compact varieties resist damage.
- Shopping list:
- Breathable mesh wind screen or reed panel secured to existing structure (no drilling if required; use approved ties)
- 2–3 low, wide self-watering planters (at least 12 inches deep)
- 2 railing planters with trailing, wind-hardy flowers
- Plants: dwarf tomatoes, chilies, chard, thyme, oregano, rosemary, calendula, verbena
- Placement:
- Install wind screen along the most exposed edge.
- Place the heaviest, lowest planters close to the base of the screen for shelter.
- Railing planters in the least gusty spots with trailing, tough blooms.
- Keep all tall stakes short and well-secured; avoid top-heavy trees.
- Care notes:
- Check soil moisture frequently; wind increases evaporation.
- Use mulch (fine bark or coir chips) to reduce splash and water loss.
- Upgrades:
- Add a compact drip kit with a balcony-safe timer to simplify watering.
- Use elastic plant ties that flex in wind without cutting stems.
Blueprint E: L-Shaped Corner Retreat 8 by 10 ft (Mixed Light)
Goal: Create two cozy zones—dining and lounging—wrapped in greenery.
Why it works: Corner height with a plant tower, midline planters for rhythm, and rail planters to unify the edge. The layout maintains a central pathway that naturally flows between zones.
- Shopping list:
- 1 plant tower or corner shelf unit
- 3 rectangular planters for mixed herbs and flowers
- 3 railing planters to tie the perimeter
- 1 compact dining set plus a low lounge chair or floor cushions
- Plants: mix of edible herbs (basil, oregano, parsley), chives, dwarf tomatoes, calendula, petunias, marigolds, and a statement plant like dwarf olive or faux-bamboo nandina (climate permitting)
- Placement:
- Corner tower at the bend, tallest plants at the top sheltered by walls.
- Rectangular planters line each leg of the L, leaving the inner corner open.
- Railing planters run along the outer edge for continuity.
- Dining set near the door; lounge zone in the sunnier leg for evening warmth.
- Care notes:
- Rotate edible planters every few weeks to balance light.
- Deadhead flowers weekly to keep blooms coming.
- Upgrades:
- Add a narrow outdoor bar shelf along the rail for serving.
- Use matching planter colors to tie the whole scene together.
Step 5: Watering and Feeding Without the Stress
Consistent moisture is the number-one success factor for container gardening. Build watering into your layout and routine.
Smart watering strategies
- Group by thirst: Keep water-lovers together and drought-tolerant plants together for efficient care.
- Self-watering planters: Ideal for a set-and-forget routine on busy weeks.
- Capillary mats: Place under clusters of pots to wick water evenly.
- Drip irrigation: A small kit with a timer can run from a nearby faucet or a balcony-safe reservoir.
- Finger test: Check moisture 1 inch down; water deeply when dry instead of frequent sips.
Fertilizing made simple
- Slow-release granules in spring carry your plants for 2–3 months.
- Liquid feed every 2–4 weeks during peak growth for tomatoes, peppers, and flowers.
- Leafy greens need lighter, more frequent feeding; avoid heavy nitrogen late in summer heat.
Step 6: Easy Pest and Disease Prevention
A little prevention saves a lot of plant drama. Your beginner balcony garden layout should include airflow and simple inspection habits.
- Quarantine new plants for a week before mixing them in.
- Scout weekly: Check leaf undersides for aphids, mites, or whiteflies.
- Boost airflow: Do not overcrowd; prune to keep foliage from matting.
- Clean tools and trays monthly; remove dead leaves promptly.
- Natural controls: Use insecticidal soap or neem oil for soft-bodied pests; BT for caterpillars where allowed.
- Water at soil level to limit mildew on leaves.
Step 7: Style Your Retreat—Color, Texture, and Comfort
Form meets function when your space looks as good as it grows. Small design moves can make your balcony feel bigger and more cohesive.
- Pick a palette: One neutral base (planter color), one dominant hue (blooms or textiles), and one accent.
- Play with heights: Tall focal points at corners, mid-height lines along the sides, low planters up front.
- Repeat shapes: Echo round planters or rectangular boxes for visual rhythm.
- Textural mix: Pair glossy leaves with feathery fronds and spiky herbs.
- Lighting: Solar strings, lanterns, or clip-on spotlights add instant evening ambiance.
- Soft layers: Outdoor rug, cushions, and a throw turn garden time into relaxing time.
Step 8: Budget-Friendly Hacks and Upcycles
You can build a gorgeous, productive balcony garden on a budget with these simple swaps.
- Nursery pot + cachepot: Use inexpensive grow pots tucked inside thrifted baskets.
- Crate bench: Two sturdy wooden crates topped with a cushion become seating and storage.
- Pallet planter: Stand a sanded pallet upright with landscape fabric pockets for herbs and flowers.
- DIY drip: Reuse clean water bottles with pinholes as slow-release spikes for weekends away.
- Free mulch: Shredded fall leaves or coir chips reduce evaporation in summer.
Always confirm weight and safety—avoid heavy wet soil in massive containers if your building has strict load limits.
Step 9: Seasonal Roadmap—What to Do and When
Keep your balcony thriving year-round with a simple seasonal rhythm that matches any beginner balcony garden layout.
Spring
- Deep-clean the balcony; check planters and trellis stability.
- Refresh the top third of soil with fresh mix and compost.
- Plant cool-season greens first; harden off seedlings before moving outside.
Summer
- Water early in the morning; mulch to conserve moisture.
- Deadhead flowers weekly; pinch herbs to delay bolting.
- Fertilize lightly on a regular schedule.
Autumn
- Swap heat-lovers for kale, pansies, violas, and chard.
- Collect seeds from marigolds and nasturtiums for next year.
- Reduce feeding as growth slows.
Winter
- Consolidate pots nearer to walls for protection.
- Add evergreens or decorative branches for structure.
- Use frost cloth on cold nights if your climate dips below freezing.
Step 10: Troubleshooting Common Balcony Garden Issues
- Plants look leggy: They need more light; move them forward, prune lightly, and consider reflective surfaces.
- Soil dries too fast: Add self-watering planters, mulch, or a capillary mat; group pots closer together.
- Yellow leaves: Overwatering or poor drainage. Check holes, let soil dry to the correct level, and ensure saucers are not waterlogged.
- Mildew on leaves: Increase airflow, water at soil level, and remove affected foliage.
- Too crowded: Edit. Keep a clear path and prioritize your favorites for a calmer space.
Quick-Start Checklists
10-Step Weekend Plan
- Measure and sketch your balcony.
- Note sun hours and wind exposure.
- Pick one blueprint that matches size and light.
- Make a shopping list (containers, mix, plants).
- Choose lightweight, self-watering options where possible.
- Set containers in place before filling.
- Fill with quality mix; pre-moisten as you go.
- Plant from back to front, tallest to shortest.
- Water deeply; add mulch on top.
- Place a watering can and snips by the door for easy upkeep.
Beginner-Friendly Plant Combos
- Sunny Salad Box: Lettuce mix, arugula, basil, marigold edge
- Pizza Planter: Dwarf tomato, oregano, thyme, trailing nasturtiums
- Shade Texture: Fern, heuchera, hosta, trailing ivy
- Windwise Herb Stack: Rosemary, thyme, chives, compact chili
Frequently Asked Questions
Can I succeed with a north-facing balcony?
Yes. Focus on foliage stars that thrive in lower light—ferns, hosta, heuchera, and shade-tolerant annuals. Use light-colored surfaces and mirrors to brighten the space. A shade-first beginner balcony garden layout is all about texture and calming greens.
What about building rules and drilling?
If your lease or HOA bans drilling, choose tension-rod plant poles, freestanding trellises, over-rail brackets rated for your railing type, and modular shelves. Every blueprint here includes no-drill options.
How do I avoid annoying neighbors with runoff?
Use planters with saucers, self-watering reservoirs, or a boot tray lined with pebbles. Water slowly to avoid overflow and angle trays so excess does not pour over the edge.
Is weight a real concern?
Yes. Wet soil is heavy. Use lightweight planters, coco coir-based mixes, and spread containers evenly. When in doubt, check guidelines and stay conservative.
Can I grow an edible garden in partial sun?
Absolutely. Focus on leafy greens, herbs like parsley and mint, and compact fruits like strawberries. Choose the edible-focused blueprint that matches your light and scale it down as needed.
Putting It All Together: Your First Week With a Balcony Garden
Choose a layout that matches your space and light, gather materials, and set aside one weekend to build your foundation. Keep tools handy, water consistently, and edit as you learn. Your balcony will quickly shift from empty square footage to a living, fragrant retreat.
Bonus: Sample One-Month Care Calendar
- Week 1: Plant, water deeply, and label everything. Light feeding for edibles.
- Week 2: Check moisture daily; pinch basil; deadhead first blooms.
- Week 3: Top up mulch; inspect for pests; rotate planters if growth is uneven.
- Week 4: Light liquid feed; succession sow more greens in railing boxes.
The Beginner Balcony Garden Layout Mindset
Think of your space as a flexible studio. Start simple, observe, and adjust. Use vertical solutions to multiply greenery. Choose plants for your light and lifestyle. Prioritize a clear path and easy watering. If you follow these steps, any beginner balcony garden layout you choose from this guide will reward you with beauty, harvests, and daily moments of calm—no sprawling yard required.
Your Next Step
- Pick one blueprint above that matches your balcony size and sun.
- Make the shopping list and stick to it.
- Set everything in place before you fill with soil—then plant from back to front.
- Add one comfort element: a chair, a lantern, or a rug. This is your retreat.
In a single weekend, you can go from blank slab to blissful greenery. Welcome to balcony gardening that actually works.
Keywords naturally integrated: beginner balcony garden layout, balcony gardening, container gardening for beginners, small balcony garden ideas, vertical balcony garden, balcony herb garden, self-watering planters, railing planters, microclimate, windbreak, edible balcony, shade plants, full sun plants, compact seating.