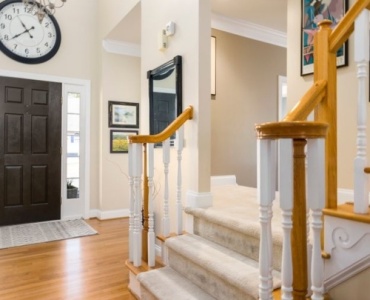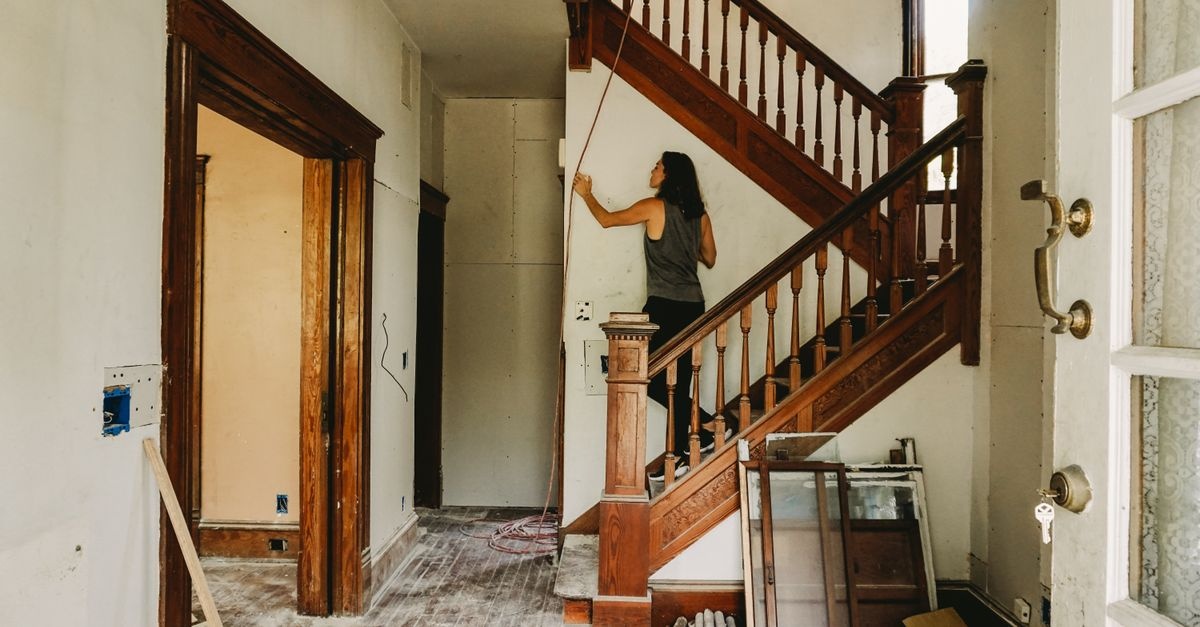
When your staircase is scuffed, dated, or simply uninspiring, reaching for paint is not the only option. In fact, the warm character of timber often shines brightest when you enhance, protect, and style the wood rather than covering it. This in-depth guide showcases practical, creative, and sustainable approaches that preserve grain, add comfort, and elevate the look of your home. If you have been searching for Wooden stair renovation ideas without painting, you will find strategies here for every style, budget, and skill level.
Why Skip Paint and Work With the Wood Instead
Choosing a paint-free makeover lets your staircase keep its natural soul while still delivering a dramatic refresh. Here are compelling reasons to go this route:
- Show off the grain. Clear and toned finishes reveal figure, knots, and character rather than hiding them.
- Durability you can renew. Many penetrating oils and hardwax finishes are simple to patch or refresh without full sanding.
- Health and environment. Low-VOC or plant-based products reduce indoor emissions and align with eco-friendly values.
- Tactile comfort. Natural finishes feel warm underfoot and can improve slip resistance compared to glossy paints.
- Timeless appeal. Wood ages gracefully; a paint film often chips, which is harder to maintain elegantly.
Prep Smarter, Not Harder
Every successful no-paint staircase makeover begins with thoughtful preparation. Before you open a can of oil, wax, or sealer, set the stage for success.
- Identify wood species. Oak takes stain evenly and responds beautifully to wire brushing. Maple and pine can blotch; consider a pre-conditioner or choose clear finishes.
- Assess condition. Look for loose treads, creaks, nail pops, pet scratches, deep gouges, and water stains. Address structure first; cosmetics come second.
- Gather essentials. You may need a vacuum, tack cloths, painter tape, orbital sander, sanding blocks, grits from 80 to 220, dust mask, and protective gloves.
- Manage dust and safety. Stair dust travels. Drape openings, use extraction if sanding, and consider a respirator when working with bleaches or solvents.
- Clean thoroughly. Degrease with a wood-safe cleaner. Old polishes can repel finishes; remove residue for proper bonding.
- Test first. Always sample finishes on a discreet area or scrap to confirm color, sheen, and traction.
15 Wooden stair renovation ideas without painting
Below are fifteen design-forward upgrades that honor wood without resorting to paint. Each idea can stand alone or be combined for a layered transformation.
1. Deep Clean and Degloss for a Weekend Refresh
Sometimes grime and micro-scratches dull the wood more than you realize. Start with a deep clean using a pH-balanced wood cleaner. Follow with a liquid deglosser or a gentle abrasive pad on glossy polyurethane to restore a satin glow. Finish with a wood soap or conditioner formulated for stair traffic.
- Best for: Lightly worn stairs with intact finish.
- Time and skill: Low commitment; ideal as a first step before bigger changes.
- Pro tip: Microcrystalline wax can spot-repair small scuffs and add slip-resistant sheen.
2. Sand and Seal with a Clear Matte Finish
If old coatings are ambered or peeling, a full sand may be the clean slate you need. Progress through grits to 150 or 180 on treads, and hand-sand edges and nosings. Seal with a waterborne polyurethane or a plant-based hard sealer in matte to minimize glare and highlight grain without darkening excessively.
- Best for: Stairs with heavy wear or yellowed finishes.
- Sheen choice: Matte hides micro-scratches; satin adds a gentle glow.
- Safety: Use anti-slip additives if your sealer allows it.
3. Hardwax Oil for a Natural, Repairable Surface
Hardwax oils penetrate and protect while leaving a soft, natural feel underfoot. They are easy to refresh in high-traffic zones without full sanding. Choose clear or lightly tinted versions to enhance tone. Two to three thin coats, buffed between, deliver resilient protection that is simple to maintain.
- Best for: Homes seeking a low-sheen, wood-first aesthetic.
- Maintenance: Clean with a compatible soap; re-oil traffic lanes as needed.
- Note: Always test for slip; some brands offer traction boosters.
4. Rich Penetrating Stain for Depth and Contrast
When the wood looks flat or mismatched, a penetrating stain can unify tone and add depth. Wipe-on oil-based stains offer longer open time; water-based options dry faster and have low odor. On blotch-prone woods, use a pre-stain conditioner. Seal with a durable topcoat once color is even.
- Best for: Mixed species or patchy color.
- Color strategy: Go mid-tone for versatility; very dark hues can show dust and wear.
- Edge detailing: Darken nosings slightly for a subtle safety cue.
5. Reactive Stains and Ebonizing for Naturally Dramatic Color
Reactive colorants work with wood chemistry rather than sitting on top. Iron acetate on tannin-rich woods like oak produces an ebonized, charcoal tone. Tannin boosters can extend the effect to low-tannin species. Seal with a clear matte finish to preserve the depth without adding plastic shine.
- Best for: Oak and other tannin-rich woods.
- Look: Sophisticated, modern, and striking without using paint.
- Testing: Expect variation; sample on several steps first.
6. Liming Wax to Pop the Grain
Liming wax sits in open pores, creating a pale contrast that highlights texture. On oak, the effect feels coastal or Scandinavian. Start by opening the grain with a brass brush, apply the liming wax, then seal with a compatible clear wax or hardwax oil. The result is organic and light without covering the wood.
- Best for: Open-pored species like oak or ash.
- Vibe: Airy, textural, and quietly refined.
- Care: Maintain with neutral wax refreshers.
7. Wire-Brushed Texture for Grip and Rustic Charm
Wire brushing removes soft spring wood, leaving a tactile surface that improves traction and adds a handcrafted look. Follow with oil or hardwax oil to accentuate the ridges. Keep the brushing direction consistent with the grain and maintain gentle pressure to avoid gouges.
- Best for: Rustic, farmhouse, or mountain styles.
- Functional win: Subtle anti-slip without visible tape.
- Combine with: Liming wax or light stains for depth.
8. Wood Bleaching to Brighten and Even Tone
Oxalic acid removes black water stains and iron marks; two-part bleaches can lighten overall color. Neutralize carefully per product directions, rinse, and allow to dry before finishing. Bleaching is excellent when you want a pale canvas for a clear sealer or a minimal tint.
- Best for: Water-stained or overly orange woods.
- Finish pairings: Waterborne matte poly or natural oil keeps brightness.
- Safety: Wear gloves and eye protection; ventilate well.
9. Inlay Thin Metal or Wood Strips for Luxe Lines
Introduce slender brass, bronze, or contrasting wood inlays near the nosing or at tread edges. Shallow grooves routed into the tread accept the inlay, which is then glued flush. This jewelry-like detail elevates even a simple clear finish.
- Best for: Modern and transitional interiors.
- Practical plus: Edge lines guide foot placement and increase visibility.
- Tip: Seal metal inlays to prevent tarnish transferring to socks.
10. Replace or Cap Nosings with Contrasting Hardwood
Swapping worn nosings for a durable contrasting hardwood creates a striking border and renews a high-wear zone. You can also add a premade cap that extends slightly to protect the tread front. Blend the main tread to your chosen finish and let the nosing be the accent.
- Best for: Stairs with damaged edges.
- Design tip: Pair warm walnut nosings with oiled oak treads for balanced contrast.
- Safety: Slight contrast improves step definition.
11. Natural Fiber Runner for Comfort and Quiet
A sisal, seagrass, wool, or jute runner adds warmth, softens acoustics, and protects the center of each tread. Choose a pattern with subtle flecking to mask wear. Finish exposed wood edges with oil or clear sealer for a neat frame, and consider stair rods or discrete bars for heritage charm.
- Best for: Busy households and pets.
- Eco angle: Renewable fibers with non-toxic backings are widely available.
- Maintenance: Regular vacuuming and prompt spot cleaning extend life.
12. Leather-Wrapped Accents for Quiet Luxury
Leather panels on risers or slim strips on nosings introduce a tactile, upscale note. Choose full-grain or recycled leather and seal it for durability. The interplay of supple leather and grainy wood reads sophisticated without overwhelming the staircase.
- Best for: Boutique, library, or loft-inspired interiors.
- Pair with: Dark ebonized treads or soft walnut oil for contrast.
- Care: Wipe with a damp cloth; recondition seasonally.
13. Veneer or Plank-Faced Risers for a Fresh Profile
If risers are dented or visually busy, face them with thin wood veneer or slim planks rather than paint. Match the species or choose a complementary tone. Clear finish seals the update while keeping the look cohesive with the treads.
- Best for: Uneven, patched, or mismatched risers.
- Style note: Vertical grain veneer can make stairs appear taller.
- Budget tip: Veneer saves cost and weight versus solid wood.
14. Discreet Anti-Slip Strips and Clear Edge Bands
Transparent anti-slip treads or clear nosing bands protect without altering the wood tone. Choose UV-stable products that do not yellow. If you prefer a natural route, use shallow grooves or a fine wire-brushed strip at the outer tread to add friction.
- Best for: Households with kids, seniors, or pets.
- Look: Nearly invisible, preserving your finish choice.
- Bonus: Extend finish life in the most abused zone.
15. Under-Tread Lighting and Shadow Lines
Low-profile LED strip lighting under nosings or along the stringer adds drama and safety without touching the wood surface. Warm color temperatures flatter natural finishes. Hidden channels keep the look crisp and architectural.
- Best for: Contemporary and gallery-like spaces.
- Practical: Improves nighttime navigation and step definition.
- Pair with: Matte clear finishes or deep reactive stains for contrast.
Style Recipes You Can Steal
Combine ideas for a tailored look that balances beauty, practicality, and budget. Here are ready-made formulas:
- Scandi calm: Light bleach, matte waterborne sealer, liming wax grain pop on treads, and a pale wool runner.
- Modern luxe: Ebonized oak treads, brass inlay lines, leather-wrapped risers, and warm 2700K LED strip under each nosing.
- Farmhouse warm: Wire-brushed oak, mid-tone oil stain, contrasting walnut nosings, and sisal runner with black binding.
- Coastal fresh: Gentle bleach to reduce yellowing, clear matte finish, limed pores, and woven jute runner with natural edge.
- Minimalist gallery: Sand and seal in ultra-matte, add discreet anti-slip grooves, and float a shadow line along the stringer with hidden LEDs.
Budget, Timeline, and Skill Level at a Glance
Every home and staircase is different, but this guide can help you estimate what to expect:
- Quick wins under a weekend: Deep clean and degloss, transparent anti-slip strips, clear wax touch-ups, LED strip lighting if power exists.
- Intermediate 2 to 4 days: Sand and clear seal, hardwax oil application, penetrating stain plus topcoat, wire-brushed texture.
- Statement projects: Inlays, contrasting nosings, veneer-faced risers, leather accents, custom runner install with rods.
- Budget tiers: Cleaning and clear finishes are the most affordable; custom metal inlays and leather details land at the high end.
Maintenance That Keeps Wood Looking Its Best
Natural finishes reward routine care with long life and graceful aging. Protect your investment with simple habits.
- Daily or weekly: Vacuum with a brush head to remove grit that scratches.
- Monthly: Damp mop with a wood-safe cleaner; avoid standing water.
- Seasonally: Refresh hardwax oils or waxed finishes on traffic lanes; buff to even sheen.
- Annually: Inspect nosings and edge bands; re-adhere as needed. Condition leather or tighten runner rods.
- As needed: Use color-matched wax sticks for small dents and a blending pencil for micro repairs.
Common Mistakes to Avoid
- Skipping prep. Dirt, silicone residues, and old waxes can sabotage adhesion and sheen uniformity.
- Over-sanding edges. Thin nosings and stair lips can round off quickly; hand-sand with care.
- Ignoring slip resistance. Always consider traction, especially with glossy or glassy surfaces.
- Color guessing. Wood species and age alter results. Test samples across multiple steps.
- Sealing too soon. Let stains, bleaches, and oils fully cure before topcoating to avoid clouding and adhesion issues.
Frequently Asked Questions
Can I refresh stairs without fully sanding them?
Yes. If the existing coating is sound, you can deep clean, lightly abrade with a sanding pad, and apply a compatible clear coat or hardwax oil. Spot-sanding traffic lanes and feathering edges can also minimize effort.
What finish is most forgiving for high-traffic homes?
Hardwax oil is a favorite for easy touch-ups, while matte waterborne poly offers good scratch resistance and low odor. Either can be maintained with periodic refreshes rather than full refinishing.
How do I deal with pet scratches on treads?
Light scratches often disappear after a gentle sand and re-oil or new topcoat. For deeper gouges, fill with a color-matched hard wax stick, level, and blend the surrounding sheen.
Are natural fiber runners durable?
Wool is the most resilient and stain-resistant of the natural fibers, with a soft underfoot feel. Sisal and seagrass offer great texture and durability but prefer drier conditions and prompt spot care.
What if my stairs have mismatched woods?
Use a pre-stain conditioner on blotch-prone boards and choose a unifying mid-tone stain. Alternatively, embrace the variation with a clear matte finish and add consistent elements like matching nosings or a runner to tie the look together.
A Step-by-Step Mini Plan for a Balanced Makeover
Here is a simple framework to guide your decisions and keep momentum:
- Step 1 Assess Identify species, damage, and your target style. Take photos in daylight and evening to see tone shifts.
- Step 2 Sample Test two to three finish options on the same step. Compare sheen, warmth, and slip.
- Step 3 Prep Clean, fix squeaks, set nails, fill small holes, and protect adjacent walls.
- Step 4 Finish Apply your chosen clear coat, oil, or stain system with patient dry times and light between-coat abrasion.
- Step 5 Accents Add runners, inlays, or new nosings for function and flair.
- Step 6 Maintain Establish a quick routine so your stairs stay beautiful longer.
Sustainability Notes for Conscious Renovators
If environmental impact matters to you, it is easy to align your staircase project with greener choices:
- Choose low-VOC finishes. Modern waterborne polys and plant-based hardwax oils offer excellent performance with reduced emissions.
- Source responsibly. If adding nosings or veneers, look for FSC-certified woods and recycled metals for inlays.
- Think repairability. Finishes that can be spot-refreshed keep material out of landfills over decades.
- Skip heavy coatings. Thin, breathable finishes can extend the healthy life of the wood substrate.
From Before to After Without Paint
The beauty of these approaches is how adaptable they are. Whether you want Scandinavian lightness, moody modern drama, or farmhouse warmth, you can get there with a clear strategy that celebrates the timber you already have. These Wooden stair renovation ideas without painting range from quick weekend refreshes to heirloom-grade upgrades, all designed to respect the wood and your indoor air quality.
Putting It All Together
Start small with a deep clean and a sample board. Decide on a finish system that suits your lifestyle, then add one or two statement details such as a natural fiber runner or a brass inlay line. With patient prep and a focus on tactile, repairable finishes, your staircase will look better on day one and continue to improve with age. If you are mapping out Wooden stair renovation ideas without painting that feel personal and sustainable, let the grain lead the way and the rest will follow.
Quick Checklist to Kick Off
- Photograph and assess your stairs in natural and artificial light.
- Decide on a look: bright and airy, mid-tone warmth, or deep and dramatic.
- Sample two finishes and one accent idea on a discreet step.
- Plan the order of operations: clean, fix, finish, then add accents.
- Set a maintenance routine on your calendar for easy longevity.
In short, you can transform your staircase with thoughtful, paint-free methods that respect the material and elevate your home. These Wooden stair renovation ideas without painting are proven, practical, and full of design potential. Step into a better daily experience, one tread at a time.