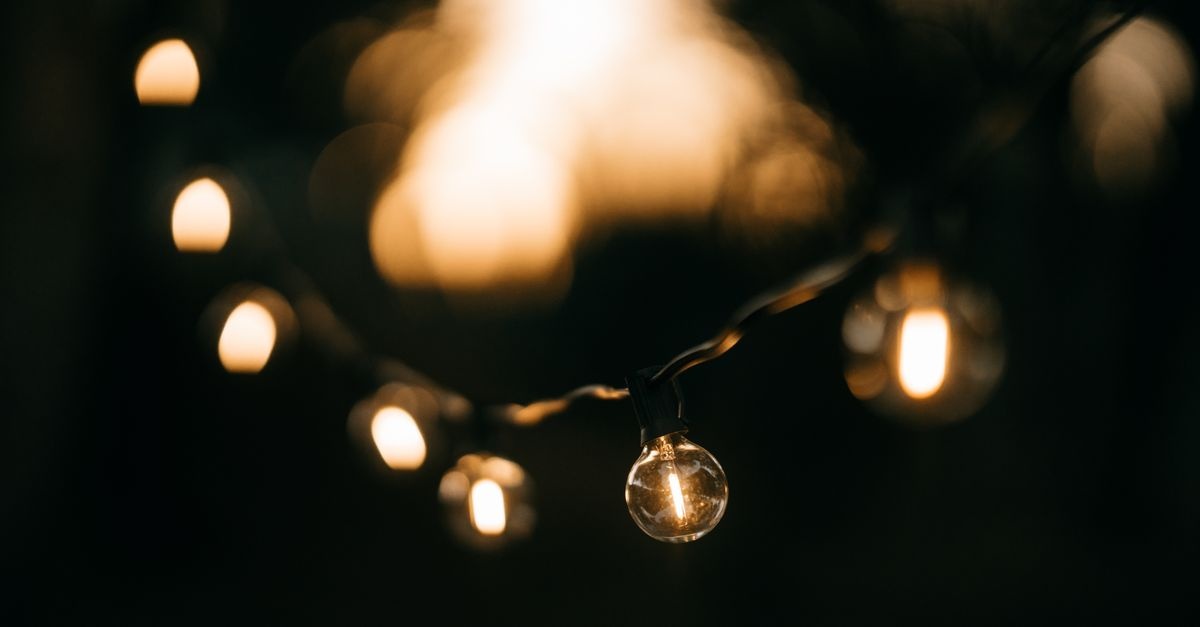
Illuminate Your Yard, Not Your Electric Bill: Smarter Outdoor Lighting Tips
You can have a beautiful, safe, and inviting yard without burning through energy. The key is a thoughtful plan that blends efficient fixtures, targeted placement, and smart controls. If you have ever asked how to reduce outdoor lighting electricity use while keeping your home attractive and secure, this comprehensive guide gives you a blueprint that works in any climate or budget.
Instead of flooding your whole yard with light, you will learn how to light with intention. From the quick weekend wins to a full outdoor redesign, the following steps help you cut wattage, reduce runtime, and eliminate waste, all while improving the look and function of your landscape.
Quick Wins You Can Do This Week
Before diving into a full plan, capture the easiest savings first. These changes typically pay back in weeks or months and immediately show you how to reduce outdoor lighting electricity use without sacrificing the look of your yard.
- Swap bulbs to LED: Replace incandescent, halogen, or CFL lamps with LED equivalents. Look for Energy Star or DesignLights Consortium listings.
- Add timers or smart plugs: Set a schedule so lights are not on all night. Many smart plugs also provide energy data so you can see your progress.
- Use motion sensors: Convert security and utility lights to motion-activated so they run only when needed.
- Install dusk-to-dawn photocells wisely: Photocells prevent daytime waste; pair them with timers to avoid all-night operation.
- Lower brightness: Replace 50 W halogen with a 5–7 W LED spotlight and aim precisely; less wattage can look better when properly aimed.
- Clean lenses and remove obstructions: Dirt and overgrown plants absorb light, causing you to crank up wattage. Clean fixtures and trim shrubs.
Understand Light and Energy: The Essentials
Good design decisions start with a few fundamentals. You do not need to be an engineer to understand how to reduce outdoor lighting electricity use; you only need a practical grasp of how light works and how it is measured.
Lumens vs watts
- Lumens measure the amount of light output you see.
- Watts measure power use. Lower watts at the same lumens means better efficiency.
Stop choosing bulbs by watts; pick by lumens. For example, a 50 W halogen spotlight might produce around 700 lumens; a quality LED can deliver the same with about 7–9 W.
Color temperature and comfort
- Warm white 2700–3000 K: Cozy ambience for patios, paths, and facades.
- Neutral white 3000–3500 K: Balanced tone for task areas.
- Cooler 4000 K+: Reserved for visibility-critical task zones; often too stark for residential yards.
Warmer color usually lets you use fewer lumens because it is more comfortable and reduces glare.
Beam angle and shielding
- Narrow beams for focal points like trees or sculptures.
- Wide beams for general wash lighting.
- Shielding and glare control improve perceived brightness and reduce waste, helping you see more with fewer watts.
Audit Your Yard: Where Energy Goes
A simple walk-through at dusk reveals opportunities and shows exactly how to reduce outdoor lighting electricity use. Make a list of each circuit, fixture, lamp type, runtime, and purpose.
What to look for
- Redundancy: Two or more fixtures lighting the same zone.
- Over-lighting: Surfaces washed with far more light than necessary.
- Misdirected light: Beam spilling into the sky or neighbor windows.
- Old tech: Halogen floodlights, mercury vapor, high-pressure sodium, or CFLs.
- Controls: Always-on circuits or photocells without timers.
Take photos and note brightness, glare, and shadows. You will use this audit to create a right-sized plan, dial in schedules, and target the biggest wins first.
Design With Intent: Task, Accent, and Safety
Layered lighting minimizes energy by putting the right amount of light exactly where you need it. This is the most strategic answer to how to reduce outdoor lighting electricity use without compromising safety or curb appeal.
Task lighting
Brighten only where work happens: the grill, garden bench, shed door, or garbage area. Use focused beams and controls so lights switch off automatically after use.
Accent lighting
Use gentle beams to highlight a tree canopy, stone wall, or fountain. This creates drama with low wattage. One 3 W LED uplight can transform a landscape feature with almost no energy impact.
Safety and wayfinding
Path lights, step lights, and address markers should be subtle and shielded. Using lower lumen fixtures spaced closer together often improves visibility and reduces total power compared with fewer high-output fixtures.
Choose Efficient Fixtures and Bulbs
Fixture selection determines both energy use and longevity. The combination of LED efficacy, optics, and build quality drives savings year after year.
LED over everything else
- High efficacy: Look for 80–120 lumens per watt or higher.
- Long life: 25,000–50,000 hours means fewer replacements.
- Low maintenance: Less ladder time and fewer purchases.
- Instant on: Perfect for motion sensors and smart control scenes.
LED retrofits are the most reliable lever for anyone wondering how to reduce outdoor lighting electricity use without sacrificing brightness.
Integrated vs replaceable LED
- Integrated fixtures have built-in boards and optics, often better performance and weather sealing.
- Replaceable-lamp fixtures accept GU10, MR16, or E26 LED lamps, offering easier swaps later.
Either approach works. Opt for fixtures with robust drivers, heat sinks, and weather ratings suited to your climate.
Solar lights: when they shine
- Strengths: Zero electricity cost, easy install, off-grid operation.
- Ideal uses: Path markers, accent lights, remote corners where wiring is costly.
- Considerations: Quality varies; choose models with larger panels, good batteries, and replaceable components.
Solar units can be a strategic part of how to reduce outdoor lighting electricity use, especially for lower-brightness tasks.
Weatherproofing and durability
- Outdoor rating: Ensure fixtures carry suitable weather ratings for rain, snow, or coastal air.
- Materials: Powder-coated aluminum or marine-grade stainless resists corrosion.
- Seals and gaskets: Protect optics and electronics from moisture.
Smart Controls: The Multiplier of Savings
Controls cut runtime, the single biggest factor in energy. Even efficient LEDs waste power if they are on when no one needs them. Smart control strategies provide the most reliable, daily path for how to reduce outdoor lighting electricity use.
Timers and schedules
- Mechanical timers: Low cost, basic on off windows.
- Digital timers: Astronomical timers track sunset sunrise across seasons.
- Smart plugs and hubs: App-based control, voice assistants, energy tracking, and integrations.
Use time-based control for decorative zones and combine with photocells for dusk start and scheduled shutoff.
Photocells and dusk-to-dawn logic
A photocell is perfect for entry and safety zones that must react to ambient light. To prevent all-night energy use, pair photocells with timers, motion sensors, or curfews.
Motion and occupancy sensors
- Security and utility: Driveway, side yard, and garage floods should be motion activated.
- Adjust dwell time: Set shorter hold times to reduce runtime.
- Aim and sensitivity: Avoid false triggers from trees or traffic.
Dimming and scenes
Modern LED drivers support dimming. Create scenes that run at 30–60 percent brightness most nights, with the option to boost for gatherings. Dimming compounds savings and often improves ambience.
Placement and Aiming: Light What Matters
Good placement lets you use fewer fixtures and lower wattage. The right angle eliminates glare and spill that waste energy and annoy neighbors.
Shield first, aim second
- Shielded fixtures keep light on target and reduce light trespass.
- Aim away from windows and property lines; use house walls and plantings as reflectors.
- Mount at the right height to avoid hotspots and to spread light evenly.
Use surfaces to your advantage
Light colored walls, pavers, and mulch bounce light. You can often reduce lamp wattage by 30–50 percent when you leverage reflective surfaces for fill light.
Low Voltage Systems Done Right
Most residential landscapes use low voltage systems that are efficient, safe, and flexible. A well-designed system is a core tactic for how to reduce outdoor lighting electricity use across an entire property.
Transformer selection
- Size correctly: Sum the wattage of all fixtures, then add 20–30 percent headroom.
- Multi-tap outputs: Allow compensation for voltage drop on long runs.
- Integrated controls: Choose models with built-in timers, photocells, or smart modules.
Cable layout and voltage drop
- Shorter runs reduce losses; use thicker cable for longer distances.
- Hub and spoke or loop layouts promote even voltage at fixtures.
- Test at the far end: Aim for fixture voltage in the recommended range for LED stability.
Balanced voltage ensures LEDs run at the intended brightness rather than wasting power or failing early.
Security Lighting Without the Energy Pain
Security is a common reason for oversizing and overusing fixtures. You do not need stadium lights to deter intruders. A thoughtful plan yields better security and lower cost.
- Motion-activated fills: Sudden light is more startling and effective than a constant glow.
- Targeted zones: Focus on doors, ground-floor windows, and paths, not the whole yard.
- Reduce glare: High glare hinders your eyes and camera sensors. Shield and dim to reveal detail.
Use lower-wattage, well-aimed LEDs on motion sensors. This approach is a proven method for how to reduce outdoor lighting electricity use while enhancing security outcomes.
Dark-Sky Friendly Practices
Dark-sky practices benefit neighbors, wildlife, and your bill.
- Fully shielded fixtures to prevent upward light.
- Warm color temperature to minimize blue-rich light that scatters more in the sky.
- Lower lumen packages since better optics and focus improve visibility per watt.
These choices create calmer nights, clearer skies, and less wasted power.
Maintenance: The Hidden Energy Saver
Small upkeep actions significantly improve efficiency.
- Clean lenses and reflectors every season to restore output.
- Re-aim fixtures after storms or plant growth shifts.
- Trim foliage that blocks light; this reduces the need to increase brightness.
- Check schedules twice a year to align with changing sunset sunrise times.
Regular maintenance is a low-cost way to sustain gains and a critical step for anyone committed to how to reduce outdoor lighting electricity use over the long term.
Holiday and Event Lighting With Less Energy
Festive lighting can be efficient and spectacular.
- LED string lights use a fraction of the power of older sets.
- Timers or smart schedules to limit run to a few hours nightly.
- Solar accents for temporary paths and decor.
- Dim or reduce on weekdays; save full displays for weekends or special nights.
Cost and ROI: A Simple Math Example
Here is a quick way to evaluate upgrades. Suppose you have ten 50 W halogen uplights that run four hours nightly. That is 500 W total, or 2 kWh per night. At a cost of 0.20 per kWh, that is about 0.40 per night and 146 dollars per year. Replacing them with 7 W LEDs reduces total to 70 W, or 0.28 kWh per night. Annual cost drops to roughly 20 dollars. If the LED fixtures cost 30 dollars each, your 300 dollar investment pays back in about two years, faster if rates are higher or runtime is longer. Add motion or early shutoffs and the payback can be even quicker. This is precisely how to reduce outdoor lighting electricity use with a tangible return.
Putting It All Together: A Step-by-Step Plan
Step 1: Define zones and goals
- Entry and safety: Reliable visibility every night.
- Accent and ambience: Select features to highlight, not every surface.
- Task: Functional light where you work.
- Security: Motion-triggered coverage for vulnerable areas.
Step 2: Right-size brightness
- Path lighting: Often 100–200 lumens per fixture, close spacing.
- Accent uplights: 200–500 lumens depending on distance and object size.
- Security floods: 700–1500 lumens, motion-activated, shielded.
Step 3: Choose efficient fixtures
- LED first, with quality optics and warm color.
- Look for listings from credible efficiency programs.
- Weather-ready enclosures and corrosion-resistant finishes.
Step 4: Add layered controls
- Photocell for dusk activation where appropriate.
- Timer or smart schedule to shut down decorative zones early.
- Motion sensors for security and utility zones.
- Dim scenes for everyday use; boost brightness for gatherings.
Step 5: Install and aim precisely
- Shield and baffle to prevent glare and spill.
- Aim to graze surfaces and silhouette plants for depth.
- Test at night and adjust before burying cables.
Step 6: Monitor and refine
- Check energy data from smart plugs or utility portals.
- Tweak schedules seasonally for best results.
- Maintain cleaning and trimming schedules to preserve efficiency.
Special Scenarios and Pro Tips
Small patios and balconies
- Use string lights and small lanterns on dimmers for flexible ambience.
- Solar or rechargeable for easy, cord-free setups.
Large yards and acreage
- Zone by activity and limit distant floodlighting.
- Perimeter motion sensors and low-level path lights near the home.
Coastal or harsh weather
- Marine-grade materials and sealed drivers.
- Regular inspection to prevent corrosion that reduces output and wastes power.
Outdoor cameras and lighting
- Avoid glare into camera lenses for clear footage.
- Use constant low-level fills only when necessary; rely on motion-boosted scenes instead.
Common Mistakes That Waste Energy
- Over-lighting: Brighter is not always safer or more beautiful.
- All-night schedules: Decorative zones do not need to run until dawn.
- No shielding: Glare reduces visibility and effectiveness.
- Ignoring maintenance: Dirty lenses and overgrown plants kill efficiency.
- Mixing color temps: Disjointed look that often leads to turning up brightness to compensate.
Sustainability and Wildlife Considerations
Beyond bills, light affects ecosystems. Choose warm tones, shielded fixtures, and shorter runtimes to protect pollinators and nocturnal wildlife. These steps align perfectly with how to reduce outdoor lighting electricity use while being a responsible neighbor.
Utility Rebates and Incentives
Many utilities offer rebates for Energy Star LED bulbs, fixtures, or smart controls. Check local programs for instant discounts or mail-in rebates that can cut project costs by 10–40 percent. For larger estates or multifamily properties, consult energy audits that may be subsidized.
Frequently Asked Questions
How much can I save by switching to LED?
LEDs use around 80–90 percent less power than comparable halogen or incandescent lamps. In most homes, payback happens within one to three years, faster with smart controls.
Are solar path lights worth it?
Yes for low-level path markers or accent lighting, especially where wiring is difficult. For bright task or security applications, wired LED often performs better and still delivers big savings.
Will motion sensors annoy neighbors?
Properly aimed and set to moderate sensitivity, motion-activated lights minimize nuisance while increasing security. Keep beams shielded and within your property lines.
What color temperature is best for homes?
Warm white in the 2700–3000 K range is generally most comfortable, reduces glare, and complements landscaping.
Do I need a professional?
You can DIY smaller upgrades like bulbs, smart plugs, and solar stakes. For extensive low voltage systems or complex layouts, a pro ensures proper voltage, waterproofing, and aiming.
A Practical Nightly Schedule Template
Use this as a starting point for schedules that show how to reduce outdoor lighting electricity use by trimming runtime:
- Dusk to 10 pm: Entry, steps, and key paths at 50–70 percent brightness. Accent features at 30–50 percent. Security on motion.
- 10 pm to midnight: Entry and essential safety lights at 30–50 percent. Accent lights off. Security stays on motion.
- Midnight to dawn: Entry light at low setting if needed. Paths off, except minimal wayfinding near doors. Security strictly motion-activated.
Case Study: Front Yard Refresh
A typical suburban front yard used four halogen floods on the facade and garage, plus six path lights. Total load was about 380 W running from dusk to dawn via photocell alone. The refresh plan replaced floods with two 12 W LED wall washers and a 10 W garage light, added a photocell plus timer to shut off these zones at 11 pm, and converted path lights to six 2 W shielded LEDs set to 30 percent after 10 pm. New total load before 11 pm is 38 W, after 11 pm is about 4 W. Annual savings exceeded 140 dollars at local rates, glare disappeared, and the home looked warmer and more refined. This is a practical demonstration of how to reduce outdoor lighting electricity use through design, equipment, and schedules.
Tools and Shopping Checklist
- LED bulbs and fixtures in appropriate color temperature and beam angles.
- Smart plugs or timers, ideally astronomical.
- Motion sensors with adjustable sensitivity and time delay.
- Shielded housings and glare control accessories.
- Low voltage transformer with adequate capacity and multi-tap options.
- Outdoor-rated cables and connectors for safe, efficient runs.
- Cleaning supplies for lenses and housings.
Mindset Shift: Design for Enough
The most important idea in this guide is sufficiency. Design for enough light, not maximum light. That single shift will naturally guide you toward LEDs, smarter controls, better aiming, and calmer nights. If your objective is how to reduce outdoor lighting electricity use in a way that sticks, designing for enough is the habit that keeps savings real and lasting.
Conclusion: Light Smarter, Live Better
Great outdoor lighting is not about overpowering the night, it is about shaping it. You can showcase your landscape, move safely, and enjoy evenings outdoors while paying far less for electricity. The path is clear: choose efficient LEDs, layer your lighting by task, control it intelligently, aim it precisely, and maintain it simply. Follow these steps and you will illuminate your yard, not your electric bill, every single night.