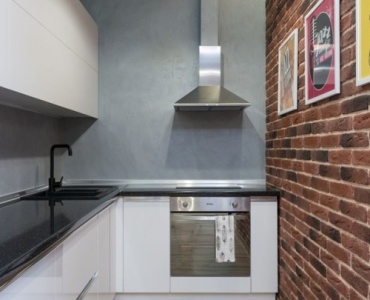
You can absolutely transform your home without the chaos. With the right roadmap, you’ll avoid budget shocks, timeline slips, and communication breakdowns. This practical guide walks you through how to plan a stress‑free renovation—from setting vision and budget to managing contractors, approvals, timelines, and quality—so your project ends with a high-five, not a headache.
The Calm-First Mindset
Before you open a paint can or sign a contract, commit to a calmer approach. A serene remodel isn’t luck; it’s the result of clear decisions, structured planning, and consistent communication. Think of yourself as the project’s CEO: you set strategy, appoint the right team, and make confident calls based on a plan you trust.
- Clarity over speed: Spend more time on pre-planning to save time (and money) during construction.
- Document everything: If it’s not written, it’s not real—specs, finishes, change orders, timelines.
- Expect surprises, prepare solutions: Build buffers for budget, schedule, and approvals.
Step 1: Define Your Why, Vision, and Scope
To plan a renovation without stress, begin with your goals. When you’re clear on what success looks like, decisions get easier and the project moves faster.
Clarify Outcomes
- Function: What problems are you solving? Storage? Poor lighting? Hard-to-clean surfaces?
- Feel: What mood do you want—warm minimalism, modern farmhouse, sleek industrial?
- Future: How many years will you live here? Plan durability and resale accordingly.
Room-by-Room Scope of Work
Create a simple document that spells out tasks per space. Example: “Kitchen: remove soffit, relocate sink, new cabinets, quartz counters, oak flooring, 2x pendant lights, undercabinet LED, backsplash to 18 inches, new 36-inch range, ducted hood.”
- Be specific: Dimensions, quantities, product lines, finishes, and installation notes.
- Flag dependencies: “Flooring must be installed after electrical rough-in.”
- Note constraints: HOA rules, load-bearing walls, historical elements.
Dealbreakers vs. Flex List
Make two columns: Non‑negotiables (must‑haves) and Nice‑to‑haves (features you can swap or value-engineer). This is your stress shield when costs rise or supply chains shift.
Step 2: Build a Budget That Actually Works
A realistic budget is the backbone of a calm remodel. Include line items, soft costs, and a contingency so surprises don’t become crises.
Set a Baseline and Contingency
- Hard costs: Labor, materials, fixtures, appliances.
- Soft costs: Design fees, engineering, permits, inspections, delivery, disposal.
- Contingency: 10–20% depending on project complexity, age of home, and scope.
Track your budget in a simple spreadsheet with columns for Estimated, Committed, and Actual. Update weekly.
Know Typical Ranges and Hidden Costs
- Kitchen refresh: $10k–$35k (paint, hardware, counters, lighting, minor electrical)
- Full kitchen gut: $35k–$120k+ (layout changes, cabinets, plumbing/electrical, appliances)
- Bathroom: $8k–$40k depending on size and finishes
- Hidden costs: Asbestos/lead abatement, structural surprises, panel upgrades, rot, insulation, mold, permits, storage, temporary housing.
Funding and Cash Flow
- Payment schedule: Tie milestone payments to deliverables (e.g., “after rough-in approved”).
- Emergency buffer: Keep 2–3 months of household expenses separate from the reno budget.
- Financing: HELOC, cash-out refinance, renovation loan—compare interest, fees, and timelines.
Step 3: Assemble the A‑Team
Choosing the right pros is the single best move for a smooth project. Vet thoroughly and protect yourself with contracts.
Who You Might Need
- General contractor (GC): Coordinates trades, schedule, site protection, and inspections.
- Designer/architect: Drawings, layouts, elevations, finish schedules, code compliance.
- Specialists: Structural engineer, HVAC, electrician, plumber, tile setter, cabinetmaker.
Vetting the Shortlist
- References: Speak with at least three clients; ask about communication, schedule, cleanliness, and issue resolution.
- Portfolio + site visit: Inspect finish quality in person; look at corners, grout lines, trim reveals.
- License + insurance: Verify worker’s comp and general liability; request certificates.
- Bid leveling: Compare apples to apples by providing the same scope and spec package to each bidder.
Contract Essentials
- Scope of work attached: Drawings, specs, allowances clearly listed.
- Payment milestones: Based on inspections or defined phases.
- Change order process: Written approval required before extra work; note pricing method (fixed vs. time-and-materials).
- Timeline + liquidated damages: Define completion date; some contracts include small penalties for unjustified delays.
- Lien waivers: Required with each payment to protect you from subcontractor claims.
Step 4: Permits, Codes, and Approvals
Skipping approvals is the opposite of a no-drama plan. Permits safeguard safety, valuation, and future resale.
Common Permits
- Building: Structural changes, window/door resizing, framing.
- Electrical: Panel upgrades, new circuits, recessed lighting.
- Plumbing: Relocating fixtures, new lines, gas work.
- Mechanical: HVAC modifications, ducting, venting.
Timing and Inspections
- Allow lead time: Some municipalities take 2–8 weeks for review.
- Inspection cadence: Rough-in, insulation, final—coordinate your schedule around these checkpoints.
- Documentation: Keep stamped plans and permits on-site; photograph walls before closing them.
HOA / Co‑op / Condo
- Rules: Work hours, elevator reservations, materials restrictions, insurance requirements.
- Neighbor notices: Give a heads-up; goodwill reduces complaints.
Step 5: Create a Calm, Crystal‑Clear Plan
This is where you lock in design decisions so the job site runs like clockwork.
Drawings, Specs, and Finish Schedules
- Floor plans + elevations: Show dimensions, outlet/switch locations, lighting layout.
- Spec sheets: Product names, SKUs, colors, finishes, sizes, install notes, lead times.
- Mood + sample board: Real samples for flooring, tile, paint, hardware in one place.
Build a Realistic Schedule
- Critical path: Identify tasks that, if delayed, hold up everything (e.g., inspections, custom cabinets).
- Dependencies: Tile after waterproofing; paint after priming and sanding; counters after cabinets installed.
- Buffers: Add 10–20% float for long-lead items and inspections.
Risk Register and Plan B
- Risks: Backordered tile, hidden rot, weather, crew availability.
- Mitigations: Preorder materials, maintain alternates list, test for asbestos/lead, schedule backups.
Step 6: Procurement and Lead Times
Smooth jobs are won before demo. Order early, confirm quantities, and stage deliveries.
Long‑Lead Items to Order First
- Windows/doors: 6–16 weeks
- Custom cabinets: 6–12+ weeks
- HVAC equipment: 2–8 weeks
- Specialty tile/stone: 3–10 weeks
- Lighting fixtures: 2–10 weeks (confirm bulbs, trims, drivers)
Logistics and Storage
- Inspect on arrival: Open boxes, check for damage, verify counts against POs.
- Dry, safe storage: Protect wood and tile from moisture; label pallets by room.
- Just‑in‑time: Schedule deliveries by phase to reduce clutter and losses.
Step 7: Live‑Through Strategy
Living at home? Keep it livable with smart planning that reduces dust, noise, and disruption.
Dust Control and Site Protection
- Containment: Plastic zip walls, negative air machines, sealed vents.
- Protection: Ram board on floors, corner guards, drop cloths, shoe covers.
- Cleaning: HEPA vacuum daily; wipe high‑touch surfaces; weekly deep clean.
Temporary Spaces
- Kitchen workaround: Induction hot plate, microwave, toaster oven, pantry bins, outdoor grill.
- Bath workaround: Schedule showers around trades; set up a grooming station elsewhere.
- Storage: Clear bins, labels, off‑site pod or garage zone.
Kids, Pets, and Safety
- Quiet hours: Coordinate nap/work times with noisy tasks.
- Pet plan: Crate or friend’s house on demo days; secure outdoor gates.
- Safety brief: No-go zones, covered outlets, locked tool storage.
Step 8: Communication Cadence
Communication is the antidote to chaos. Decide how, when, and where project info lives.
Weekly Rhythm
- Standing site meeting: 15–30 minutes with GC every week; review progress, issues, next steps.
- Shared hub: Cloud folder or project app with drawings, specs, meeting notes, photos.
- Daily updates: Quick text or photo log of what was done and what’s next.
Change Orders Without Drama
- Written only: No verbal approvals; every change documented and priced.
- Impact noted: Each change shows cost and schedule impact before approval.
- Version control: Update drawings/specs immediately after a change is signed.
Decision Deadlines
- Decision tracker: List of outstanding decisions with due dates and responsible parties.
- Escalation: If a decision is late, choose the pre‑approved fallback to keep schedule.
Step 9: Quality Control and Inspections
Trust, but verify. Clear standards and checkpoints keep quality high and rework low.
Pre‑Construction Kickoff
- Walkthrough: Confirm layout, heights, tile patterns, grout color, door swings.
- Mockups: Test tile layout, paint swatches, lighting temps (2700K vs 3000K).
- Photo baseline: Shoot existing conditions and mechanicals before cover‑up.
During Construction
- Hold points: Approve waterproofing before tile; templating before counters; primer coat before final paint.
- Field dimensions: Verify actual measurements; adjust cabinets/trim accordingly.
- Submittals: Review cut sheets for fixtures to ensure compatibility and clearances.
Punch List and Closeout
- Punch list walk: Blue tape flaws; create a detailed list with deadlines.
- Closeout package: Warranties, manuals, paint codes, photos of shutoffs and studs.
- Retention: Hold a small final payment until punch list is completed.
Step 10: Sustainability and Wellness
Healthy, efficient choices make your home feel better now and save money later.
Indoor Air Quality
- Low‑/zero‑VOC: Paints, adhesives, sealants, and finishes.
- Ventilation: Ducted range hood, quiet bath fans on timers, ERV/HRV if feasible.
- Dust‑smart sanding: Tools with HEPA extraction; change HVAC filters frequently.
Energy and Water
- Appliances: Energy Star; induction cooktops for efficiency and indoor air.
- Lighting: LED everywhere; dimmers for mood and energy savings.
- Fixtures: WaterSense showerheads and faucets; dual‑flush toilets.
Waste and Reuse
- Deconstruction: Salvage doors, hardware, cabinets; donate to reuse centers.
- Recycling: Separate metal, cardboard, drywall where services exist.
- Right‑sizing: Order accurate quantities; keep 5–10% attic stock for future repairs.
Design Decisions That Keep You Sane
Consistency reduces decision fatigue. Choose a clear, cohesive direction and stick to it.
Palette and Materials
- Start neutral: Timeless base (floors, tile) with personality in easily swapped elements (paint, textiles).
- Coordinate undertones: Warm vs cool whites; test samples in daylight and night lighting.
- Durability first: Quartz counters, porcelain tile, washable paint in high‑traffic zones.
Lighting Layers
- Ambient: Recessed or ceiling fixtures for general light.
- Task: Under‑cabinet, vanity, reading lamps where you need focused light.
- Accent: Sconces, cove lighting, directional spots to add depth.
Storage and Flow
- Zones: Drop zone at entry, baking zone in kitchen, laundry sorting by hamper.
- Right‑size cabinets: Deep drawers beat lower cabinets; add pull‑outs and dividers.
- Clear paths: 36–42 inches standard circulation; 48 inches in busy kitchens.
Universal Design
- Comfort heights: 34–36 inch counters, comfort‑height toilets.
- Zero‑threshold shower: Safer and sleeker; plan linear drains early.
- Lever handles + good contrast: Easier for all ages and abilities.
Budget Savers (Without Regret)
- Save on: Decorative lighting (but not wiring), cabinet hardware, paint, some tiles, open shelving.
- Splurge on: Infrastructure (plumbing valves, electrical), waterproofing, cabinets/hardware, countertops you touch daily.
- Value engineering: Keep layout to avoid moving plumbing; standard cabinet sizes; prefinished floors.
Sample 12‑Week Renovation Timeline
Timelines vary, but here’s a small‑to‑mid scale, single‑space example to visualize flow. Adjust for permits, custom work, and inspections.
- Week 1: Site protection, demo, initial rough layout verification.
- Week 2: Framing adjustments, mechanical rough‑ins (plumbing/electrical/HVAC).
- Week 3: Rough inspections; order any missed parts immediately.
- Week 4: Insulation, drywall hang.
- Week 5: Drywall finish, prime; finalize tile layout mockups.
- Week 6: Flooring or shower pan/waterproofing.
- Week 7: Tile install; cabinet delivery staged.
- Week 8: Cabinet install; template counters.
- Week 9: Counter fabrication; paint first coat; trim and doors.
- Week 10: Counter install; plumbing and electrical trim‑out.
- Week 11: Final fixtures, hardware, touch‑ups; cleaning.
- Week 12: Final inspections, punch list, closeout package, celebration.
Renovation Checklists You Can Copy
Pre‑Design
- Define goals, constraints, and success metrics.
- Draft scope of work per room.
- Set budget, contingency, and funding source.
- Collect inspiration; build a mood board and sample kit.
Pre‑Construction
- Hire GC/designer; verify insurance and references.
- Sign contract with detailed scope, timeline, payment schedule.
- Submit permits; align HOA approvals.
- Order long‑lead items; confirm delivery dates.
- Plan dust control, site protection, storage, and temporary spaces.
During Construction
- Weekly site meetings and daily updates.
- Approve hold points (waterproofing, templates, primer).
- Log changes; sign change orders before work proceeds.
- Update budget and schedule tracker weekly.
Closeout
- Blue‑tape walk; complete punch list.
- Receive manuals, warranties, paint codes, and as‑built photos.
- Get lien waivers from GC and trades.
- Set reminders for seasonal maintenance.
Maintenance (Post‑Reno)
- Change HVAC filters quarterly during the first year.
- Seal grout/stone as required; keep touch‑up paint labeled.
- Register products to activate warranties.
FAQs: Calm Answers to Common Fears
How do I keep the project on budget?
Lock specs early, maintain a 10–20% contingency, and approve no changes without documented cost and schedule impact. Update your budget weekly.
What if my contractor pushes for quick decisions?
That’s a sign of missing pre‑planning. Pause. Request options with costs and lead times. Use your dealbreakers/flex list to decide.
Is DIY worth it?
DIY can save on demolition, painting, or simple installs, but structural, electrical, plumbing, and waterproofing are best left to licensed pros for safety, warranty, and insurance reasons.
How can I avoid delays?
Order long‑lead items early, have alternates ready, schedule inspections in advance, and make decisions before each trade mobilizes.
What’s the best way to plan a remodel with minimal stress?
Use a written scope, realistic budget with contingency, vetted pros, documented approvals, and a communication cadence. In short, this is how to plan a stress‑free renovation that runs smoothly.
Putting It All Together: Your No‑Drama Game Plan
Here’s a concise blueprint you can follow (and customize) for a remodel that stays calm from day one:
- Vision + Scope: Define outcomes and a room‑by‑room task list with non‑negotiables.
- Budget: Include soft costs and a 10–20% contingency; track weekly.
- Team: Vet and hire the right GC/designer; level bids and sign clear contracts.
- Approvals: Pull permits and align HOA rules early.
- Design Package: Finalize drawings, specs, and samples before demo.
- Procurement: Order long‑lead items; stage deliveries; inspect on arrival.
- Site Plan: Dust control, protection, temporary living strategies.
- Communication: Weekly meetings, daily updates, documented change orders.
- Quality: Hold points, inspections, and a rigorous punch list.
- Closeout + Maintenance: Manuals, warranties, lien waivers, seasonal checklist.
Why This Works
This framework reduces uncertainty, the root of renovation stress. You’re replacing guesswork with structure: clear scope, smart buffers, vetted pros, and a documented plan. That’s the real secret to how to plan a stress‑free renovation that finishes beautifully and predictably.
Next Steps
- Open a project folder and create subfolders: Scope, Budget, Drawings, Specs, Contracts, Permits, Photos.
- Write your dealbreakers/flex list and a room‑by‑room scope.
- Set your budget with a 10–20% contingency and build a simple tracker.
- Shortlist three contractors/designers and start bid leveling with the same scope documents.
- Draft a 12‑week schedule outline and identify long‑lead items to order early.
When you plan with intention, you don’t just get a nicer home—you get your time, sanity, and confidence back. That’s renovation without the meltdown. If you want a printable template pack (scope sheet, budget tracker, decision log, punch list), create copies of the checklists above and adapt them to your project. You’ve got this.
P.S. Bookmark this guide and revisit it before each project phase. It’s your safety net for a smooth, on‑time, on‑budget makeover.