There is real satisfaction in creating new plants from a favorite shrub, and smooth hydrangeas, known botanically as Hydrangea arborescens, are among the most generous candidates. In this step by step tutorial, you will learn how to propagate smooth hydrangea cuttings from start to thriving shrub. We will cover timing, tools, cutting types, rooting media, humidity and temperature control, troubleshooting, and long term care. Whether you are working with the beloved Annabelle type or newer improved cultivars, these methods scale from a single pot on a balcony to a full propagation bench.
Why Multiply Smooth Hydrangeas
Hydrangea arborescens rewards you with clouds of blooms, tough constitution, and cold hardiness. Propagating your own stock saves money, preserves favorite forms, and ensures consistent garden design. It also lets you share rare selections with friends and expand hedges without buying a trunk full of containers.
- Clonal consistency: Cuttings create genetically identical copies, preserving flower color, form, and bloom timing.
- Speed: Under good conditions, softwood cuttings root in 2 to 5 weeks and can be potted up the same season.
- Cost effectiveness: A single mother plant can yield dozens of new shrubs in one spring.
- Resilience: Smooth hydrangeas root more readily than many woody ornamentals, which makes them ideal for beginners.
Understanding the Plant: What Helps Cuttings Root
To master how to propagate smooth hydrangea cuttings, it helps to understand a little plant physiology. Roots develop from meristematic tissue near nodes and along the cambial layer. When a stem segment is cut and placed into a warm, moist but airy medium, hormones like auxin cue new root initiation. Achieving balance between humidity and oxygen is critical: too wet suffocates tissues and invites rot; too dry stalls callus formation.
- Nodes and internodes: Aim to include at least one or two nodes in the rooting zone.
- Auxins: Commercial rooting hormone powders or gels containing IBA (indole-3-butyric acid) or NAA can boost success.
- Air and water: A porous medium such as perlite and peat or coco coir keeps oxygen around developing roots while maintaining moisture.
- Heat and light: Warm media (around 70 to 75 F) and bright but indirect light accelerate rooting without leaf scorch.
Timing: When to Take Cuttings
Season and stem maturity determine rooting speed. You have three main windows, each with tradeoffs.
Softwood cuttings (late spring to early summer)
- Best for speed: Tender new growth roots quickly.
- Signs of readiness: Stems snap rather than bend; leaves are full size but tissue is not woody.
- Typical rooting time: 2 to 5 weeks under humidity.
Semi hardwood cuttings (mid to late summer)
- Moderate speed: Slightly tougher stems, still responsive to auxin.
- Benefit: Less likely to wilt in high heat.
- Typical rooting time: 3 to 6 weeks.
Hardwood cuttings (late fall to winter, dormant)
- Slow but steady: Dormant sticks can root in cool frames.
- Advantage: No leaf care or misting needed initially.
- Typical rooting time: Several months; pot up in spring.
Tools and Materials
Preparation makes success more dependable. Gather and disinfect tools before cutting. Clean tools minimize disease and improve cut quality.
- Sharp pruners or a sterile knife (wipe with alcohol between plants)
- Rooting hormone (powder or gel with IBA)
- Propagation medium: perlite and peat, or perlite and coco coir; a sterile seed starting mix also works
- Containers: cell trays, small nursery pots, or deep plug trays with drainage holes
- Humidity dome, clear plastic bins, or zipper bags to maintain high humidity
- Mister or spray bottle for gentle foliar misting
- Bottom heat mat (optional but helpful for softwood cuttings)
- Alcohol wipes or a 10 percent bleach solution for sanitation
- Labels and pencil to track cultivar and date
Choosing the Mother Plant
The quality of your starting material governs the vigor of your new shrubs. Select a vigorous, disease free donor. Water deeply a day before harvesting to ensure stems are well hydrated. Avoid plants that recently received systemic insecticides if you plan to share plants.
- Healthy foliage with no spots or mildew
- Strong shoots from the current season
- True to type if you want to clone a specific selection like Annabelle or Incrediball
Step by Step: Softwood Cutting Method
For many gardeners, this is the simplest, fastest path to new plants. The following process shows exactly how to propagate smooth hydrangea cuttings in early summer.
1. Prepare the medium and containers
- Fill pots or trays with a 50 to 70 percent perlite blend and the balance peat or coco coir. Moisten until evenly damp, not soggy.
- Tap containers to settle the mix. Pre poke holes with a clean dibble or pencil to avoid scraping off hormone later.
2. Take the cuttings
- Cut in the cool of morning so stems are turgid.
- Select shoots without flower buds if possible; flowering diverts energy from rooting.
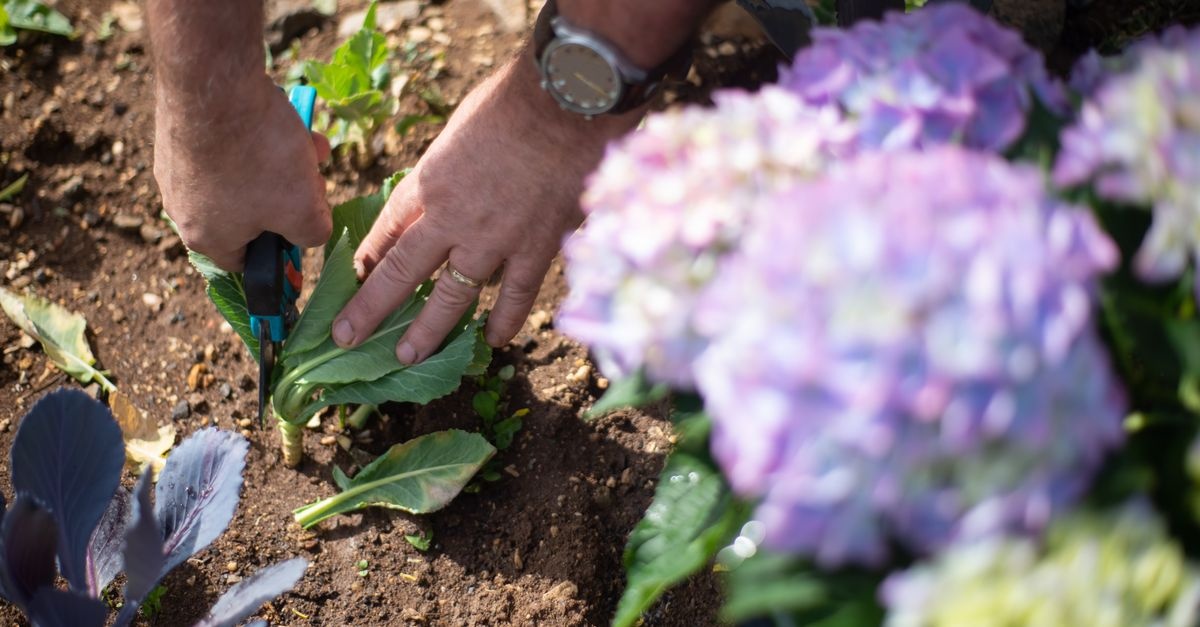
- Snip a 4 to 6 inch piece just below a node using sterilized pruners.
- Place stems in a bag with a little moisture or a cool jar of water while you collect more.
3. Trim leaves and prepare the base
- Strip off the bottom pair of leaves to expose at least one node. Keep one or two pairs of leaves at the top.
- Halve large leaves with scissors to reduce transpiration and wilting.
- Make a fresh clean cut just below a node at a slight angle to maximize rooting surface.
4. Apply rooting hormone
- Moisten the basal end and dip into hormone powder or gel. Tap off excess; you want a thin, even coat.
- If using powder, pour some into a separate dish to avoid contaminating the original container.
5. Insert into the medium
- Slide the cutting into the pre made hole so at least one node is buried.
- Firm the medium gently around the stem for good contact while maintaining air pore space.
- Space cuttings so leaves do not touch, improving airflow.
6. Create a humid microclimate
- Mist the foliage and cover with a clear dome, bin lid, or plastic bag propped off the leaves.
- Open vents or crack the cover daily for fresh air; stagnant air encourages rot.
7. Provide light, warmth, and care
- Place under bright, indirect light; avoid harsh midday sun that can cook the enclosure.
- Maintain media at 70 to 75 F. A heat mat boosts rooting speed, especially in cool rooms.
- Mist lightly once or twice per day as needed to keep leaves from wilting.
- Water the medium only when the top feels lightly dry; do not saturate.
8. Check for rooting and pot up
- After 2 to 3 weeks, tug gently. Resistance indicates roots.
- When you see new growth or fine roots exiting drain holes, transplant into a light potting mix.
- Gradually wean off humidity over 3 to 5 days before full sun exposure.
Alternative: Semi Hardwood and Hardwood Methods
If summer gets away from you or you want a lower maintenance approach, these options work well.
Semi hardwood approach
- Take cuttings in mid to late summer from firm, green brown shoots.
- Use a slightly stronger hormone concentration.
- Maintain humidity as with softwood, but reduce misting to prevent fungal issues.
Hardwood approach
- Harvest pencil thick, dormant stems in late fall after leaf drop.
- Cut into 6 to 8 inch lengths with at least two nodes. Keep track of which end is up.
- Insert outdoors in a sheltered bed or cold frame, burying the lower node, and mulch lightly.
- Alternatively, stick cuttings in pots of coarse sand and overwinter in a cool, frost free area.
- Roots form slowly; leaf out and pot up in spring.
Choosing and Mixing the Rooting Medium
The right medium balances water retention, drainage, and sterility. Garden soil compacts and harbors pathogens, so skip it for propagation. Instead, use blends designed for airiness.
- Perlite plus peat or coco: Classic, affordable, and airy.
- Perlite plus vermiculite: Excellent water holding, good for warm, dry rooms.
- Seed starting mix: Works if light and sterile, but often benefits from extra perlite.
Pre moisten the medium thoroughly and let excess water drain before sticking cuttings. Soggy media suffocates stems and invites damping off fungi.
Humidity, Airflow, and Light Management
Cuttings lack roots and rely on leaves to balance moisture. That means you must create a steady moisture envelope without letting condensation flood the leaves.
- Humidity domes: Keep relative humidity high, reducing wilting.
- Air exchange: Crack lids daily and wipe heavy condensation.
- Light intensity: Bright, indirect light develops strong leaves. Shade cloth or a north facing window is ideal.
- Photoperiod: 12 to 16 hours of light from LED grow lights maintains energy without heat stress.
Sanitation: The Hidden Success Factor
When planning how to propagate smooth hydrangea cuttings, keep one mantra in mind: cleanliness shortens rooting time. Sterilize blades, keep media fresh and sterile, and avoid reusing poorly cleaned trays.
- Disinfect pruners before each new plant.
- Rinse perlite and hydrate peat or coco with clean water.
- Use fresh rooting hormone to reduce contamination.
- Remove any wilted or diseased cuttings immediately.
Troubleshooting and Pro Tips
Even with careful technique, issues can creep in. Use these cues to diagnose and correct quickly.
If cuttings wilt and collapse
- Likely cause: Low humidity or too much sun.
- Fix: Increase misting, improve shade, or shorten leaves further.
If stems blacken at the base
- Likely cause: Overwatering or fungal infection.
- Fix: Let medium dry slightly, improve drainage, sanitize tools, and avoid burying too deep.
If nothing roots after 5 weeks
- Likely cause: Stems too old or temperatures too cool.
- Fix: Take fresher softwood cuttings and add bottom heat; refresh hormone.
Pro tips for higher success
- Score a shallow vertical scrape on the basal bark to expose cambium before applying hormone.
- Bundle multiple cuttings in a communal tray for consistent humidity and temperature.
- Use a light anti transpirant spray if conditions are dry and warm.
- Label by cultivar and date to compare rooting speed among selections.
Potting Up and Hardening Off
Once you have firm resistance or visible roots, you are more than halfway. Your goal now is to transition from a high humidity bubble to typical garden conditions without shock.
- Potting mix: A high quality potting soil with added perlite keeps roots growing fast.
- Gentle extraction: Use a dibble to lift without tearing delicate roots.
- Gradual humidity reduction: Open vents wider every day for 3 to 5 days until leaves stand without wilting.
- Light acclimation: Start with bright shade and move to morning sun over two weeks.
Feeding and Watering Young Plants
Hydrangea arborescens grows fast when well fed and watered, but tender roots burn easily. Keep nutrition mild and even.
- Apply a dilute, balanced liquid fertilizer (for example, one quarter strength) once roots fill the pot.
- Water deeply, then let the top inch of soil dry slightly before watering again.
- Mulch in containers with fine bark to moderate moisture and temperature.
Transplanting to the Garden
By late summer or early fall, your rooted cuttings can move to the landscape. Planting too late in cold regions may risk winter kill, so consider overwintering in pots if frost looms.
- Site: Bright morning sun and afternoon shade are ideal; full shade reduces bloom count.
- Soil: Loamy, well drained soil with ample organic matter.
- Spacing: 3 to 5 feet apart for hedge forms; check mature width for your cultivar.
- Water: Keep evenly moist the first season. Mulch 2 to 3 inches deep, keeping mulch off the stems.
Overwintering Young Hydrangeas
Cuttings rooted and potted in late season need protection in cold climates.
- Heel pots into a protected bed and mulch heavily once the ground cools.
- Store in an unheated garage or cold frame where temperatures stay just above freezing.
- Water sparingly through winter to keep the root ball from desiccating.
Alternative Propagation Paths
When mapping out how to propagate smooth hydrangea cuttings, remember you have other clonal routes too.
Simple layering
- Bend a flexible stem to the ground in spring, nick the underside lightly, pin it in contact with the soil, and cover with 2 inches of mix.
- Keep moist; roots form by late summer. Sever and transplant in fall or the following spring.
Division
- Mature clumps sometimes sucker. In early spring, dig and split off a piece with several shoots and roots.
- Replant promptly and water well.
Frequently Asked Questions
Can I root stems in water?
Yes, some gardeners root Hydrangea arborescens in a jar of water. However, water roots differ anatomically from soil formed roots and may transplant less smoothly. If you use water, move to a potting mix as soon as white roots reach about one inch.
Do I need a greenhouse?
No. A bright window, a clear storage bin used as a mini greenhouse, and a simple seedling heat mat can deliver excellent results.
Which cultivars root best?
Classic Annabelle types and many modern selections like Incrediball and Haas Halo respond well. Very woody, older shoots root more slowly; target current season growth for speed.
Is rooting hormone required?
Not strictly, but it raises success rates and speeds root initiation. Choose a reliable product and use sparingly.
Common Mistakes to Avoid
- Overly wet media: Leads to rot and failure. Aim for evenly moist, never soggy.
- Too much sun: Plastic domes magnify heat. Provide bright shade.
- Leaving flowers on: Buds divert energy. Remove blooms from cuttings.
- Skipping sanitation: Dirty blades spread pathogens rapidly.
- Rushing acclimation: Harden off gradually to avoid setback.
A Simple Week by Week Timeline
- Week 0: Gather tools, mix medium, prepare containers.
- Week 1: Take softwood cuttings, stick in trays, cover with humidity dome.
- Week 2: Vent dome daily, mist lightly, watch for mold and remove any losses.
- Week 3 to 4: Test for resistance. Begin weaning from humidity if roots have formed.
- Week 4 to 6: Pot up rooted cuttings into individual containers.
- Week 8 onward: Light feeding, gradual light increase, and transplant to the garden when robust.
Eco Friendly and Budget Friendly Tweaks
- Reuse clean nursery pots and trays to reduce plastic waste.
- Choose coco coir instead of peat if you are minimizing peat use.
- Build a DIY humidity chamber from a clear storage tote and two small blocks to prop the lid for airflow.
- Use a simple mechanical timer with LED shop lights for consistent photoperiod.
Scaling Up for Abundance
Once you are comfortable with how to propagate smooth hydrangea cuttings, it is easy to scale. Stick larger batches in 72 cell plug trays, group trays on a heat mat, and manage humidity with a single large dome or tent. Keep meticulous labels for each batch and schedule weekly checks. Consistency across water, light, and temperature makes for uniform, transplant ready crops.
- Batch planning: Take cuttings every two weeks in early summer for a rolling supply.
- Quality control: Cull weak pieces early so they do not crowd better performers.
- Record keeping: Track cultivar, date, hormone strength, and results. Repeat what works.
Putting It All Together
To recap the essentials for predictable success: choose healthy donor stems at the right stage, use a light and sterile rooting medium, keep humidity high while ensuring airflow, provide warm media and bright but gentle light, and handle the transition to independent growth with care. Follow these practices and you will confidently turn a single cherished hydrangea into a flourishing drift of blooms.
Quick Checklist
- Healthy, well watered mother plant
- Sterile pruners and fresh rooting hormone
- Perlite rich medium, pre moistened
- Clear cover for humidity plus daily venting
- Warm media, bright indirect light
- Patience for 2 to 5 weeks, then gentle potting up
- Gradual acclimation and steady moisture
Conclusion
Now you know in practical detail how to propagate smooth hydrangea cuttings from spring through winter, with softwood, semi hardwood, and hardwood methods. With clean tools, the right medium, and a steady hand for humidity and light, you can multiply Hydrangea arborescens with confidence. Start with a handful of cuttings this season, and by next summer you will be planting a sweep of new shrubs that all trace back to your favorite original.
Next step: Assemble your tools, set up a small propagation station, and take your first batch of cuttings in the cool of the morning. Within weeks you will see new roots and new confidence growing together.