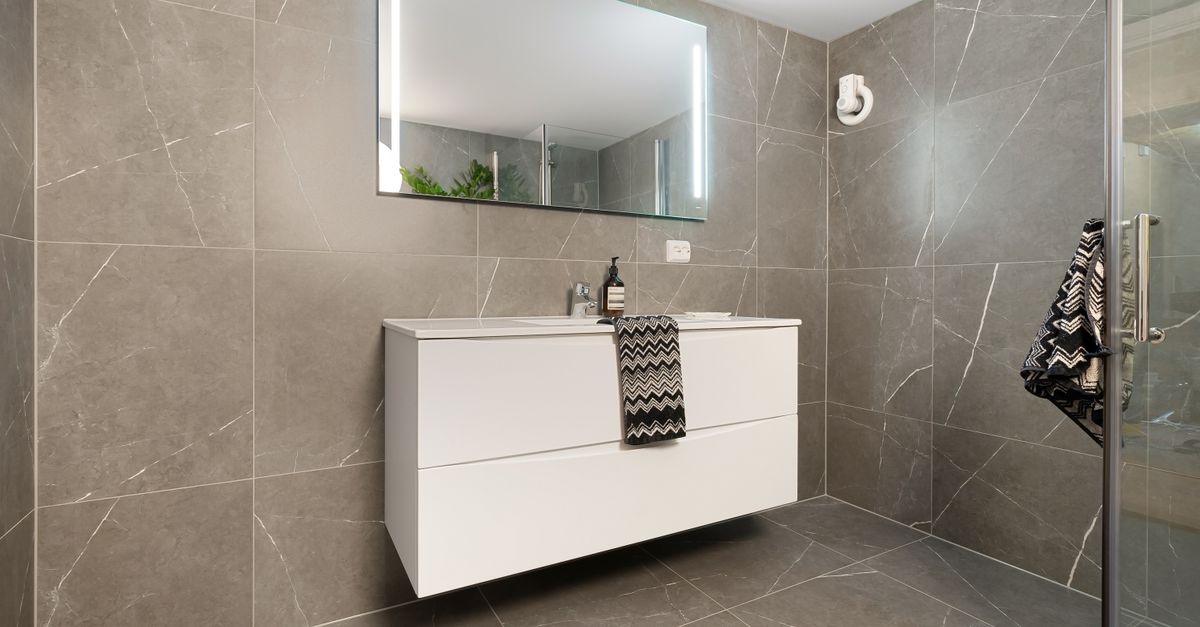
If you have ever finished a tile project only to notice wavy joints, blotchy color, or grout haze clinging to the surface, you know how fast a beautiful install can turn frustrating. Consider this your calm, practical roadmap to a clean, consistent finish. We will break the process into clear, repeatable steps so you can achieve even grout lines without second-guessing. Whether you are tackling a shower wall, a tub surround, or a bathroom floor, the methods here deliver a reliable outcome—Bathroom tile grouting–even and error‑free—with less mess and fewer surprises.
We will cover essentials like choosing the right grout type, prep work that guarantees smooth joints, proven tools and timing, and pro-level finishing that avoids haze and pinholes. You will also find troubleshooting tips, maintenance pointers, and a simple checklist you can refer to on grouting day. Let us turn a sometimes‑stressful step into a confident, satisfying finish.
What Even Grout Lines Really Mean
Even grout lines are about more than looks. They are the difference between a crisp, professional aesthetic and a busy, uneven finish. Here is what we mean by even:
- Consistent joint width: Each gap between tiles matches its neighbors as closely as possible, visually and by measurement.
- Uniform depth and fullness: Joints are packed solidly to the tile edges without dips, voids, or overfilled ridges.
- Clean edges: The borders of each tile remain sharp, not smeared over with slurry or haze.
- Color consistency: Grout color cures evenly, avoiding patchiness from excess water, uneven mixing, or premature cleaning.
Good news: You achieve all of that through planning, timing, and light pressure control—not brute force. With a short checklist and some timing cues, your results can be reliably smooth and straight.
Tools and Materials You Need
Gathering the right tools upfront is the simplest way to ensure a smooth, error‑free grouting day. Here is a practical list tailored for bathrooms:
- Grout: Cementitious (sanded or unsanded), high-performance cement grout, or epoxy grout, depending on joint width and exposure.
- Grout float: A firm rubber float for walls and floors; a margin float helps in tight corners and niches.
- Mixing bucket: Two buckets minimum—one for mixing, one for rinse water.
- Low‑speed drill + mixing paddle: Optional but great for consistent blends (especially epoxy); otherwise a margin trowel works.
- Clean sponges and microfiber cloths: Multiple, so you can rotate to keep the rinse water clean.
- Grout release or sealer (optional): Helpful with textured or porous tiles to ease cleanup.
- Rubber gloves, knee pads, and eye protection: Comfort and safety boost focus and results.
- Caulk (100% silicone, color‑matched): For changes of plane like corners and around tubs or countertops.
- Tile spacers or wedges: If you are setting and grouting in one session, spacers keep lines true until the mortar cures.
- Timer: Your best friend for slake, open time, and wash windows.
Choosing the Right Grout for Your Bathroom
Picking the right grout is half the battle. Bathroom environments vary (showers, steam, floors), and each situation favors one type:
Cementitious Grout (Traditional)
- Sanded: Best for joints roughly 1/8 inch to 1/2 inch. The sand prevents cracking and shrinkage in wider joints. Great for most floors and some walls with wider joints.
- Unsanded: For tighter joints up to about 1/8 inch (often recommended at 1/16 inch). Ideal on polished stone or delicate tile where sand could scratch.
Pros: Budget‑friendly, familiar, widely available. Cons: Porous; often needs sealing; can stain if unsealed; color variation possible if over‑watered.
High-Performance Cement Grouts
Modified cement grouts with additives offer better stain resistance and color consistency. Some are labeled rapid‑set or fast‑cure. Great for busy bathrooms, they reduce waiting time and maintenance.
Epoxy Grout
Highly stain‑resistant, dense, and durable—excellent for showers and wet zones. It resists mold and staining better than cement grout.
- Pros: Top‑tier chemical and stain resistance, strong color consistency, minimal sealing required.
- Cons: Higher cost, shorter working time, requires precise mixing and cleanup timing.
If your priority is long‑term performance in a shower or niche, epoxy can be worth it. If budget and ease matter most, a quality sanded or unsanded cement grout (properly sealed) is a reliable choice for Bathroom tile grouting–even and error‑free outcomes.
Planning and Prep: The Secret to Straight Lines
Even grout joints begin before the first ounce of grout hits your tile.
Layout and Lippage
- Check for consistent joint spacing: If tiles were set with uneven spacer pressure, correct what you can before grouting. You cannot correct wavy lines with grout.
- Assess lippage: Even slight height differences between tiles make grout lines look uneven. If lippage is severe, consider remediation before grouting.
- Clean joints: Remove thin‑set ridges, spacers, dust, and debris so grout can fully fill the joints.
Surface Preparation
- Degrease if needed: Body oils, construction dust, or adhesive residue can interfere with cleanup.
- Protect edges and fixtures: Mask trim or sensitive surfaces. Set floor protection outside the work zone.
- Dampen porous tiles (cement grout only): Slightly damp—not wet—surfaces reduce premature drying and help color consistency.
Moisture and Substrate Checks
- Shower walls: Ensure waterproofing is complete and cured (membranes per manufacturer specs). Grout is not a waterproofing system; it is part of the finish.
- Floors: Verify thin‑set has fully cured (commonly 24 hours or more). Walking on soft mortar risks waves you will see forever.
Taking 20 extra minutes here is the cheapest insurance policy for error‑free grouting.
Mixing Grout Like a Pro
Proper mixing sets the stage for color consistency and smooth, even joints.
General Steps for Cement Grout
- Measure water: Follow the manufacturer ratio precisely. Avoid eyeballing—it invites color shifts.
- Add powder to water: Not the other way around. Mix slowly for about 2–3 minutes until creamy and lump‑free.
- Slake: Let the mix rest for 5–10 minutes (as specified). This allows full hydration of the binders.
- Re‑mix briefly: Do not add extra water. Re‑mix to restore workability.
Avoid over‑watering before, during, and after application. Excess water leads to weak joints, color washout, and blotchiness—the enemy of Bathroom tile grouting–even and error‑free results.
Mixing Epoxy Grout
- Pre‑stage tools: Set up buckets, sponges, and rinse water first; epoxy has a shorter open time.
- Combine all parts fully: Scrape pail sides to blend resin and hardener uniformly; then fold in the filler.
- Work in small batches: Maintain control and keep a predictable pace.
The Step‑by‑Step Grouting Process
These steps apply to most bathroom scenarios, with notes for walls, floors, and showers.
1) Pre‑Wet or Prime (If Applicable)
For cement grout on porous tiles or hot, dry days, lightly dampen the tile with a wrung‑out sponge. Surface should be cool and barely damp—not shiny wet.
2) Pack the Joints
- Hold the float at about 45 degrees: Press grout diagonally across joints to pack completely, avoiding scooping grout out of the lines.
- Overlap passes: Multiple light passes beat one heavy swipe. You want solid, void‑free fill without plowing out previous work.
- Work small areas: For cement grout, about 10–15 square feet at a time on walls; 15–25 on floors. For epoxy, even smaller zones.
3) Strike Off Excess
With the float nearly vertical, drag diagonally across the tile faces to remove surplus grout while keeping the joints full. This is where evenness takes shape: do not dig into joints; skim the surface.
4) Initial Wash
- Timing matters: Start the first wash when the grout firms slightly but is not fully hardened—a window often 10–20 minutes for cement grout, sooner for epoxy. Follow the bag or pail instructions.
- Use a lightly damp sponge: Rinse frequently in clean water and wring well. Excess water here causes color issues.
- Wipe diagonally: Light, single passes; then rotate the sponge to a clean side for the next pass. Avoid scrubbing.
5) Shape the Joints
As part of the initial wash, gently tool the joints with the sponge to achieve a uniform, slightly concave profile that sits just below the tile edges. This improves shadow lines and helps keep dirt from accumulating.
6) Secondary Wash / Buff
- Check for haze: After the surface dulls slightly, do a second light wash or microfiber buff to remove film. Replace rinse water often.
- Epoxy note: Use the manufacturer’s recommended cleaning additive or emulsifier in the rinse water to prevent stubborn residue.
7) Final Detail
- Inspect corners, edges, niches: Remove any crumbs or lumps before they set.
- Clean transitions: Where tile meets metal trim or stone, run a final cloth pass to keep edges crisp.
Even Lines, Every Time: Technique Keys
To lock in visual uniformity, focus on these cues throughout the process:
- Consistent pressure: Too much float pressure can carve joints; too little leaves voids. Aim for firm, even packing with gentle strike‑offs.
- Diagonal motion: Keeps you from scooping grout out of the joints.
- Joint fullness check: After striking off, quickly scan for low spots and re‑pack before the initial wash.
- Minimal water in sponges: Water is a shaping tool, not a solvent. A saturated sponge blurs edges and washes out color.
- Controlled timing: Start washing only when the grout has set enough to resist smearing. Rushing the wash is a top cause of streaks and haze.
These habits give you that sought‑after, error‑free grouting finish—tight, uniform, and clean.
Special Situations in Bathrooms
Vertical Surfaces (Shower Walls)
- Start high and work down: Gravity is not your friend; prevent drips and sags by staying within small zones.
- Mind niches and shelves: Treat them as separate zones so you can control timing and cleanup.
Floors and Sloped Pans
- Map exit routes: Work from the farthest corner toward the door to avoid stepping on fresh joints.
- Shower pans: Take extra care to prevent pooling rinse water; use a well‑wrung sponge and a microfiber buff.
Mixed Materials
- Polished stone with tight joints: Prefer unsanded or an epoxy rated safe for the surface to prevent scratching.
- Textured porcelain or encaustic cement: Consider a grout release or sealer before grouting; it drastically eases haze removal.
Caulk vs. Grout: Changes of Plane
In bathrooms, any change of plane (wall‑to‑wall corners, wall‑to‑floor, tile‑to‑tub) should be sealed with flexible caulk, not rigid grout. Silicone or hybrid sealants accommodate movement and prevent cracking where two surfaces meet. Use color‑matched silicone for a seamless look. This is critical for Bathroom tile grouting–even and error‑free durability over time.
Timing Windows You Cannot Ignore
- Slake time (cement grouts): 5–10 minutes after initial mixing, then re‑mix.
- Open time: Your workable pot life. When grout starts to firm in the bucket, stop and mix a fresh batch; do not revive with water.
- Initial wash window: Usually 10–20 minutes after packing, but follow the label. Epoxy windows can be shorter.
- Final buff: When a slight haze appears and the surface dulls, buff with microfiber.
- Cure time: Keep the area dry and protected—often 24–72 hours. Showers typically require the longer end. Always check the product sheet.
Avoiding the Big Grouting Mistakes
- Over‑watering the mix: Leads to weak, blotchy grout. Measure precisely.
- Washing too soon: Smears pigment and pulls grout from joints.
- Dirty rinse water: Re‑deposits haze and fine grout particles on the tile.
- Scrubbing instead of wiping: Aggressive motions round over edges and erode joint fullness.
- Skipping caulk at changes of plane: Leads to cracks and water intrusion over time.
- Leaving haze overnight: Especially with epoxy, it can become stubborn and require specialty removers.
Troubleshooting: Quick Fixes for Common Issues
Grout Haze
Symptom: A cloudy film that dulls the tile surface after curing. Fix: For cement grout, use a dedicated haze remover or a mild acidic cleaner (following instructions and testing first). For epoxy, use the manufacturer’s recommended remover. Always rinse well and buff dry.
Pinholes or Voids
Symptom: Tiny holes in the joints after curing. Fix: Mix a small batch and re‑pack only the affected areas, timing a careful wash. Often due to insufficient packing or over‑washing.
Color Variation
Symptom: Patches of lighter or darker grout. Fix: Usually caused by inconsistent water ratios, premature washing, or uneven drying. Deep clean first. If unevenness remains, a grout colorant or sealer with tint can unify the look.
Cracking
Symptom: Hairline cracks along joints. Fix: Determine if the crack is at a change of plane (replace with silicone). Elsewhere, it can indicate shrinkage or movement; remove and re‑grout the damaged stretch with proper packing and spacing.
Staining or Efflorescence
Symptom: White, powdery residue or dark stains. Fix: Address moisture sources; clean efflorescence with a specialty cleaner. Seal cement grout after full cure to reduce future issues.
Sealing and Long‑Term Care
Sealing Cement Grout
- When to seal: After full cure (typically 48–72 hours; verify product). Avoid sealing too early, which can trap moisture.
- Type: Penetrating, breathable sealers are popular for bathrooms. They help resist stains and make cleaning easier.
- Application: Use a small brush or applicator bottle to focus on joints; wipe tile faces quickly to prevent streaks.
Routine Maintenance
- Mild, pH‑neutral cleaners: Preserve sealer and grout color better than harsh chemicals.
- Ventilation: Keep showers dry between uses; squeegee or towel surfaces to reduce mildew.
- Annual check: Inspect high‑use zones and re‑seal as needed—especially on cement grout.
When you combine smart sealing with regular light cleaning, your grout stays bright and uniform—keeping that error‑free grouting look for years.
Safety, Comfort, and Setup Tips
- Ventilation: Keep windows open or use exhaust fans, especially with epoxy or solvent‑based products.
- Gloves and eye protection: Cement and epoxy can irritate skin and eyes.
- Knee pads and breaks: Better comfort equals better focus—and better joints.
- Clean as you go: Change rinse water often; swap in fresh sponges and cloths.
Pro‑Level Tricks for Perfect Joints
- Micro‑batch mixing: Mix smaller amounts more often, keeping consistency uniform and avoiding rushed washes.
- Two‑sponge method: One sponge for the first pass to shape joints; a second, cleaner sponge for the final pass. Swap water frequently.
- Microfiber final buff: When haze just appears, buff with a dry microfiber cloth in light circles. It sharpens edges and removes film.
- Warm water (for epoxy cleanup): Slightly warm rinse water can help break down epoxy residue—always per manufacturer guidance.
- Test board: Grout a small sample board with your exact tile and grout to confirm color and cleanup timing before hitting the real surface.
Budgeting and Quantity: How Much Grout Do You Need?
Grout consumption depends on tile size, thickness, joint width, and depth. Many manufacturers provide a coverage calculator. As a rule of thumb:
- Small format tiles with tight joints: Lower grout volume but more labor per square foot.
- Large format tiles with wider joints: Higher volume; plan for extra material in relief textures.
- Always add 10–15%: Coverage charts assume ideal conditions. A buffer prevents mid‑project shortages.
From a cost standpoint, material is only part of the equation; time saved by correct timing and cleanup matters just as much for a Bathroom tile grouting–even and error‑free finish.
Frequently Asked Questions
Do I have to seal epoxy grout?
Usually not. Epoxy is dense and stain‑resistant out of the pail. Always confirm with the manufacturer; some suggest a topical protectant in specific cases.
Which is better for a shower: sanded or unsanded grout?
Base it on joint width and tile surface. Use unsanded for very tight joints and delicate surfaces prone to scratching; sanded for wider joints for strength. Consider epoxy for high‑moisture zones if your budget allows.
How do I keep grout color consistent?
Measure water precisely, mix thoroughly, slake and re‑mix, avoid over‑washing, and keep your rinse water clean. Work in small, repeatable zones.
Can I grout and then immediately use the shower?
No. Respect cure times—often 48–72 hours or per the product data sheet. Premature exposure to water risks color issues and weakness.
What is the right sponge technique?
Light, diagonal passes with a well‑wrung sponge. Rinse often. Avoid circular scrubbing that rounds edges and pulls grout.
A Simple, Stress‑Free Workflow You Can Follow
- Prep: Clean joints, remove spacers, and protect surrounding finishes.
- Stage: Set up buckets, sponges, microfiber cloths, timer, and caulk for later.
- Mix: Measure accurately, slake (cement grout), and re‑mix. For epoxy, combine parts fully and work in small batches.
- Pack: Apply diagonally with steady pressure; fill joints completely.
- Strike off: Skim diagonally to remove excess while keeping joints full.
- Initial wash: Begin when grout firms; use a barely damp sponge, diagonal passes, and frequent rinses.
- Shape: Tool joints to a consistent, slightly concave profile.
- Final buff: Remove haze with a clean microfiber cloth.
- Caulk changes of plane: Use color‑matched silicone; tool neatly.
- Cure and seal: Respect cure times; seal cement grout as directed.
Putting It All Together
Great grout lines are not magic—they are the result of a measured process done at a comfortable pace. With the right grout for your surface, clean joints, consistent mixing, small work zones, light sponge passes, and careful timing, you will produce crisp, uniform lines that elevate the entire bathroom. When in doubt, slow down, refresh your rinse water, and re‑check the timing windows on the bag or pail.
Follow this guide and you will have exactly what you came for: Bathroom tile grouting–even and error‑free results—without the stress, the haze, or the do‑over. Even lines. Zero oops.