From Plastic Barrel to Black Gold: Build a Rotating Compost Bin in a Weekend
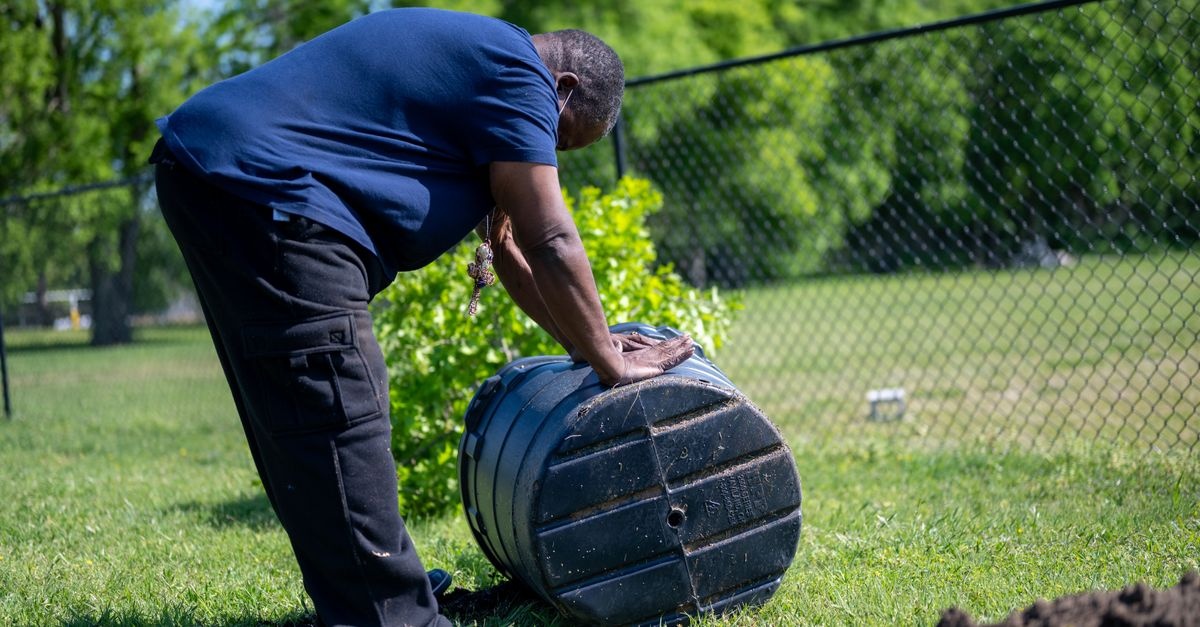
Looking for a reliable, low-cost path to nutrient-rich compost that doesn’t attract pests or demand backbreaking turning? A rotating compost tumbler made from a reclaimed plastic barrel delivers fast results, tidy operation, and year-round convenience. In this complete weekend project guide, you’ll learn how to make a composter from plastic barrels using common tools and hardware, plus time-tested composting techniques that speed up decomposition and keep odors at bay. By Sunday evening, you’ll be spinning your first batch.
Why a Rotating Barrel Composter?
Traditional compost piles work, but they can be messy, slow, and labor-intensive. A drum-style tumbler addresses those pain points with simple physics and smart design:
- Faster breakdown: Frequent tumbling improves aeration, boosting microbial activity for quicker results.
- Cleaner and contained: Yard waste and kitchen scraps are sealed inside, deterring pests and controlling runoff.
- Low effort: A quick spin replaces manual turning with a pitchfork, saving time and your back.
- Year-round composting: Tumbler walls hold heat better, extending the active season.
- Portable and compact: Fits on patios or small yards and can be relocated easily.
Project Overview at a Glance
- Build time: 1 weekend (about 8–12 total hours)
- Skill level: Easy to intermediate DIY
- Estimated cost: $60–$180 (materials vary by region and what you already own)
- Key tasks: Barrel prep, ventilation and drain, access door, internal baffles, axle and bearings, frame/stand, assembly, sealing
Materials and Tools
Core Materials
- Plastic barrel (45–65 gallons / 170–245 L): Food-grade, HDPE, tight-head or open-head with lid. Avoid barrels that held chemicals.
- Axle: 3/4” or 1” (19–25 mm) galvanized steel pipe, black pipe, or solid rod. Length: barrel width + frame clearance.
- Bearings or bushings: Pillow block bearings or heavy-duty flange bearings sized to axle; budget option: PVC bushings.
- Frame lumber or steel: 2x4 or 2x6 lumber, exterior screws/bolts; or angle iron/unistrut with bolts.
- Hinges and latch: Stainless or galvanized; draw latch recommended for a tight seal.
- Bolts, nuts, washers: Corrosion-resistant. Include fender washers for plastic.
- Weatherstripping: Closed-cell foam or rubber gasket for door seal.
- Handles: Two to four heavy-duty pull handles for easy rotation.
- Mesh screen: 1/4” hardware cloth for ventilation ports (optional but recommended to keep insects out).
- Rust-proof paint/sealant: For frame protection (if wood, use exterior sealer; if metal, use primer + enamel).
Tools
- Drill/driver with bits (including hole saws: 1–2” for vents, 3/8” for drains, appropriate for bolt sizes)
- Jigsaw or reciprocating saw (for the access door)
- Wrenches/sockets, tape measure, marker, square
- Safety gear: eye protection, gloves, dust mask
- Optional: angle grinder (metal frame), miter saw (wood frame), rivet gun
Optional Upgrades
- Baffles (internal fins): Scrap PVC or treated wood to tumble and break up material.
- Crank handle or gear: For heavy loads or reduced wrist strain.
- Leachate catch bin: Shallow tray or bucket below to capture nutrient-rich runoff.
- Dual-chamber setup: Two barrels or a divided barrel for continuous composting.
Design Choices You’ll Make
Barrel Size and Type
Choose a food-grade HDPE drum that previously held safe contents (e.g., edible oils, vinegar, syrups). Avoid barrels that stored solvents or industrial chemicals. For most backyards, 55 gallons hits the sweet spot: large enough to build heat, small enough to rotate easily.
Axle Methods
- Through-axle (most durable): A pipe runs through the barrel center and sits in bearings on the frame. You’ll drill two aligned holes through the barrel walls.
- External trunnions: Short stubs bolted to the barrel ends ride in U-shaped brackets. Easier to service but requires robust end plates.
- Rim rollers: The barrel rides on casters at its outer rim. Simple, but can slip in wet conditions and wears rims over time.
Frame Options
- Wood sawhorse frame: Fast and accessible with common tools. Use exterior-grade lumber and lag bolts.
- Metal frame (angle iron/unistrut): Strong and slim profile; weather-resistant with the right finish.
- A-frame stands: Stable and compact; good for patios.
Door/Lid Style
- Rectangular cut-out with hinges: Easiest to load; use a draw latch and gasket for sealing.
- Round port with threaded cap: Weatherproof and clean look; slower loading/unloading.
Ventilation and Drainage
- Vent holes: Numerous 1–1.5” vents spread around the barrel, covered from inside with mesh to exclude pests; smaller holes (3/8”) can supplement.
- Drain port: A few 3/8” holes lowest on the barrel to release leachate and prevent soggy conditions.
Safety and Prep
Clean and De-label the Barrel
- Rinse thoroughly: Fill one-third with hot water and a bit of biodegradable soap. Roll to scrub interior, then drain.
- Neutralize odors: Add a cup of baking soda with warm water, shake, and rinse again.
- Sun dry: Leave open to dry in direct sun. UV and heat help off-gas lingering smells.
- Remove labels/residue: Use citrus adhesive remover or rubbing alcohol if needed.
Plan Layout Before Cutting
- Mark the barrel’s centerline around its circumference using a strap or tape.
- Sketch placement for door, axle, vents, and drains. Keep large vents away from hinge and latch areas.
- Confirm the balance: door centered between baffles reduces wobble.
Step-by-Step Build: Weekend Timeline
Day 1 Morning: Barrel Layout, Door, and Venting
- Door outline: Draw a rectangle roughly 12” x 18” (30 x 45 cm) on the barrel side. Round the corners for strength.
- Pilot holes: Drill pilot holes at the corners; insert a jigsaw blade and cut along the line. Save the cut-out as the door.
- Reinforce edges: Add a 1”-wide flange by riveting or screwing a plastic/metal rim strip around the opening, or bond a PVC frame inside for stiffness.
- Hinges and latch test-fit: Pre-drill and mount hinges on the door and barrel using stainless screws and fender washers. Add the draw latch opposite the hinges. Remove the door for now while you drill other holes.
- Ventilation holes: Mark a grid of 1–1.5” (25–38 mm) vents across the barrel, with more on the upper half and fewer on the lower third. Drill cleanly. On the inside, attach mesh screen with rivets or stainless screws to cover large vents.
- Drainage: Drill 3–4 holes of 3/8” (10 mm) along the lowest line when the barrel rests in its “neutral” position. Add a small gutter or fit a threaded bulkhead with a plug to collect leachate (optional).
Day 1 Afternoon: Axle and Frame
- Axle holes: Measure and mark the barrel center on both ends. Drill hole saw openings sized for your axle, keeping them precisely aligned. Deburr gently.
- Install axle: Slide the pipe/rod through. Add large fender washers and rubber gaskets where it passes through the plastic to protect and seal.
- Internal baffles (recommended): Cut two or three 2–½” PVC strips or treated wood slats (length equal to the barrel’s internal width). Bolt them to the inside along the barrel’s length, spaced evenly around the circumference. Baffles help lift and tumble material for faster aeration.
- Frame build (wood option):
- Construct two A-frames with 2x4s. Cross-brace for rigidity.
- Top each A-frame with a 2x6 saddle drilled to accept bearings.
- Mount pillow block bearings using lag bolts. Confirm axle height keeps the door comfortable to reach (about waist height).
- Frame build (metal option):
- Cut angle iron/unistrut to form two uprights and a base.
- Bolt on flange bearings; ensure perfect alignment for smooth spinning.
- Add diagonal braces to eliminate wobble.
- Dry fit: Rest the axle into bearings. Spin the barrel to verify clearance and balance. Adjust as needed.
Day 2 Morning: Door Fitting, Handles, and Sealing
- Weatherstripping: Apply closed-cell foam tape around the door opening for a snug seal.
- Reinstall door: Reattach hinges and latch with corrosion-resistant hardware. Tighten until the seal compresses slightly but the door still closes smoothly.
- Handles: Install 2–4 heavy-duty handles around the barrel to aid rotation. Space them evenly for balance.
- Index marks: Paint or mark “Full” and “Half” levels, and an arrow showing spin direction to standardize your tumbling routine.
Day 2 Afternoon: Final Assembly and Finishing Touches
- Seal frame surfaces: Apply exterior sealant to wood or rust-inhibiting primer and enamel to metal. Let dry fully.
- Leachate tray: Place a shallow bin beneath drain holes if you’d like to collect nutrient-rich liquid (dilute 10:1 with water before using on plants).
- Spin test: Load a few gallons of dry leaves and give several rotations. Listen for scrapes, check door integrity, and confirm smooth action.
How to Make a Composter from Plastic Barrels: The Quick Summary
- Use a food-safe HDPE barrel and aerate it with multiple vents plus a few drains.
- Cut a hinged access door with a tight latch and gasket.
- Mount a sturdy axle through the center on bearings, supported by a braced frame.
- Add internal baffles and exterior handles for effective tumbling.
- Keep loads balanced and materials at the right moisture and carbon:nitrogen ratio for fast, odor-free composting.
Dialing In Aeration, Moisture, and Heat
Great composting is 80% biology and 20% engineering. Your rotating plastic barrel composter gives you the engineering; now tune the biology:
- Aeration: Tumbling introduces oxygen; vents maintain exchange. Spin 5–10 turns, 3–4 times per week for active batches.
- Moisture: Aim for “wrung-out sponge” damp. If material clumps or smells sour, it’s too wet—add shredded cardboard or leaves and increase venting.
- Heat: A 55-gallon tumbler can reach 120–140°F (49–60°C) with the right mix. Insulate in winter with a removable jacket if needed.
What to Put In (and Keep Out)
Greens (Nitrogen-Rich)
- Fruit and vegetable scraps
- Coffee grounds and filters, tea leaves
- Fresh grass clippings (mix with browns to avoid matting)
- Plant trimmings (disease-free)
Browns (Carbon-Rich)
- Dry leaves and straw
- Shredded cardboard and paper (uncoated)
- Sawdust and wood shavings (untreated)
- Coco coir or chopped corn stalks
Avoid
- Meat, fish, dairy, greasy foods
- Pet waste
- Diseased plants or seedy weeds (unless your tumbler reliably gets hot)
- Large branches, glossy paper, treated wood
Starting Your First Batch
- Base layer: Add 3–4 inches of browns (dry leaves/cardboard) to absorb moisture.
- Alternate layers: Add a small bucket of greens, then a larger portion of browns (roughly 1:2 by volume). Sprinkle a handful of finished compost or garden soil as a microbial inoculant.
- Moisten: If dry, add water lightly. Close and give 10 spins to mix.
- Feed thoughtfully: For the first week, add small amounts daily or every other day, keeping the brown-to-green ratio high to maintain structure.
Operating Tips and Routine
- Loading: Fill to 60–80% capacity. Overfilling reduces tumble action and airflow.
- Tumbling schedule: 3–4 sessions weekly in warm weather; 1–2 in colder periods.
- Particle size: Chop kitchen scraps and shred browns for faster breakdown.
- Rest periods: When the tumbler feels warm and active, let it rest 2–3 days between spins to preserve heat.
- Batch vs. continuous: For fastest results, stop adding new material once the barrel is 3/4 full and let it finish while you start a second bin.
Troubleshooting and Fixes
- Ammonia odor or slimy mix: Too many greens or too wet. Add shredded cardboard/leaves, drill a couple more vents if needed, tumble daily for several days.
- Dry, stalled pile: Add water while tumbling until materials are damp, then add a small amount of greens.
- Low heat: Increase greens, ensure adequate volume (at least half full), reduce over-venting in cold weather, insulate the barrel.
- Leachate pooling: Open drain, tilt slightly toward drain side, add more browns.
- Barrel wobble: Rebalance load; check that handles and baffles are symmetric and hardware is tight.
Weatherproofing and Seasonal Use
- Seal hardware: Use rubber washers and exterior caulk around hinges and latch to prevent leaks.
- UV protection: Paint non-food-contact exterior with UV-stable paint to extend barrel life.
- Winter composting: Wrap with removable insulation (old moving blanket under a tarp). Feed smaller, more frequent batches of finely chopped material.
Pest-Proofing and Odor Control
- Tight door seal: Maintain weatherstripping; keep latch snug.
- Mesh-backed vents: Prevent flies and wasps from nesting inside.
- Cover fresh greens: Always bury kitchen scraps under a layer of browns.
- Site selection: Place on level ground away from overhanging branches that might drop seeds or sap.
Upgrades and Variations
- Dual-chamber barrel: Install a divider plate and a second door; rotate between active and finishing sides.
- Crank and gear: Add a side-mounted crank with a sprocket/chain for heavy batches.
- Compost thermometer port: A grommeted hole to insert a 12–18” thermometer without opening the door.
- Aeration fins: Larger or curved baffles speed breakdown of fibrous yard waste.
Cost Breakdown and Sourcing
- Barrel: $15–$60 (farm supply, restaurant suppliers, online classifieds)
- Axle and bearings: $20–$60 (hardware stores, industrial supply)
- Lumber/steel: $25–$80 (depends on stock on hand)
- Hardware and sealants: $15–$40
- Optional upgrades: $10–$40 (handles, gasket, mesh)
Repurposing materials can drop the cost dramatically. Many DIYers complete a robust plastic barrel composter for under $100 using reclaimed lumber and a salvaged pipe.
Environmental Impact and Payback
- Waste diversion: A household can divert 200–500 lbs (90–225 kg) of organic waste annually.
- Soil health: Finished compost improves structure, water retention, and microbial diversity.
- Fertilizer savings: Home compost reduces or eliminates synthetic fertilizer needs for many gardens.
Frequently Asked Questions
Q: How long until I get finished compost?
A: In warm weather with a good greens/browns balance and regular tumbling, expect 4–8 weeks. In cool seasons, 8–12+ weeks.
Q: Should I drill more vents if it smells?
A: First add browns and increase tumbling. If odors persist, add a few more small vents near the top side.
Q: Do I need two bins?
A: One works, but two enable continuous composting: one fills while the other finishes.
Q: Can I use a blue or white drum?
A: Color doesn’t matter much, though darker warms faster. Prior contents matter most—choose food-grade.
Q: Is this safe on a balcony?
A: Yes, if the frame is compact, the barrel is sealed, and weight is appropriate for your structure. Keep a small leachate tray beneath.
Pro Tips for Smooth Building
- Mark twice, drill once: Axle alignment is critical for smooth spinning.
- Use fender washers: They distribute load on plastic and prevent cracking.
- Round door corners: Sharp angles concentrate stress; rounded cuts last longer.
- Balance matters: Space baffles, handles, and the door symmetrically around the barrel.
Putting It All Together
By now, you’ve seen exactly how to make a composter from plastic barrels that’s durable, easy to spin, and tuned for quick decomposition. The combination of a centered axle on bearings, abundant venting with insect screens, a gasketed access door, and internal baffles transforms a common plastic drum into a high-performance compost tumbler. Once built, the system rewards a consistent routine: load with the right mix, keep moisture in the sweet spot, and rotate several times a week.
Sample Build Recipe (Printable Checklist)
- Clean 55-gallon food-grade HDPE barrel
- Cut 12”x18” door, round corners; hinge + latch with gasket
- Drill 18–24 vents (1–1.5”), add interior mesh
- Drill 3–4 drains (3/8”); optional bulkhead fitting
- Install through-axle (3/4”–1”) with fender washers and rubber grommets
- Add 2–3 internal baffles (PVC/wood) equally spaced
- Mount axle to pillow block bearings on braced A-frame stand
- Add 2–4 exterior handles; paint/seal frame
- Spin test with dry leaves; adjust balance
Responsible Sourcing and Safety
- Verify prior contents: Only use barrels certified for food contact or known to have held food-safe materials.
- Cut carefully: Wear eye protection and gloves; support curved surfaces when drilling.
- Weather-safe placement: Level ground, good drainage, and access for tumbling and harvest.
Conclusion
With simple tools and a weekend of effort, you can convert a reclaimed drum into a tidy, efficient rotating compost bin that turns everyday scraps into garden gold. You’ve now seen, step by step, how to make a composter from plastic barrels that stands up to the elements, resists pests, and produces finished compost in weeks rather than months. Build it once, use it for years, and enjoy healthier soil, fewer trips to the landfill, and a greener home landscape.
Bonus: Quick Reference for Best Results
- Ratio: 2 parts browns : 1 part greens (by volume)
- Moisture: Damp like a wrung sponge
- Turn: 5–10 spins, 3–4 times per week
- Fill level: 60–80% of capacity
- Finish time: 4–8 weeks in warm weather
If you’re eager to keep momentum, scale this design into a dual-chamber plastic barrel composter or add a crank to make turning effortless. Either way, you’re now equipped with the knowledge and confidence to turn a simple drum into steady batches of black gold, season after season.
Note: This guide naturally incorporates practical steps on how to make a composter from plastic barrels along with related techniques for a DIY rotating compost tumbler, ensuring both a successful build and thriving compost biology.