You can renovate with confidence when you follow a structured plan, not random guesses. This definitive guide takes you from high-level vision to move-in readiness with a practical, field-tested roadmap you can trust. Whether you are updating one room or transforming an entire property, the approach below turns complex decisions into simple, sequential actions. Think of it as your home renovation step by step blueprint, blending design thinking, smart budgeting, diligent scheduling, and tight quality control so you get a beautiful outcome without chaos.
Start With Vision: Define What Success Looks Like
Before you compare tiles or pick paint, define exactly why you are renovating and what will make the project a success. Good preparation here reduces change orders later, speeds up decisions, and anchors every dollar you spend to clear outcomes. This is the first and most important move in any home renovation step by step plan.
Clarify Goals and Nonnegotiables
Set a few crisp, outcome-based goals supported by nonnegotiables. Goals keep you focused; nonnegotiables defend what matters most when trade-offs appear.
- Function first: More storage, better flow, safer stairs, more natural light.
- Experience: Quieter bedrooms, a cook-friendly kitchen, a spa-like bath.
- Nonnegotiables: Keep original floors, retain a mature tree, finish before a key life event.
Document these on a single page you will revisit at every decision point, part of a disciplined home renovation step by step framework.
Define Scope, Zones, and Phasing
Scope is simply what is included and what is not. Break the house into logical zones, then map work to those zones. Decide if you will phase construction or do it all at once. Clear scope yields accurate bids and calmer schedules.
- Whole home vs selective rooms: Kitchen, baths, flooring, windows, exterior envelope.
- Cosmetic vs structural: Paint and fixtures or walls moved, beams added, systems upgraded.
- Phasing: Primary suite first, kitchen later. Phasing can protect cash flow and sanity.
Write a plain-language scope narrative before drawings. That narrative evolves into your scope of work and aligns with your home renovation step by step planning.
Collect Inspiration and Constraints
Gather images, finishes, and features you love, but pair each with a constraint like budget or space. Inspiration without boundaries causes rework. Constraints create clarity and momentum within a home renovation step by step roadmap.
- Save 15 to 30 images max that represent overall vibe, not just isolated details.
- Note why each image works and what you would change.
- List site constraints like load-bearing walls, low ceilings, tricky plumbing runs.
Budget With Foresight, Not Hope
Budgets collapse when they ignore full scope, taxes, logistics, and unknowns. Build from the ground up and protect yourself with contingency. Budgeting this way supports a predictable home renovation step by step process.
Know Typical Cost Ranges and Drivers
Costs vary by region, labor market, and finish level, but patterns remain consistent. Kitchens and baths cost more per square foot due to plumbing, electrical, cabinets, and tile. Structure, systems, and custom work also drive costs. Factor demolition, disposal, permits, design fees, shipping, storage, and temporary living as you plan your home renovation step by step budget.
- Allowances: Create realistic allowances for tile, slabs, lighting, plumbing, appliances.
- Lead items: Windows, custom cabinets, specialty lighting often carry longer lead times and higher costs.
- Tax and freight: Remember sales tax and freight for heavy or fragile items.
Pick a Financing Method
Decide early how you will fund the work. Common options include cash, home equity line of credit, cash-out refinance, renovation loan, or staged savings. Confirm timelines and draw processes so payments do not slow the job.
Set a Real Contingency
Older homes hide surprises. Even newer homes produce changes. Build a contingency of 10 to 20 percent of construction costs. Keep this fund for unknowns and schedule recovery. A meaningful contingency is central to any home renovation step by step plan.
Be Strategic About Saving
Save money through scope clarity, not corner-cutting. Value engineering means redesigning to meet the same intent more efficiently. It does not mean using unreliable materials or skipping critical waterproofing. Smart trade-offs like standard cabinet sizes or simpler tile patterns keep your home renovation step by step project on budget without lowering quality where it counts.
Assemble the Right Team
Even experienced DIYers benefit from professional partners. A competent team manages risks, code, and complexity. The earlier you add the right pros, the smoother your home renovation step by step journey will be.
Choose Your Delivery Model
- Design-build: One firm handles design and construction for speed and coordination.
- Design-bid-build: Hire a designer or architect, bid to multiple contractors, then build.
- Owner-builder: You act as general contractor. Only advisable with deep construction knowledge and time.
Vet Contractors and Designers
Look for licenses, insurance, relevant project experience, and transparent communication. Review portfolios, request references you can call, and visit an active job site to see cleanliness and safety. Strong references are a cornerstone of your home renovation step by step risk management.
Lock Scope of Work and Contract
Build a clear scope of work with itemized inclusions, exclusions, and assumptions. Align on a schedule of values, payment milestones tied to progress, change order process, and dispute resolution. This documentation anchors your home renovation step by step execution.
Develop the Design
Design is where you reconcile vision, budget, and buildability. Move from concepts to measurable plans that a crew can build. Robust design reduces change orders, keeps bids apples to apples, and supports a smooth home renovation step by step rollout.
Measure and Model
Begin with accurate as-built measurements. If walls move or structure changes, bring in engineering. Use scaled plans and 3D visuals, even simple ones, to understand space, sightlines, and storage. Iterate on layout before you finalize finishes.
Specify Products and Systems
Create a specification book listing brands, models, finishes, and installation notes for every component. Include doors, windows, flooring, tile layout, grout color, paint codes, plumbing and lighting fixtures, hardware, appliances, mechanical equipment, and smart home prewire. Clear specs are vital to a home renovation step by step procurement plan.
Value Engineer With Intent
When costs come in high, adjust with intent rather than random cuts. Swap to a standard cabinet line but keep solid plywood boxes. Simplify tile layouts but preserve waterproofing standards. Protect life safety, building envelope, and mechanical performance first.
Permits, Approvals, and Insurance
Permits protect you legally, support resale value, and verify safety. Skipping them can derail timelines and create expensive fixes. Navigating approvals deliberately is a critical stage in any home renovation step by step timeline.
Understand Permit Scope
Work that alters structure, plumbing, electrical, mechanical, or egress usually needs a permit. So do window changes, additions, and many exterior updates. Coordinate drawings, engineering, site plans, energy compliance, and any special forms your jurisdiction requires.
Account for HOA or Historic Reviews
If a homeowners association or preservation board oversees your property, submit design materials early. Allow for review cycles in your schedule.
Check Insurance and Safety Requirements
Verify contractor liability and workers compensation insurance. Ask for additional insured certificates. For older homes, plan for lead-safe practices or asbestos abatement when needed.
Preconstruction Logistics and Procurement
Great jobs are won before the first wall comes down. Ordering, storing, and staging in advance prevents costly gaps. This is the operational core of a reliable home renovation step by step plan.
Order Long Lead Items
Windows, doors, custom cabinets, specialty fixtures, and appliances can take weeks or months. Order them as soon as drawings are approved. Track estimated ship dates and build your schedule around delivery realities, all within your home renovation step by step checklist.
Plan Temporary Living and Site Protection
Decide whether you will live on site or relocate. Set up dust containment, floor protection, negative air, and daily cleanup rules. Label zones for crew, tools, and material drop-off. Clear logistics are a hallmark of any strong home renovation step by step approach.
Schedule, Sequencing, and Communications
Establish a weekly meeting rhythm and a shared calendar that includes inspections, material arrivals, and milestones. Define who approves field decisions and within what time frame. Timely answers keep crews moving.
Demolition and Structural Prep
Demolition launches visible progress but also reveals hidden conditions. Proceed methodically, protect what stays, and stay ready to adapt. Managing this phase tightly supports a predictable home renovation step by step cadence.
Protect and Salvage
Cover floors and fixtures that remain. Salvage doors, trim, and hardware for reuse when possible. Responsible demo saves money and character.
Expect Surprises
Plan for hidden junction boxes, out-of-plumb framing, or undersized joists. Use contingency funds wisely and document every discovery.
Structural Work and Framing
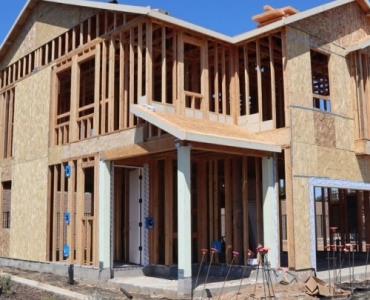
Install beams, headers, and supports according to engineering. Frame new walls, fur out uneven surfaces, and set rough openings for windows and doors. Solid structure is the backbone of a safe home renovation step by step build.
Rough-In and Systems Integration
Behind the walls is where your home truly becomes comfortable and efficient. Coordinate trades to avoid conflicts and rework. This step is central to a high-performing home renovation step by step schedule.
Plumbing, Electrical, and HVAC
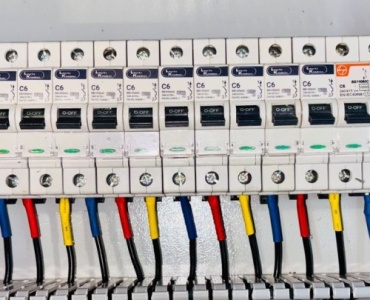
Run supply and waste lines, set shower valves at correct heights, and confirm venting paths. Pull circuits, plan switching and lighting zones, and run low-voltage for data or speakers. Route ducts, verify returns, and size equipment for comfort and code. Photograph every wall before closing so you can find studs and lines later.
Windows, Doors, and Insulation
Install new units plumb, level, and flashed correctly. Air sealing and insulation matter for comfort and energy costs. Use the right product for each zone and climate. Proper envelope work is foundational to any home renovation step by step upgrade.
Quality Gate Before Close-In
Walk through with your designer or contractor to confirm heights, locations, and blocking for future items like towel bars or heavy shelving. Correct now, not after drywall goes up.
Inspections and Quality Checks
Schedule required inspections at rough-in and final stages. Passing on the first visit keeps momentum. Organized documentation and quick responses mark a disciplined home renovation step by step project.
What Inspectors Look For
Code compliance, proper clearances, correct wire gauges, correct pipe slopes, smoke and carbon monoxide detectors, egress, and properly sized circuits. Meet or exceed standards to avoid delays.
Owner Quality Assurance
Create your own punch list at each stage. Test outlets, verify slopes in wet areas, check vent hood ducting path, and measure door rough openings. Partner with your team to resolve issues early.
Close-In: Drywall, Substrates, and Floors
Once the bones and brains are in place and approved, you close walls and prepare surfaces. Getting substrates right makes finishes last. This is a precise stage in your home renovation step by step sequence.
Drywall and Waterproofing
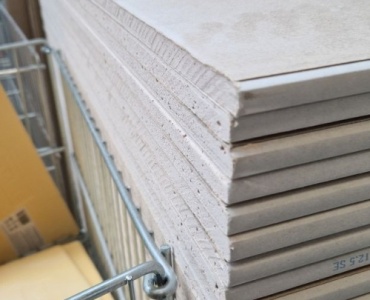
Hang, tape, and sand drywall with attention to light angles. In wet areas, use cement board or approved waterproof systems and detail corners and niches carefully. Quality waterproofing prevents expensive callbacks.
Floor Prep
Level subfloors, test moisture, and install underlayments per manufacturer specs. Good prep ensures long life for hardwood, tile, or luxury vinyl. Floor prep is a small line item that protects a large investment in your home renovation step by step plan.
Finishes and Millwork
Now the character emerges. Finishes require patience, dust control, and sequencing discipline. Keep a clean site so coatings and surfaces cure properly. This visible stage is where your home renovation step by step journey becomes tangible.
Cabinets, Trim, and Built-Ins
Install cabinets plumb and level. Scribe panels, notch for outlets, and provide ventilation clearances. Set trim tight with crisp reveals and consistent caulk lines.
Tile and Countertops
Dry-lay tile to confirm pattern and alignment. Maintain consistent grout joints. Template countertops after cabinets are secure, then confirm overhangs and seam placement. Protect these surfaces immediately after install.
Paint and Wallcoverings
Prime and paint with adequate cure time between coats. Label leftover paint by room and finish. For wallpaper, control humidity and use the correct adhesive for the material.
Fixtures, Appliances, and System Start-Up
Final connections and commissioning bring the space to life. Precision here prevents leaks, tripped breakers, and warranty headaches. Careful commissioning is essential to any home renovation step by step wrap-up.
Set Fixtures and Appliances
Install lighting, set sinks and faucets, mount accessories with proper blocking, and bring in appliances. Verify clearances for doors and drawers and test every function.
Commission HVAC and Smart Systems
Balance airflow, verify refrigerant charge, and confirm thermostat programming. Connect smart devices, label panels, and back up settings. Proper start-up protects warranties and comfort.
Final Inspections, Punch List, and Closeout
As construction winds down, tighten documentation and detail. Aim to pass final inspections on the first try, then methodically close open items. This disciplined finish is the hallmark of a successful home renovation step by step effort.
Official Sign-Off and Documentation
Secure final approvals from your jurisdiction. Collect manuals, warranties, paint codes, and care guides. Request lien releases and as-built drawings where applicable.
Create and Burn Down the Punch List
Walk room by room in good daylight. Note scuffs, touch-ups, misaligned doors, missing caps, and squeaks. Track items in a shared list, assign owners, and set realistic due dates. Close it out before move-in if possible.
Move-In Readiness and Styling
Clean deeply, style intentionally, and protect new surfaces during furniture delivery. This last mile deserves care. A thoughtful arrival plan is the satisfying end of your home renovation step by step journey.
Deep Clean and Protect
Remove dust from ducts, wipe every surface, and polish fixtures. Use floor runners, sliders, and corner guards on move day. Install felt pads under furniture.
Furnish, Light, and Layer
Place large pieces first, then lighting, rugs, art, and accessories. Let the space breathe. Make a short list of missing items and fill them over time rather than rushing.
Post-Renovation Care and Warranty
Great results last when you maintain them. Schedule seasonal tasks, monitor humidity, and track warranties. Thoughtful upkeep completes the home renovation step by step cycle and preserves value.
Maintenance Calendar
- Check caulk and grout, clean drains and traps.
- Replace HVAC filters and vacuum returns.
- Test GFCI and AFCI breakers and smoke detectors.
- Seal stone and maintain exterior envelope.
Warranty and Records
Set calendar reminders for warranty deadlines. Keep receipts, serial numbers, and a photo record of rough-ins. Update insurance coverage for your improved home.
A Practical Timeline You Can Adapt
Every schedule depends on scope, approvals, and lead times, but a solid template helps you plan. Use the following as a baseline and refine with your team to suit your home renovation step by step timeline.
Sample Kitchen Schedule
- Weeks 1 to 2: Final design, order cabinets and appliances.
- Weeks 3 to 4: Permits, site protection, demolition.
- Weeks 5 to 7: Rough plumbing, electrical, HVAC, inspections.
- Weeks 8 to 9: Drywall, floor prep, primer.
- Weeks 10 to 11: Cabinets, template counters, tile.
- Weeks 12 to 13: Counters, appliances, lighting, plumbing trims.
- Week 14: Paint, hardware, punch list, final inspection.
Adjust for custom mills or specialty stone to keep your home renovation step by step schedule realistic.
Sample Whole-Home Schedule
- Month 1: Design lock, permits submitted, long leads ordered.
- Month 2: Demo and structural, windows and doors.
- Months 3 to 4: Rough-ins and inspections, insulation and close-in.
- Months 5 to 6: Finishes, cabinets, tile, paint.
- Month 7: Fixtures, commissioning, punch, final sign-offs.
Budget Template and Allowances
A simple, transparent budget structure prevents surprises and guides decisions. Tie every line to scope and a person responsible. Use this model to strengthen your home renovation step by step budgeting.
- Design fees and surveys
- Permitting and plan check
- Demolition and disposal
- Structural and framing
- Plumbing rough and trims
- Electrical rough and trims
- HVAC and ventilation
- Windows and doors
- Insulation and drywall
- Flooring prep and finish
- Cabinets and countertops
- Tile and stone
- Paint and wallcoverings
- Lighting fixtures and devices
- Plumbing fixtures and accessories
- Appliances and venting
- Smart home and low voltage
- Site protection and cleaning
- Contingency and escalation
Common Pitfalls and How to Avoid Them
Forewarned is forearmed. Avoid these traps with upfront planning, clear documentation, and proactive communication. These guardrails keep your home renovation step by step plan steady.
- Scope creep: Lock your scope before bidding and use a change order process.
- Unrealistic allowances: Base allowances on real products you would actually buy.
- Ignoring lead times: Order long-lead items early to protect the schedule.
- Weak waterproofing: Never skimp on membranes, flashing, and slopes.
- Permit shortcuts: Follow the rules; it pays off at resale and in safety.
- Poor sequencing: Tile before painting is smart; rushing paint first invites damage.
Room-by-Room Tips
Kitchen
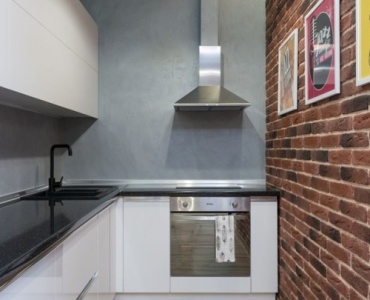
Prioritize workflow triangles, durable countertops, proper venting to the exterior, and ample task lighting. Leave room for trash and recycling. A precise kitchen plan accelerates your home renovation step by step cadence.
Bathrooms
Set shower valves at comfortable heights, slope pans accurately, and place niches where water will not pool. Use exhaust fans ducted outside with timers or humidity sensors.
Living Spaces and Bedrooms
Orient furniture around natural light and views. Prewire for shades and data. Consider acoustic treatments in multiuse spaces.
Exteriors
Address drainage, flashing, and ventilation. Good envelopes protect interiors and energy bills.
Sustainability and Healthy Home Choices
Build a space that is good for you and the planet. Small decisions add up across a home renovation step by step journey.
- Prioritize air sealing, insulation, and right-sized HVAC.
- Choose low or zero VOC finishes and adhesives.
- Use LED lighting and smart controls.
- Consider reclaimed or FSC-certified wood.
- Explore heat pump water heaters or induction cooking.
Communication Rhythm That Works
Teams succeed when they talk early and often. A clean cadence underpins every effective home renovation step by step plan.
- Weekly site meeting with action items and owners.
- Daily log for progress, deliveries, and issues.
- Two-week lookahead to reduce surprises.
- Single source of truth for drawings and specs.
Quality Standards You Can See and Feel
Define done with photos and mockups. Use sample boards for grout, caulk, and paint sheens. Tracking these details strengthens your home renovation step by step execution.
- Mock up tile edges and transitions.
- Approve cabinet door gaps and reveals.
- Confirm lighting color temperature by room.
- Decide where to stop and start accent paints or wallpapers.
Frequently Asked Questions
How long will my project take
Timelines depend on scope, materials, approvals, and crew capacity. A single kitchen can run 10 to 16 weeks once demo starts, while whole-home projects can span several months. Preordering long-lead items and locking decisions early shortens the path and supports your home renovation step by step schedule.
Do I need a permit
If you move walls or alter plumbing, electrical, or mechanical systems, you almost certainly do. When in doubt, ask your city or county. Permits protect you and future owners.
How do I compare contractor bids
Level the playing field with one scope, one set of drawings, and one spec list. Ask for a schedule of values. Clarify exclusions and assumptions so you can compare apples to apples.
How big should my contingency be
Plan 10 to 20 percent of hard construction costs. Use the higher end for older homes or design-heavy work with many custom elements.
Where can I save without regret
Reduce custom millwork where a standard size fits. Simplify tile layouts. Choose widely available fixtures. Never cut corners on waterproofing, structure, or safety.
What if I find a problem behind the walls
Pause, document, and evaluate options with your team. Use contingency funds and issue a formal change order to preserve clarity on cost and schedule.
Your Project, Your Playbook
Renovating a home is a big undertaking, but it does not need to be chaotic. Lead with vision, document scope, budget with margin, and respect sequencing. Communicate early, order smart, and hold quality gates. Follow this field-tested home renovation step by step roadmap and you will not only reach move-in day more smoothly, you will enjoy the space for years to come. Save this guide, share it with your team, and adapt it to your home. Then take a deep breath and start with the very next clear step.