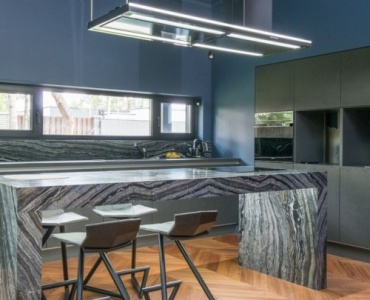
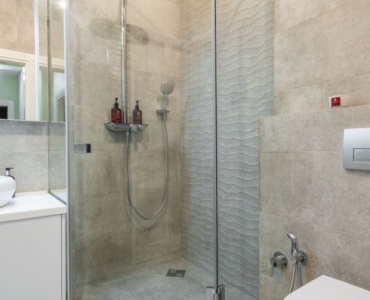
When the walls are already open, every wire, box, and breaker becomes easier—and cheaper—to reach. That is the sweet spot where a design vision and practical engineering meet. By coordinating construction and renovation and electrical system changes at the same time, you can move from demolition dust to elegant dimmers and smart controls without backtracking or budget creep. This comprehensive guide walks you through the planning, products, and processes that make electrical modernization a natural extension of your remodel, not a stressful add-on.
Why Pair Remodeling With Electrical Upgrades
For many homeowners, the biggest regret after a remodel is not planning electrical improvements earlier. Once finishes go in, adding a new circuit, moving a light, or running data cable means more dust and higher costs. With proactive coordination, you gain:
- Lower labor costs because access is open during framing and drywall.
- Cleaner aesthetics by hiding wires, conduits, and junction boxes.
- Better performance from optimized circuit layouts, panel capacity, and lighting design.
- Future-ready infrastructure with smart switches, CAT6A, and spare conduits for later tech.
- Code compliance and safety through timely permits, inspections, AFCI/GFCI protection, and proper grounding.
In short, thoughtful planning aligns your aesthetic goals with the pragmatic realities of renovation and electrical system changes. The result is a home that looks better, works smarter, and costs less to operate.
Set a Strategy: Scope, Budget, and Timeline
Define the Scope
Start by deciding what will change and what will stay. Consider:
- Lighting layers: ambient, task, and accent lighting by room.
- Circuit updates: dedicated circuits for appliances, home office, EV charger.
- Controls: dimmers, smart switches, occupancy sensors, scene controllers.
- Data and low-voltage: Ethernet, Wi-Fi access points, security, audio, thermostats.
- Service capacity: panel upgrades, subpanels, surge protection, load calculations.
Budget Realistically
Allocate funds for must-haves and nice-to-haves. A practical split might be:
- 50–60% essential electrical rough-in and finish (circuits, boxes, wiring, terminations).
- 15–25% smart controls, dimmers, and lighting fixtures.
- 10–15% networking and low-voltage systems (Ethernet, PoE, coax).
- 10–15% contingency for change orders, surprises behind walls, and inspection notes.
This keeps renovation and electrical system changes aligned with financial boundaries while leaving room for value-adding tech.
Lock the Timeline
Electrical progress usually follows this order:
- Design and permits: finalize diagrams, circuits, and load calculations.
- Rough-in: run cables, set boxes, label circuits, and install low-voltage feeds.
- Inspection: verify code compliance before insulation and drywall.
- Finish: install devices, fixtures, dimmers, and smart controls; program scenes and test.
Synchronizing these steps with framing, plumbing, and HVAC avoids costly rework.
Audit the Existing System Before You Build
A thorough assessment uncovers constraints and opportunities:
- Service and panel: amperage rating (100A, 150A, 200A+), free breaker spaces, condition of bus bars.
- Circuit mapping: identify overloaded runs, long voltage-drop paths, and nuisance trips.
- Wiring type: copper vs. aluminum, presence of ground, old cloth or knob-and-tube.
- Device condition: worn receptacles, non-tamper-resistant outlets, outdated switches.
- Safety layers: AFCI in living areas, GFCI in wet zones, whole-home surge protection.
Document findings with photos and a spreadsheet. This becomes the foundation for well-planned renovation and electrical system changes.
Code and Safety Essentials (General Guidance)
Codes vary by jurisdiction. Always consult your local authority and a licensed electrician. Broadly, keep these in mind:
- AFCI: required in many habitable spaces to reduce arc-fault fire risk.
- GFCI: required near sinks, outdoors, garages, basements, and within specified distances of water.
- Grounding and bonding: ensure water and gas lines are bonded; add ground rods where required.
- Dedicated circuits: for appliances like microwaves, disposals, laundry, and EV chargers.
- Box fill: use correct box sizes for conductor count and device type.
- Smoke and CO detectors: interlinked, correctly located, and updated if expired.
- Tamper-resistant receptacles: required in many living areas for child safety.
These fundamentals shape every decision as you advance from demolition to dimmers.
Panels, Capacity, and Load Management
When to Upgrade the Panel
An electrical panel upgrade pays off when you add high-demand loads. Consider a service or panel change if you plan:
- Level 2 EV charging (typically 40–60A circuits).
- Electric range, induction cooktop, or double oven.
- Heat pump HVAC or electric tankless water heater.
- Workshop tools, sauna, hot tub, or large home office.
Have your electrician perform a load calculation. If the math is tight, a 200A main or a subpanel can future-proof your renovation and electrical system changes.
Smart Load Centers and Monitoring
Modern panels with integrated energy monitoring help you see consumption by circuit. Benefits include:
- Real-time usage to catch vampire loads.
- Automations that delay EV charging or water heating off-peak.
- Alerts for tripped breakers or unusual usage patterns.
Pair monitoring with a whole-home surge protector at the main panel for baseline equipment protection.
Lighting Design: From Dust to Dimmers
Layer the Light
Good lighting starts with a plan. For each room, define:
- Ambient: recessed cans or linear fixtures for general illumination.
- Task: under-cabinet lights, pendants over islands, vanity lights.
- Accent: wall-washers, toe-kick LEDs, art spots, cove lighting.
Choose high-CRI LEDs for color accuracy, and match color temperature by zone. Then choose controls.
Choosing Dimmers and Controls
Not all dimmers are equal. To avoid flicker and buzzing:
- Match dimmer type (ELV, MLV, TRIAC, 0–10V) to the driver in your LED fixtures.
- Size dimmers for total wattage, including inrush current.
- Consider smart dimmers that support scenes, schedules, and voice control.
Coordinate multi-way locations (3-way, 4-way) and ensure a neutral wire is available for many smart switches.
Scene Setting and Automation
With smart dimmers and switches, create liveable, one-tap experiences:
- Cooking: island pendants bright, under-cabinet mid, accent off.
- Movie: living room to 20%, sconces to 10%, blackout shades down.
- Entertain: kitchen and dining to 70%, accent lights on art to 50%.
This is where your renovation and electrical system changes translate into daily delight.
Smart Home Platforms and Interoperability
Pick an Ecosystem (and Keep It Flexible)
Whether you prefer Apple Home, Google Home, Amazon Alexa, or a dedicated hub, aim for:
- Matter and Thread readiness for long-term device compatibility.
- Local control options for privacy and reliability.
- Open APIs or bridges to integrate shades, sensors, HVAC, and audio.
Smart switches, dimmers, motion sensors, and thermostats are the front end of your renovation and electrical system changes. Treat them as a system, not stand-alone gadgets.
Low-Voltage and Networking: The Hidden Backbone
Structured Cabling
Plan a central low-voltage panel with home runs for:
- CAT6A Ethernet for work-from-home, media, and PoE devices.
- Coax for cable/satellite or OTA antennas.
- Speaker wire for built-in audio.
- Security cameras, doorbells, and contact sensors.
Run extra conduits to key areas for future upgrades—today’s foresight spares tomorrow’s drywall patches.
Wi-Fi and Access Points
Pre-wire ceiling locations for PoE Wi‑Fi 6 or Wi‑Fi 6E access points. A wired backhaul plus strategic AP placement beats any all-in-one router for coverage and speed.
AV and Home Theater Considerations
For media rooms:
- Route HDMI over conduit for serviceability and evolving standards.
- Place floor or wall boxes for power and data near seating.
- Isolate AV circuits to reduce noise and interference.
Kitchen and Bath: High-Impact Zones
Kitchen Essentials
Kitchens demand careful planning and are central to renovation and electrical system changes:
- Dedicated appliance circuits for refrigerator, microwave, dishwasher, disposal, and range.
- Small appliance circuits across countertop receptacles.
- Under-cabinet lighting on separate dimmable circuits for task and ambiance.
- Island outlets in pop-ups or side panels; consider USB-C receptacles.
Bathroom Must-Haves
- GFCI protection for outlets near sinks and tubs.
- Vanity lighting at face height for even illumination.
- Exhaust fans with humidity sensors and dedicated switches.
- Heated floors or towel warmers on timers or smart controls.
Safety Layers You Should Not Skip
AFCI and GFCI Where Required
Arc-fault and ground-fault protections are non-negotiable. They also influence how you design multi-wire branch circuits and share neutrals. Your electrician will set correct breakers or outlet devices to meet requirements.
Surge Protection
Combine whole-home surge protection at the panel with point-of-use protectors for sensitive electronics. This layered approach shields your investment in smart devices.
Detectors and Alarms
Install interlinked smoke and CO detectors per code, including in bedrooms, hallways, and each level. Consider hardwired with battery backup for reliability.
Energy Efficiency and Comfort
LEDs, Sensors, and Schedules
LED fixtures paired with:
- Occupancy sensors for closets, pantries, and garages.
- Daylight sensors for sunlit spaces.
- Schedules that adapt to sunrise/sunset.
These small automations lower bills and extend lamp life.
Smart Thermostats and Zoning
Use smart thermostats to coordinate HVAC with occupancy, window sensors, and shades. If you are reworking ducts or hydronic loops, discuss zoning for better comfort and control.
Electrification, Solar, and EV Readiness
If you plan to electrify:
- Pre-wire for EV charging with a 240V circuit and a suitable receptacle or hardwired EVSE.
- Reserve panel space and roof pathways for solar PV and battery storage.
- Consider a generator interlock or transfer switch for outages.
Building in pathways during your renovation and electrical system changes greatly reduces future costs.
Accessibility and Aging-in-Place Considerations
Design decisions today can extend independence tomorrow:
- Lower switch heights and higher outlets for wheelchair access.
- Large rocker switches and illuminated indicators for visibility.
- Voice control and simple scenes (All On, All Off) for convenience.
- Door sensors and notifications for safety.
Permits, Inspections, and Documentation
Permits are not red tape; they are protection. A permitted job gets second eyes on safety details:
- Permit scope should reflect all planned renovation and electrical system changes.
- Inspection timing: schedule rough-in and final with your GC and electrician.
- As-built documents: save circuit maps, photos of open walls, and device lists.
Documentation simplifies future service and home resale disclosures.
Hire the Right Pros
Licensed Electrician vs. DIY
Even if you are handy, electrical systems can be hazardous. Licensed electricians bring expertise in code, load balancing, and safe installation. Use DIY discretion for low-voltage tasks like Ethernet pulls if permitted.
Vetting and Contracts
- Get multiple bids with itemized labor and material costs.
- Verify license, insurance, and references.
- Define change order processes and response times.
- Require labeled panels and updated one-line diagrams on completion.
Future-Proofing Your Investment
Trends evolve. Protect flexibility by:
- Adding spare conduits from panel to attic/basement and key rooms.
- Leaving breaker spaces for upcoming loads.
- Choosing open-standard devices or platforms with proven integration.
- Labeling every cable and documenting terminations.
Well-executed renovation and electrical system changes should make tomorrow’s upgrades easier, not harder.
Room-by-Room Playbook
Living Room
- Recessed grid with dimmable zones for flexibility.
- Floor outlet near seating for lamps and chargers.
- Conduit for TV mount with hidden power and HDMI.
Bedrooms
- Three-way switches from entry and bedside.
- USB-C outlets near nightstands.
- Quiet ceiling fan on separate control.
Home Office
- Two or more Ethernet drops plus dedicated 20A circuit for equipment.
- Task lighting with low glare.
- Acoustic considerations and surge protection for sensitive gear.
Garage
- Bright, high-CRI LED strips for work surfaces.
- 240V circuit for EV or tools.
- GFCI outlets and motion-activated lighting.
Common Mistakes to Avoid
- Under-specifying the panel: add capacity for EVs, heat pumps, and future circuits.
- Ignoring neutral availability: many smart switches require a neutral wire.
- Mismatched dimmers and LEDs: verify driver compatibility to prevent flicker.
- Skipping prewire: run data and speaker wire now; wireless is not a cure-all.
- Neglecting labeling: unclear circuits slow down service and add costs later.
Mini Case Study: A Kitchen-Great Room Transformation
During a first-floor remodel, the homeowners aimed for a bright, social space that adapts from cooking to movie nights. The team coordinated renovation and electrical system changes as follows:
- Panel: added a 200A main with whole-home surge protection.
- Lighting: layered recessed, pendants, and toe-kick LEDs, each on smart dimmers.
- Controls: created scenes for Cook, Dine, Entertain, and Night.
- Kitchen circuits: dedicated feeds for refrigerator, microwave, dishwasher, and disposal.
- Networking: CAT6A home runs to the media console and office nook; PoE AP in the hallway ceiling.
- Safety: GFCI where required, and interlinked smoke/CO detectors on the floor.
The result: a versatile space with intuitive lighting and reliable connectivity—no drywall dust needed later.
Step-by-Step Checklist
- 1. Vision: define use cases, scenes, and future loads (EV, solar, office).
- 2. Audit: assess panel, circuits, wiring condition, and safety devices.
- 3. Design: draft circuits, lighting layers, device schedules, and low-voltage plan.
- 4. Budget: break out rough-in, fixtures, smart controls, and contingency.
- 5. Permits: submit plans and coordinate inspection milestones.
- 6. Rough-in: pull cables, set boxes, label everything; capture open-wall photos.
- 7. Inspection: fix punch items promptly.
- 8. Finish: install devices, program scenes, test dimming, and set schedules.
- 9. Document: update panel directory, store as-builts, and note device models.
- 10. Handover: train occupants on smart controls and maintenance.
Frequently Asked Questions
How do I know if I need a panel upgrade?
If your load calculation is close to the service rating, or you plan high-draw additions like EV charging or electric cooking, consider upgrading. Space for extra breakers and a modern bus with surge protection supports safe renovation and electrical system changes.
Can smart bulbs replace smart switches?
Smart bulbs are great for lamps and small rooms. Smart switches and dimmers, however, preserve wall control, work even when Wi‑Fi is down (with the right setup), and unify multi-bulb circuits—often the better choice for whole-home upgrades.
What should I prewire if I am unsure?
Run conduit to key walls and ceilings, add extra CAT6A to media centers and offices, and pull a spare cable alongside every critical run. Flexibility is an asset in any renovation and electrical system changes plan.
Are occupancy sensors worth it?
Yes, especially in low-dwell spaces like pantries, laundry rooms, hallways, garages, and kids’ baths. They reduce energy waste and add daily convenience.
How do I avoid LED flicker?
Match dimmer technology to the LED driver (ELV, MLV, TRIAC, or 0–10V), check manufacturer compatibility lists, and do a test install before buying 20 fixtures.
Glossary (Quick Reference)
- AFCI: Arc-Fault Circuit Interrupter—prevents fire from arcing faults.
- GFCI: Ground-Fault Circuit Interrupter—protects from shock in wet areas.
- Load calculation: math used to size service and panel capacity.
- PoE: Power over Ethernet—runs power and data on the same cable for APs and cameras.
- Scene: a preset group of lighting levels and device states.
Putting It All Together
When you time your renovation and electrical system changes with open walls and active trades, you reduce friction, uncover hidden potential, and set the stage for a home that is brighter, safer, and more efficient. From the first dust of demolition to the satisfying slide of a dimmer, each choice compounds value—today and for years to come.
Next Steps
- Walk your home and list target rooms and use cases.
- Request a load calculation and panel assessment from a licensed electrician.
- Draft a lighting and low-voltage map before drywall.
- Choose a smart platform and standardize on compatible dimmers and sensors.
Do this, and your remodel will not just look new—it will live new, with power, lighting, and controls that quietly elevate every day.