Dreaming of a fresh, spa-like retreat at home? Many homeowners start with inspiration boards and finishes, only to watch their timelines slip and budgets balloon. A Bathroom renovation without mistakes doesn’t rely on perfect circumstances; it’s built on clear goals, airtight planning, and disciplined execution. Below, you’ll find the 12 most common pitfalls—and the practical, professional steps to avoid each one—so your project stays on schedule, on budget, and on point.
What a Flawless Bathroom Makeover Really Means
A flawless remodel is not simply a room that looks great on day one. It’s one that is comfortable to use, easy to clean, and built to last in a wet, high-traffic environment. That requires durable materials, excellent moisture control, and a layout that supports daily routines. If your goal is a Bathroom renovation without mistakes, aim for a process that reduces uncertainty at every turn—from scope definition and budgeting to sequencing and final inspection.
Mistake 1: Skipping a Clear Vision and Scope
Starting without a precise vision invites endless changes. When the scope keeps shifting, costs climb, and schedules unravel. Inspiration images help, but they’re not a plan. You need a written scope that spells out what’s changing and what’s not, including fixtures, finishes, layout tweaks, storage, lighting, and ventilation.
How to Avoid It
- Define must-haves vs. nice-to-haves: Prioritize function (waterproofing, storage, task lighting) before aesthetics.
- Measure meticulously: Document wall-to-wall dimensions, ceiling height, door swings, and existing plumbing/electrical points.
- Create a scope sheet: List every component to be replaced or added, with model numbers and finish colors where possible.
Clarity at the start is your first defense in achieving a Bathroom renovation without mistakes.
Mistake 2: Underestimating the Budget and Contingency
Bathrooms pack complex systems into small spaces, so costs escalate quickly. Hidden rot, outdated wiring, or undersized ventilation can trigger change orders. Without a realistic budget, you may sacrifice quality or scramble for funds mid-build.
How to Avoid It
- Build a layered budget: Break costs into labor, materials, fixtures, permits, and cleanup. Itemize allowances for tile, vanity, faucets, and lighting.
- Include a 10–20% contingency: Older homes or layout changes may require 15–20%.
- Price the full system: Don’t forget valves, drains, waterproofing membranes, grout, sealants, and trim pieces.
Well-structured finances are essential for a Bathroom renovation without mistakes that stays within your means.
Mistake 3: Ignoring Layout, Flow, and Ergonomics
Cramped clearances, awkward door swings, and poorly placed fixtures make a beautiful space frustrating. The bathroom must fit users’ routines, mobility, and preferences. Good ergonomics also means safe transitions and easy maintenance.
How to Avoid It
- Mind clearances: Leave at least 30 inches in front of the vanity and toilet; maintain comfortable shower door swing or consider a sliding option.
- Plan the wet zone: Group shower and tub strategically to minimize plumbing runs and simplify waterproofing.
- Think accessibility: Consider comfort-height toilets, curb-less showers, wider doorways, and blocking for future grab bars.
Intentional layout decisions are the backbone of a Bathroom renovation without mistakes that feels effortless to use.
Mistake 4: Overlooking Waterproofing and Moisture Control
Moisture is relentless. Skipping proper membranes or relying on green board in wet zones invites mold, swollen subfloors, and expensive tear-outs. Showers, tub surrounds, and floor-to-wall junctions need robust defenses.
How to Avoid It
- Use a continuous waterproofing system: Choose sheet membranes or liquid-applied membranes for showers and niches, following manufacturer’s specs.
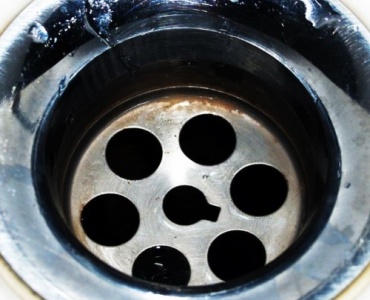
- Pre-slope and drains: Ensure correct slope to drain; use quality flanges and sealed penetrations.
- Protect outside corners and niches: Corners, benches, and niches are leak-prone—treat them meticulously.
Superior moisture management is nonnegotiable for a Bathroom renovation without mistakes that stands the test of time.
Mistake 5: Poor Ventilation Planning
Even perfect waterproofing fails if condensation runs rampant. An undersized or improperly ducted fan leads to peeling paint, fogged mirrors, and mold growth.
How to Avoid It
- Size the exhaust fan correctly: Use at least 1 CFM per square foot of floor area; larger rooms or steam showers often need more.
- Duct to the exterior: Never vent into attics or crawlspaces.
- Use timers or humidity sensors: Automate post-shower run time for better air exchange.
Strong ventilation strategy supports a Bathroom renovation without mistakes by controlling moisture where it starts.
Mistake 6: Treating Lighting as an Afterthought
Bathrooms need layered lighting: bright task illumination, ambient wash, and tasteful accent. One overhead fixture casts shadows and creates glare, undermining function and mood.
How to Avoid It
- Layer lighting: Combine recessed ambient lights, vanity sconces at eye level, and a shower-rated fixture.
- Choose the right color temperature: 2700–3000K for warmth, 90+ CRI for accurate skin tones at the mirror.
- Install dimmers: Shift from bright morning routines to spa-like evening ambiance.
Thoughtful illumination elevates everyday routines and anchors a Bathroom renovation without mistakes.
Mistake 7: Choosing Materials That Can’t Handle Bathrooms
Not all beautiful surfaces survive humidity and daily splashes. Porous stones, slippery tiles, or vanity finishes that swell with moisture become liabilities.
How to Avoid It
- Prioritize durability: Porcelain tile outperforms many stones; look for slip resistance (especially for floors) and easy-clean textures.
- Seal intelligently: If using natural stone, understand sealing schedules and maintenance.
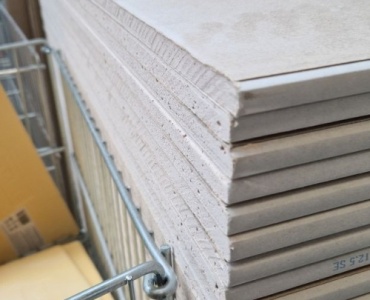
- Specify moisture-resistant substrates: Cement board or foam board in wet areas; avoid standard drywall in showers.
Right-sized specs are central to a Bathroom renovation without mistakes that keeps its good looks with minimal upkeep.
Mistake 8: DIY Beyond Your Skill Level (and Permits)
DIY can save money—but plumbing, electrical, and code compliance carry real risk. Improper wiring or hidden leaks can void insurance, threaten safety, and tank resale value.
How to Avoid It
- Know your limits: Demolition, painting, and simple installs may be DIY-friendly; sub out complex trades.
- Pull permits when required: Electrical, structural, and major plumbing often need inspections.
- Follow manufacturer instructions: Membranes, valves, and shower systems require exact steps to maintain warranties.
A smart mix of pro help and DIY effort is a strong path to a Bathroom renovation without mistakes.
Mistake 9: Neglecting Plumbing and Electrical Upgrades
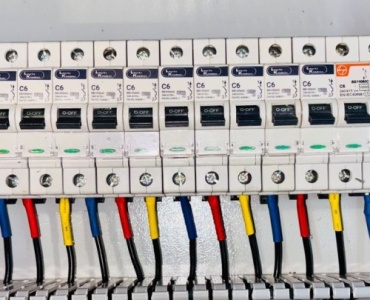
Keeping old supply lines, traps, or undersized circuits to save a few dollars can backfire. Modern bathrooms demand GFCI/AFCI protection, adequate circuits, and pressure-balanced or thermostatic valves.
How to Avoid It
- Replace tired components: Update shutoff valves, traps, and supply lines; consider upsizing for multi-head showers.
- Meet code: Install GFCI outlets, proper bathroom circuits, and adequate lighting loads.
- Future-proof: Add blocking for accessories, prepare power for smart mirrors, bidets, or toe-kick heaters.
Proactive infrastructure upgrades contribute to a Bathroom renovation without mistakes that works beautifully behind the walls.
Mistake 10: Storage, Niches, and Daily Use Oversights
Stunning bathrooms can feel cluttered within a week if storage is an afterthought. Niches placed at the wrong height collect water; vanities without drawers encourage countertop piles.
How to Avoid It
- Map your routines: Where do toothbrushes, hair tools, and towels live? Design dedicated homes for daily items.
- Right-size the vanity: Mix drawers and doors; use organizers, pullouts, and tilt-out trays.
- Plan niches and ledges: Slope shelves slightly; set heights to avoid bending or shoulder-level splashes.
Ergonomic storage is a defining trait of a Bathroom renovation without mistakes that stays tidy and calm.
Mistake 11: Inflexible Schedule and Lack of Sequencing
Poor sequencing creates rework and delays. For example, installing tile before rough inspections or forgetting lead times on custom glass can stall the entire job.
How to Avoid It
- Create a build sequence: Demolition, rough-ins, inspections, waterproofing, tile, finishes, glass, punch list.
- Order long-lead items early: Custom vanities, stone tops, and shower glass often require 4–8 weeks.
- Protect work in progress: Cover finished floors, cap drains, and maintain a clean site daily.
Disciplined planning is what turns chaos into a Bathroom renovation without mistakes.
Mistake 12: Weak Contractor Vetting and Communication
Even quality materials and solid plans can fail in the wrong hands. Misaligned expectations, unclear contracts, and minimal oversight erode trust and outcomes.
How to Avoid It
- Vet thoroughly: Check licenses, insurance, references, and recent, relevant bathroom projects.
- Use a detailed contract: Define scope, payment schedule, change-order process, timeline, and warranty terms.
- Communicate weekly: Hold brief check-ins, document decisions in writing, and track a punch list.
Strong partnerships and clear documentation are the human side of a Bathroom renovation without mistakes.
Bonus: Sustainability and Future-Proofing
A bathroom built to last wastes fewer resources over time. Sustainable choices can cut utility bills, improve indoor air quality, and boost resale value.
What to Consider
- Water-saving fixtures: EPA WaterSense faucets and showerheads, dual-flush toilets.
- Efficient ventilation: Quiet, energy-smart fans that actually get used (timers help).
- Durable finishes: Long-wearing porcelain tile, high-quality valves, and easy-clean grout.
- Accessibility now or later: Curbless showers, blocking for grab bars, and wider doorways protect long-term usability.
Resilience is a cornerstone of a Bathroom renovation without mistakes that performs for decades.
Step-by-Step Checklist for a Bathroom renovation without mistakes
Use this practical sequence to guide decisions and keep momentum steady from day one to done.
- 1. Define outcomes: Clarify function, style, budget, and timeline. Collect 3–5 inspiration images and note the why behind each.
- 2. Measure and assess: Document dimensions, study existing plumbing/electrical, and check for moisture or structural issues.
- 3. Build the scope: Itemize every change. Select preliminary fixtures, finishes, and ventilation strategy.
- 4. Budget with contingency: Price labor, materials, permits, and cleanup. Set a 10–20% reserve.
- 5. Vet contractors: Get three comparable bids with line items. Verify credentials and references.
- 6. Finalize design details: Confirm tile patterns, grout color, lighting layout, storage inserts, and shower glass style.
- 7. Order long-lead items: Vanity, countertop, custom glass, special-order tile, and fixtures.
- 8. Schedule and sequence: Map demo through punch list; align inspections with rough-in and final.
- 9. Protect and prepare: Set up dust control, floor protection, and staging for materials.
- 10. Execute rough-ins: Plumbing and electrical upgrades; check placement with on-site mockups.
- 11. Waterproof and test: Apply membranes, flood-test pans, and seal penetrations.
- 12. Tile and finishes: Set tile with proper lippage control; grout, seal if needed, and install fixtures.
- 13. Ventilation and glass: Install exhaust fans and custom shower glass after measurements are confirmed.
- 14. Clean, test, and verify: Run all fixtures, check slopes, verify GFCI, and ensure proper fan performance.
- 15. Punch list and warranty: Document small fixes, get close-out documents, and store care instructions.
Follow this roadmap, and you’re far more likely to achieve a Bathroom renovation without mistakes and a calm, predictable build.
Design and Material Decisions That Pay Off
Small choices add up to big daily wins. Dial in each layer so your bathroom looks cohesive and functions beautifully.
Tiles and Grout
- Size and pattern: Large-format tiles minimize grout lines; mosaics add grip in showers.
- Grout type: Consider epoxy grout for stain resistance in wet zones.
- Transitions: Use metal trims for clean edges; plan thresholds for curbless showers.
Fixtures and Fittings
- Valves and cartridges: Invest in reputable brands; internal quality matters more than brand badges.
- Pressure balance vs. thermostatic: Thermostatic valves offer stable temps—ideal for multi-head showers.
- Finishes: Brushed or matte hides water spots better than polished.
Vanity and Countertops
- Moisture resistance: Furniture-grade plywood boxes outperform particleboard.
- Counter choices: Quartz and porcelain slabs = durable, low maintenance.
- Sink style: Undermounts ease cleanup; integrated sinks reduce seams.
These upgrades support a Bathroom renovation without mistakes by combining practicality with polish.
Project Management Essentials
Even the best design needs disciplined oversight. Keep decisions documented, time tracked, and quality verified.
Documentation
- Spec binder or cloud folder: Store cut sheets, finish schedules, and installation guides.
- Change orders: Require written approval for scope, cost, and time impacts.
- Photo logs: Capture behind-the-wall progress for future reference.
Quality Control
- Mockups: Dry-fit layouts for tile, lighting, and hardware.
- Level and slope checks: Confirm shower pan slope and tile lippage standards.
- Function tests: Run every valve, drain, and fan before sign-off.
Structured oversight maintains momentum toward a Bathroom renovation without mistakes from start to finish.
Frequently Asked Questions
How long does a typical bathroom remodel take?
Small updates might take 2–3 weeks; full gut remodels often run 5–8 weeks, depending on scope, inspections, and lead times. Strong planning shortens timelines and supports a Bathroom renovation without mistakes.
What’s a realistic budget?
Costs vary by region and quality, but many full renovations land between moderate and premium price points. Include a 10–20% contingency. Investing in infrastructure and waterproofing is critical for a Bathroom renovation without mistakes that lasts.
Is curbless worth it?
Curbless showers enhance accessibility and visual space. They require precise slope and waterproofing; when executed correctly, they’re a standout feature in a Bathroom renovation without mistakes.
Do I really need permits?
Often yes for electrical, plumbing, or structural changes. Permits help ensure code compliance and protect resale value.
Common Pitfalls by Project Phase
Planning
- Unclear scope, missing measurements, and underestimating cost or time.
- Skipping ventilation and waterproofing specs.
Procurement
- Ordering tile without overage (10–15% extra), mismatched dye lots.
- Late orders on custom glass or vanity tops.
Execution
- Inadequate substrate prep, poor slope, rushed grout or sealants.
- Misplaced lighting or vanity heights causing daily annoyance.
Awareness of phase-specific risks is a quiet superpower for a Bathroom renovation without mistakes.
Smart Upgrades That Punch Above Their Weight
- Heated floors: Radiant comfort and faster drying improve daily experience.
- Wall-hung toilet or vanity: Easier cleaning and a lighter visual footprint.
- Shower niches or shelves: Built-in storage that blends utility with design.
- Anti-fog mirror with lighting: Clear reflection and balanced illumination.
These choices add tangible comfort and resilience to a Bathroom renovation without mistakes without ballooning costs.
Final Thoughts
Your bathroom is where days begin and end. Treat it like a system—one that must manage water, safety, comfort, and beauty in a tight footprint. With a clear scope, realistic budget, airtight waterproofing, and professional sequencing, a Bathroom renovation without mistakes is not only possible; it’s predictable. Focus on the fundamentals, document decisions, and partner with pros where it counts.
Do the planning now, and future you will thank you every single morning.