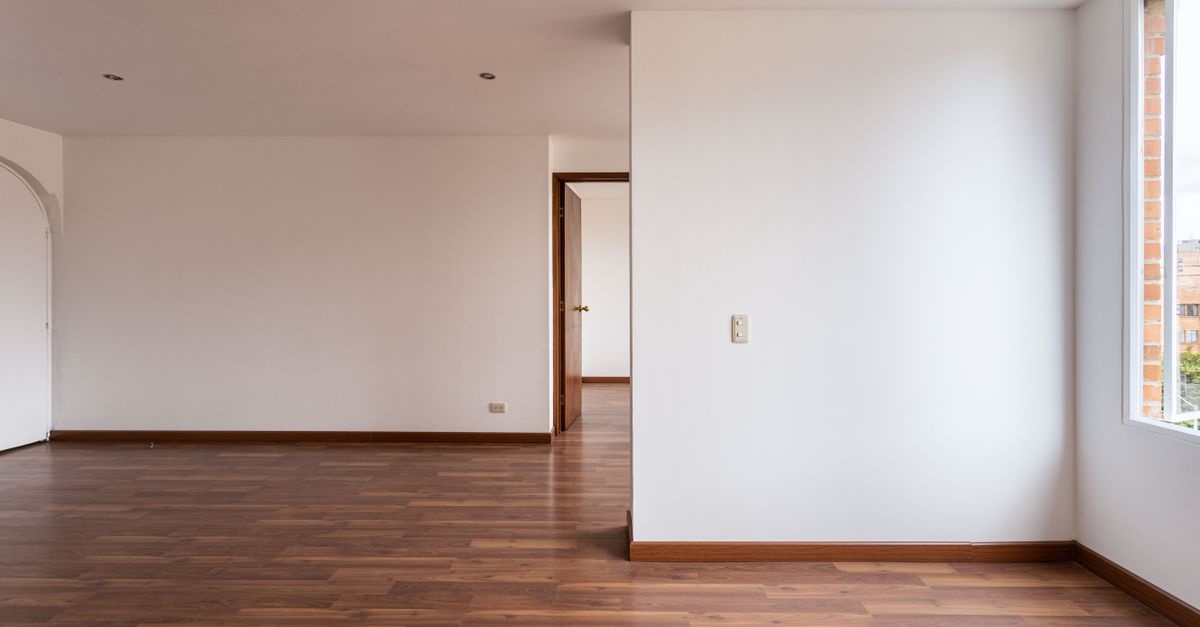
Clean lines meet long-lasting performance with anodized aluminum baseboards. They resist scratches, shrug off moisture, and bring a minimalist, architectural vibe that wood or MDF often can’t match. In this comprehensive DIY guide, you’ll learn how to install anodized aluminum baseboards with accuracy, style, and confidence—whether you choose adhesive, screws, or a hybrid method. We’ll cover planning, measuring, cutting, corners, expansion gaps, finishing details, and maintenance, plus pro insights to help you avoid common mistakes.
Why Choose Anodized Aluminum Baseboards?
Before we dive into the details of installing anodized aluminum baseboards, it’s worth understanding what sets them apart.
- Modern aesthetic: Crisp profiles, razor-straight edges, and anodized finishes (clear, black, bronze, champagne) create a premium, contemporary look.
- Durability: The anodized layer improves hardness and wear resistance, making profiles more scratch- and corrosion-resistant than painted alternatives.
- Moisture resistance: Excellent in kitchens, baths, entryways, and commercial settings where spills or mopping are routine.
- Low maintenance: Wipe-clean surfaces resist staining and won’t swell like MDF.
- Precision fit: Machined corners and consistent profiles simplify alignment and reduce putty-and-paint fuss.
- Recyclable: Aluminum is highly recyclable, and long service life improves sustainability.
Know Your Options: Profiles, Heights, and Finishes
Choosing the right profile and finish is your first design decision. The best project outcomes start with clear goals for function and style.
Common Profile Styles
- Flat/flush: Minimalist and sleek; sits tight to the wall. Great for modern spaces and continuous lines.
- Shadow-reveal (reglet): Includes a notch to create a shadow gap for a floating-wall effect. Demands precise layout.
- Cable-friendly: Some profiles conceal low-voltage cables or LED strips; check internal clearances and code requirements.
- Curved lip/soft edge: Slight radius softens the look and hides minor wall irregularities.
Heights and Thickness
- Height: 60–120 mm (2-1/2" to 5") is common. Taller profiles can make low ceilings feel higher; shorter suits compact spaces.
- Thickness: 8–15 mm. Thicker profiles are robust and mask bigger gaps; slimmer ones look extra crisp.
Finishes and Matching Hardware
- Natural/clear anodized: Satin silver that pairs well with stainless appliances and aluminum door hardware.
- Black/graphite: Dramatic contrast; emphasizes architecture and shadow lines.
- Champagne/bronze: Warmer tones that bridge modern and classic interiors.
- Custom anodized colors: Available from select manufacturers; verify lead times.
- Accessories: Matching internal/external corners, end caps, and connectors save time and sharpen results.
Planning Your Project
Thoughtful planning ensures your installation looks intentional rather than improvised. Map out every run, corner, and termination before you cut the first piece.
Map the Perimeter
- Sketch your rooms: Mark doorways, windows, built-ins, radiators, and transitions to other flooring materials.
- Identify obstacles: Outlets, telecom boxes, floor vents, and irregular walls might require notching or custom miter angles.
- Choose corner solutions: Decide between factory corner pieces or mitered joints. Factory pieces speed installation; miters look seamless with practice.
Order Enough Material
- Measure twice: Add each wall run and include extra for off-cuts and mistakes.
- Overage: Order 10–15% extra for miters and on-site surprises.
- Include accessories: End caps, joiners, internal/external corners, and any LED or cable covers.
Decide on an Installation Method
- Adhesive-only: Fast, clean, and ideal for finished walls and masonry. Requires good surface prep.
- Mechanical (screws/anchors): Adjustable, strong, and removable. Best when walls are uneven or future access behind the profile is likely.
- Hybrid (adhesive + screws): Combines immediate tack with long-term precision on wavy walls.
Pro tip: If your floors are new, protect them with Ram Board or rosin paper before you begin. Aluminum can scratch finishes if dragged or dropped.
Tools and Materials
- Measuring & layout: Tape, laser measure, 4-ft level or laser level, carpenter’s square, angle finder, chalk line or pencil.
- Cutting: Miter saw with non-ferrous metal blade (80T+), fine-tooth hacksaw, or track saw with metal-rated blade; metal file and deburring tool.
- Drilling (if mechanical): Cordless drill/driver, cobalt or titanium bits for aluminum, masonry bits (for anchors), countersink bit.
- Adhesives & sealants: MS polymer or hybrid construction adhesive, low-modulus silicone or acrylic caulk for finishing.
- Fasteners: Countersunk screws (#6–#8 or 3.5–4 mm), drywall anchors or masonry plugs as needed; nylon washers to prevent finish scuffing.
- Surface prep: Degreaser or isopropyl alcohol, clean rags, fine abrasive pad (non-scratch), primer/sealer for walls if dusty or chalky.
- Safety: Eye protection, ear protection, cut-resistant gloves, dust mask or respirator when cutting.
- Finishing: Painter’s tape, color-matched touch-up pen (if supplied), caulk finishing tool, microfiber cloth.
Wall and Floor Preparation
Solid prep is the secret behind a pro-grade result. Adhesives need a clean bond, and screws need stable backing.
- Check plumb and straightness: Use a level or laser to see how far walls deviate. Mark high and low spots.
- Repair and seal: Fill large cracks and voids. Seal chalky drywall paint or friable plaster with a suitable primer to ensure adhesive grip.
- Clean thoroughly: Remove dust, grease, and construction residue. Wipe the back of aluminum profiles with isopropyl alcohol before installing.
- Floor readiness: Floors should be installed and acclimated. Maintain a small gap between baseboard and floor to accommodate movement and for a neat caulk line if desired.
How to Install Anodized Aluminum Baseboards: Step-by-Step
This section explains how to install anodized aluminum baseboards using adhesive, mechanical fasteners, or a hybrid approach. Follow the method that best suits your substrate and design goals.
1) Measure, Mark, and Dry-Fit
- Reference line: Snap a level line or project a laser along the wall at the intended top of the baseboard.
- Locate studs: If you plan to screw into studs, mark their positions. For masonry or tile, plan for anchors or adhesive.
- Dry-fit: Lay out profiles, connectors, and corner pieces without fastening to confirm lengths and corner geometry.
2) Cutting Straight and Mitered Pieces
- Blade choice: Use a non-ferrous metal blade (80T+) on a miter saw for clean, burr-free cuts. A fine-tooth hacksaw works for small adjustments.
- Miters: Standard internal/external corners use 45° cuts. If walls are out of square, measure the actual angle with a digital angle finder and split it for each miter.
- Deburr: Smooth cut edges with a file to eliminate sharpness and improve fit. Wipe away filings to protect finishes.
- Protect the finish: Apply painter’s tape where the saw fence contacts the anodized face to reduce scuffing.
3) Account for Expansion and Contraction
Aluminum expands and contracts with temperature (about 23 µm/m·°C). In conditioned interiors this is modest, but long runs still need room to move.
- Leave a gap: 1–2 mm at end caps or transitions for every 3–4 m of continuous run. Conceal with flexible caulk or accessory covers.
- Avoid rigid bonds: Do not fill long spans solid with brittle caulk. Use an elastic sealant where movement is likely.
4) Adhesive-Only Installation
Adhesive is fast, clean, and preserves walls. It’s a top choice for masonry, tile, and straight drywall.
- Prime if needed: On chalky paint or dusty plaster, apply a bonding primer and let it cure.
- Clean the aluminum: Degrease the back with alcohol to improve adhesion.
- Apply adhesive: Run vertical beads every 6–8 inches (150–200 mm) or use an S-pattern to ensure coverage without trapping solvent. Keep beads 10–15 mm from the edges to prevent squeeze-out.
- Position the piece: Align to your reference line. Press firmly from center outward to distribute adhesive.
- Temporary bracing: Use painter’s tape or light props to hold the profile while the adhesive sets (check manufacturer’s open time).
- Wipe squeeze-out: Immediately clean any visible adhesive with a recommended solvent or alcohol, avoiding the anodized finish.
- Continue the run: Install subsequent pieces with connectors or snug butt joints, checking alignment as you go.
Note: Cold temperatures slow adhesive cure. Maintain recommended installation temperature (often 10–30°C / 50–86°F).
5) Mechanical Fastener Installation
Fasteners provide adjustability and are great for uneven walls or when you anticipate future removal.
- Mark hole pattern: Plan screws 12–16 inches (300–400 mm) apart, 1–1.5 inches (25–40 mm) from ends. Stagger holes on tall profiles.
- Pre-drill the profile: Use a bit sized for your screw’s shank; then countersink so flat-head screws sit flush. Deburr holes.
- Transfer marks to wall: Hold the profile in place, level it, and mark through the holes.
- Install anchors: For drywall, hit studs where possible. Otherwise, use quality wall anchors. For masonry, drill with a masonry bit and insert plugs.
- Screw off the piece: Drive screws by hand for final turns to avoid stripping and to protect the finish. Consider nylon washers behind screw heads to prevent marring.
- Check straightness: Use a level or laser and tweak as you go. Slight shims can correct wall waviness behind the profile.
6) Hybrid Method (Adhesive + Screws)
This approach is excellent on wavy walls: adhesive bonds the field; screws fine-tune alignment and hold corners perfectly tight.
- Apply adhesive beads as in the adhesive method.
- Set temporary screws at key locations (e.g., near corners and mid-span) to pull the profile flush.
- Remove or leave screws depending on design: some profiles hide screws; others can use decorative caps.
Mastering Corners, Ends, and Transitions
Elegance is in the details. Crisp corners and clean terminations separate a DIY look from a showroom finish.
Internal and External Corners
- Factory corner pieces: Snap-in or slide-on accessories speed installation and hide small measurement errors.
- Mitered corners: For seamless looks, cut 45° miters. Test-fit and use a tiny amount of adhesive at the miter to prevent movement while curing.
- Out-of-square walls: Measure the wall angle; if 88°, cut two 44° miters. A scrap test piece helps you dial it in before cutting final lengths.
End Caps and Terminations
- End caps: Use manufacturer’s caps to protect edges, especially near doorways or openings.
- Butt to casing: Where baseboard meets a door casing, keep a consistent reveal. A small, flexible caulk joint can hide micro-gaps.
- Open ends: Lightly break the sharp edge with a fine file if no cap is available; seal the raw edge with a dab of clear lacquer if recommended.
Floor Transitions
- Tile: Keep a small movement gap and finish with a thin silicone bead. Use color-matched silicone for invisible seams.
- Hardwood/engineered wood: Respect expansion joints. Avoid pinning the baseboard to the floor; keep it on the wall only.
- Vinyl/LVT: Maintain the manufacturer’s perimeter gap. Ensure adhesive does not ooze onto soft floors.
- Carpet: Coordinate with the tack strip location; the baseboard should slightly overlap carpet edge for a clean line without trapping pile.
Working Around Irregularities
Real-world walls wobble. Anodized aluminum still looks great if you plan for it.
- Shimming: Use thin plastic shims behind the profile to correct dips. Place shims at screw locations or within adhesive beds.
- Feathering caulk: Where tiny gaps remain, a micro bead of matching caulk smooths the visual line.
- Notching: For vents or obstacles, mark carefully, cut with a jigsaw fitted with a fine metal blade, then file smooth.
- Long runs: Use joiners between pieces and maintain expansion gaps. Align top edges to your laser for perfect continuity.
Sealing in Wet or High-Traffic Areas
Bathrooms, kitchens, mudrooms, and commercial corridors need extra resilience.
- Seal the floor edge: Apply a neat, continuous silicone bead to prevent mop water intrusion behind the profile.
- Mold resistance: Use mildew-resistant sealants where moisture is frequent.
- Impact points: At broom closets, cart paths, or luggage-prone corridors, choose thicker profiles and consider mechanical fasteners.
Integrating Cables or LED Accent Lighting
Some aluminum skirting systems are designed to conceal low-voltage wiring or to host LED strips for a floating-light effect.
- Check compatibility: Only use profiles designed for cable routing. Maintain code clearances and never mix mains voltage in non-rated channels.
- Ventilation: LED strips need some heat dissipation; aluminum helps, but check wattage and thermal specs.
- Diffusers and glare: If using LEDs, add diffusers and set dimming for soft, indirect glow.
- Access points: Plan removable sections or junction areas for maintenance.
Safety note: Electrical work may require a licensed professional. Follow all local codes.
Safety Essentials
- Eye and ear protection: Non-ferrous metal cutting is loud and can throw sharp chips.
- Gloves: Cut edges are razor-sharp. Deburr immediately and handle with cut-resistant gloves.
- Secure workpieces: Clamp profiles during cutting to prevent kick or chatter.
- Ventilation: Use dust extraction or work outdoors when cutting multiple pieces.
Common Mistakes and How to Avoid Them
- Skipping surface prep: Dusty paint and oily metals reduce adhesive strength. Clean both surfaces thoroughly.
- No expansion allowance: Tight end joints can buckle in long runs. Leave small, flexible gaps.
- Over-torquing screws: This can dimple the profile or mar the finish. Finish by hand and use countersinks.
- Impatient caulking: Apply caulk after adhesive cures to avoid movement and cracked seams.
- Wrong blade: Wood blades tear aluminum. Use a proper non-ferrous metal blade for clean cuts.
Cleaning and Maintenance
One of the best parts of anodized aluminum is how easy it is to keep pristine.
- Routine cleaning: Wipe with a damp microfiber cloth and mild soap. Rinse and dry to avoid water spots on dark finishes.
- No abrasives: Avoid scouring pads or harsh chemicals that can dull the anodized layer.
- Touch-ups: Minor scuffs often clean away. Use manufacturer-approved touch-up pens sparingly on cut ends if needed.
Time and Cost Planning
- Time: A typical room (150–200 linear feet / 45–60 m) may take a careful DIYer 1–2 days, including prep, cutting, and finishing.
- Cost drivers: Profile height and finish, accessories (corners/end caps), adhesive type, and blade quality.
- Savings tip: Accurate planning reduces off-cuts. Buy an extra profile or two to avoid rush orders for that final corner.
Quality Control: A Final Checklist
- Straight and level: Confirm with a laser or long level along every wall run.
- Tight corners: Miters close and aligned; factory corner pieces fully seated.
- Consistent reveals: Even gap to floor or consistent caulk line; no adhesive squeeze-out.
- Secure bond: Gently press along each profile after cure; no hollow spots.
- Clean finish: Remove all tape, polish surfaces, and collect metal shavings.
FAQ: Your Installation Questions Answered
Below are concise answers to frequent questions about how to install anodized aluminum baseboards and achieve the best possible outcome.
- Can I install over imperfect walls? Yes. Use shims, the hybrid method, and feathered caulk to mask small irregularities.
- Which adhesive works best? MS polymer or hybrid construction adhesives bond well to primed drywall, masonry, and aluminum. Follow the product’s open and cure times.
- Do I need to hit studs? Only for mechanical fastening into drywall. Adhesive method does not require studs but needs sound, clean surfaces.
- How do I cut perfect miters? Use a sharp, non-ferrous blade, clamp workpieces, make test cuts on scrap, and fine-tune angles for out-of-square corners.
- What about underfloor heating? Allow small movement gaps and use flexible sealants. Avoid pinning the baseboard to the floor.
- Is caulk required? Not always. Many prefer a small, neat bead for a shadow line and moisture seal, especially on tile or in wet rooms.
A Detailed Walkthrough Example
To bring everything together, here’s a condensed, room-by-room example showing how to install anodized aluminum baseboards in a medium-size living room with two doorways and one internal corner.
- Protect finishes: Cover floors and door casings. Set up your miter saw with a non-ferrous blade.
- Layout: Laser a reference line at your target height. Mark studs where accessible.
- First wall: Measure, cut a clean square end for the starting corner, and dry-fit. If using a factory internal corner, cut to the dimension minus the corner’s insertion depth.
- Adhesive: Apply vertical beads on the profile’s back, seat it along the line, tape in place, and wipe any squeeze-out.
- Second wall (internal corner): Either slide on the factory corner or cut matching 45° miters. Dry-fit, then adhere/screw as chosen.
- Doorways: Terminate neatly at casings with end caps or a tight butt joint and micro bead of caulk.
- Final wall: Use a joiner for mid-wall seams; leave a 1–2 mm expansion gap at the last termination.
- Finish: After cure, run a minimal caulk bead along the floor if desired, then smooth with a caulk tool.
- Cleanup: Remove tape, polish fingerprints with a microfiber cloth, and vacuum metal filings.
Troubleshooting Guide
- Gap at corner miter: Re-cut a degree or two tighter; lightly sand the back of the miter. Add a touch of adhesive to hold the seam.
- Profile won’t sit flat: Identify hump in wall; use the hybrid method with adhesive and a screw where the hump is, or sand/plane the hump if feasible.
- Adhesive won’t bond: Check temperature and surface cleanliness. Switch to a higher-grab MS polymer and prime the wall if chalky.
- Visible screw dimples: The countersink may be too deep or torque too high. Replace with a fresh piece if marred; adjust your technique.
- Scratches on finish: Use painter’s tape during cutting and handling. For minor marks, try a gentle aluminum polish or a manufacturer-specified touch-up.
Sustainability and Lifecycle Considerations
- Longevity: Anodized finishes outlast many painted trims, reducing replacement frequency.
- Recyclability: Off-cuts and retired profiles can enter aluminum recycling streams. Keep steel fasteners separate.
- Low VOC options: Choose low-odor adhesives and sealants for healthier indoor air.
Recap: From Edge to Elegance
You now understand how to install anodized aluminum baseboards from planning through final polish. The keys are precise measuring, clean cutting, respectful allowance for movement, and methodical fastening. Whether you go adhesive-only for a quick, seamless look or choose a hybrid method for wall correction, anodized aluminum rewards care with a finish that’s both refined and robust.
Quick Reference: Step Checklist
- Design: Select profile, height, and finish; order accessories.
- Prep: Clean, prime as needed, mark lines, locate studs.
- Cut: Use correct blade, miter accurately, deburr.
- Install: Adhesive, mechanical, or hybrid; maintain expansion gaps.
- Detail: Corners, end caps, transitions; neat caulk if desired.
- Inspect: Level, alignment, secure bonds; clean and protect.
Final thought: With patience and the right tools, the transition from rough edge to modern elegance is well within DIY reach. Take your time, measure carefully, and let the inherent precision of anodized aluminum elevate your space.
Keyword focus: This guide naturally incorporates core and related terms such as installing anodized aluminum baseboards, aluminum skirting, DIY baseboard installation methods, adhesive vs. screw mounting, corner profiles, expansion gaps, and maintenance tips to support discoverability without awkward repetition.