Your terrace should be a place to unwind, not a source of leaks and costly repairs. If you want a durable, low‑maintenance finish that resists wind, rain, and standing water, a torch‑applied bituminous membrane is one of the most dependable solutions available. In this comprehensive guide, you will learn how to waterproof a terrace with torch‑on felt correctly, from initial planning and substrate prep through to safe installation, finishing details, and long‑term care. Whether you are managing a project as a homeowner, contractor, or property manager, the insights below will help you avoid common pitfalls and deliver a watertight result that lasts.
Why Terrace Waterproofing Matters
Terraces are among the most exposed parts of a building. Sun, rain, freeze‑thaw cycles, and foot traffic all conspire to shorten the lifespan of conventional coatings. Without a robust waterproofing layer, moisture can infiltrate, causing rot in timber, corrosion of metals, efflorescence in masonry, and spalling in concrete. Left unchecked, leaks can compromise insulation performance, stain interiors, cause mold, and degrade structural components. A high‑quality torch‑on felt system provides a tough, heat‑welded barrier that resists tears, roots, and mechanical damage and offers excellent seam integrity compared to many cold‑applied alternatives.
What Is Torch‑On Felt?
Torch‑on felt is a bituminous membrane that is heated with a propane torch so the underside softens and bonds to a primed substrate or to a base layer. These membranes are often SBS‑modified (styrene‑butadiene‑styrene) for flexibility in colder climates or APP‑modified (atactic polypropylene) for enhanced UV and heat resistance. A typical system for a terrace includes:
- Vapor control layer (VCL) when building a warm roof above conditioned spaces.
- Thermal insulation boards if improved energy performance is required.
- Base sheet (underlay) to build up thickness and provide redundancy.
- Cap sheet (top layer) with a mineral granule finish for UV protection or a plain finish if it will be covered by tiles or decking.
The heat‑welded seams create a continuous, monolithic surface that is both watertight and resilient. This approach is widely used on flat roofs, balconies, and terraces in both residential and commercial projects.
Design First: Plan a System That Actually Works
Before diving into how to apply torch‑on felt, invest time in design. Good design decisions prevent 90% of waterproofing failures.
Choose the Right Build‑Up
- Cold deck: Membrane is directly over the structural deck with insulation below between joists. Watch out for condensation risks; proper ventilation and a VCL are crucial.
- Warm roof: VCL over the deck, then insulation, then the torch‑on system. Minimizes condensation risk and is common for occupied spaces below.
- Inverted roof: Membrane over deck, then XPS insulation above, held with ballast or paving on pedestals. Great for terraces receiving heavy traffic or pavers.
Confirm compatibility between the membrane and any overlay (tiles, decking on pedestals, artificial grass, or green roof components). If you plan heavy foot traffic, include protection boards or walkway pads over the cap sheet.
Ensure Proper Falls and Drainage
- Falls: Aim for a slope of at least 1:80 (1.25%) toward drains; 1:60 (1.7%) is even better to reduce ponding.
- Outlets: Provide sufficient rainwater outlets sized for local rainfall intensity and add overflow scuppers for redundancy.
- Gutters and drip edges: Use metal drip edges at perimeters and ensure water discharges cleanly away from the facade.
Persistent ponding accelerates aging of bituminous membranes and can mask defects. Good drainage design extends service life and reduces maintenance.
Detail the Upstands and Terminations
- Upstands should rise at least 150 mm above finished terrace level at doors, parapets, and walls.
- Corner fillets (at 45°) reduce stress and ease membrane forming at vertical transitions.
- Metal flashings or termination bars should secure and protect the top edge of the membrane.
Most leaks begin at edges, penetrations, and corners. Prioritize these details in design and execution.
Safety First: Hot Works Essentials
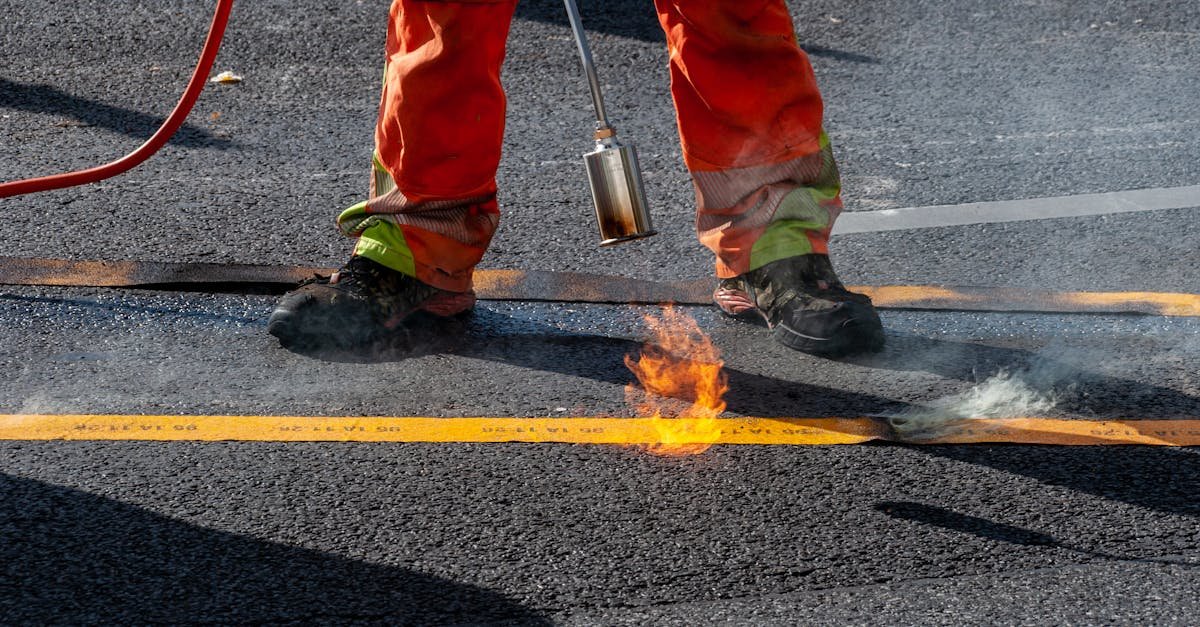
Installing a torch‑applied system involves open flame. Treat it as hot works and follow strict safety procedures.
- Permits and fire watch: Implement a hot‑work permit, keep fire extinguishers nearby, and maintain a fire watch for at least 60 minutes after work, or as required by local code and insurer.
- PPE: Wear gloves, flame‑resistant clothing, non‑slip boots, eye protection, and hearing protection when cutting metal flashings.
- Gas safety: Secure propane cylinders upright, use proper regulators and hoses, check for leaks, and keep cylinders away from direct sun and heat.
- Site prep: Clear combustible materials, protect adjacent glazing, and shield landscaping.
- Weather: Do not torch in high winds, rain, or near freezing conditions without manufacturer guidance.
For combustible substrates like timber, use torch‑safe methods: install a torch‑on safe underlay or a self‑adhesive base layer first, or include a non‑combustible separation layer or overlay board before torching the cap sheet. Always follow the membrane manufacturer’s safety instructions.
Materials and Tools Checklist
- Primer compatible with the chosen bituminous system
- Vapor control layer (if warm roof)
- Insulation boards and mechanical fixings or adhesive (as specified)
- Base sheet (SBS or APP) and cap sheet (granular or plain finish)
- Corner gussets, pre‑formed outlets, reinforcement strips
- Metal drip edges, termination bars, and parapet caps
- Propane torch with regulator and hoses; spare cylinders
- Roller, squeegee, or weighted roller for consolidation
- Chalk line, knife with hook blades, measuring tape
- Broom, blower, and cleaning materials
- Fire extinguisher (ABC or as specified), fire blanket, heat shields
Substrate Preparation: The Foundation of Success
Great membranes fail on bad substrates. Ensure the deck is clean, dry, sound, and properly primed.
- Remove old coverings that are loose, blistered, or incompatible. If overlaying an existing bitumen roof, consult the manufacturer for compatibility and use a primer or separation layer as needed.
- Repair defects in the deck: fill cracks with compatible repair mortars, replace rotten timber, and re‑secure loose boards or sheathing.
- Check moisture in concrete screeds using a moisture test. Bitumen and trapped moisture do not mix; allow adequate drying or use a venting base sheet where specified.
- Create falls with a tapered screed or insulation to prevent ponding.
- Incorporate fillets at upstands for smooth transitions.
- Prime the surface uniformly and allow it to tack off per the product data sheet.
Spend time here—adhesion, longevity, and aesthetics all start with meticulous prep.
Step‑by‑Step: Installing a Torch‑On System on a Terrace
This walkthrough assumes a straightforward warm‑roof terrace over a structural concrete or timber deck, with base sheet and mineral‑finished cap sheet left exposed or protected with tiles on pedestals.
1) Set Out and Prime
- Confirm levels, drain positions, and falls with a laser or long straightedge.
- Dry fit key details: outlets, drip edges, and termination bars.
- Clean thoroughly and apply an even coat of primer. Allow to cure to a tacky state as specified.
2) Install the Vapor Control Layer (If Warm Roof)
- Lay VCL sheets with end laps of about 100 mm and side laps of about 75 mm, or as per manufacturer instructions.
- Seal laps with torch, hot air, or self‑adhesive bonds as specified. Ensure continuity at upstands.
3) Fit Insulation and Overlay (If Specified)
- Lay rigid insulation boards tightly staggered to avoid linear joints. Mechanically fix or adhere per the wind‑uplift design.
- Add a non‑combustible overlay board (e.g., mineral fiber or cementitious board) over combustible decks if torching above.
- Check for flatness and correct any rocking boards.
4) Base Sheet Installation
- Start at the lowest point and work upward so overlaps shed water.
- Cut rolls to length, relax them to reduce curl, and align with chalk lines.
- Heat the underside evenly with a sweeping motion until a thin bitumen bleed (about 5–10 mm) appears at the edge as you roll forward.
- Maintain side laps typically 75 mm and end laps 100–150 mm, staggering end laps by at least 300 mm to avoid T‑joints stacking.
- Use a roller or foot pressure to consolidate. Re‑warm areas if necessary for full bond.
- At T‑joints, feather or heat‑dress the corner to avoid fishmouths.
5) Upstands, Corners, and Perimeter Details
- Install corner gussets first: pre‑cut triangular patches for internal and external corners.
- Form upstands by turning the base sheet up the wall to at least 150 mm above finished surface. Use a fillet to ease the bend.
- Reinforce upstands with an additional strip (e.g., 300 mm wide) before the final cap sheet for extra security.
- Fit metal drip edges at perimeters, fastening to the deck and priming the metal if required before torching onto it.
6) Penetrations, Outlets, and Thresholds
- Use pre‑formed outlets wherever possible. Prime and heat‑weld base sheet to the outlet flange; clamp rings if provided.
- At posts or balustrade anchors, wrap with collar pieces and reinforcement patches. Keep fixings above the waterproof layer when you can, or properly sleeve and seal them.
- At door thresholds, keep finished height low without sacrificing the 150 mm upstand; consider recessed thresholds with suitable drainage if access requirements demand it.
7) Cap Sheet Installation
- Choose a granule‑finished cap sheet if left exposed, typically in grey, green, or brown mineral. For coverings (tiles or decking), a plain‑faced cap sheet may be specified.
- Set out sheets so laps are offset from the base layer and never align four‑way joints.
- Torch the underside evenly, watching for a controlled bitumen bleed along laps. Avoid overheating the granules; use a gliding, even heat.
- Address laps: maintain manufacturer‑specified widths and roll firmly to ensure full bond with a neat, continuous bead.
- At end laps of mineral caps, de‑granulate the overlap strip (by heating and embedding granules or cutting back) to create a clean bonding area.
8) Finishing the Upstands and Terminations
- Apply cap sheet upstands with sufficient overlap over the base‑layer upstands. Use pre‑cut corner pieces for neat, reinforced corners.
- Finish at the top with a termination bar or chase into masonry joints with sealant, then add counter‑flashing.
- At parapets, extend over the top and protect with metal capping where appropriate.
9) Walkway Pads and Protection
- Install walkway pads or protection boards at access routes, near plant, or where furniture will sit.
- For tiles on pedestals, lay a compatible separation layer and ensure pedestal loads are distributed per structural design.
Alternative: Self‑Adhesive Bases for Torch‑Safe Installations
Where open flame is risky (timber decks, tight upstands, combustible cladding), consider a self‑adhesive base sheet with a torch‑applied cap sheet or even a fully self‑adhered system. Hot‑air welders can also be used in sensitive areas, reducing fire risk while maintaining seam integrity.
Quality Control and Testing
After installing the membrane, verify performance before adding finishes.
- Visual inspection: Check for continuous bitumen bleed at laps, no fishmouths, voids, or blisters. Ensure neat terminations and solid adhesion at details.
- Flood test: Where permitted, plug outlets and flood to a shallow depth for 24–48 hours to check for leaks. Protect interiors and consult structural limits before ponding water.
- Electronic leak detection (low‑voltage or high‑voltage) provides a non‑destructive alternative, especially under sensitive finishes.
- Adhesion checks: Gently probe laps. If they lift easily, re‑heat and consolidate.
Common Mistakes to Avoid
- Inadequate falls: Even the best membrane struggles with chronic ponding; design proper slopes.
- Insufficient upstand height: Keep that 150 mm minimum above the finished surface.
- Poor substrate prep: Dust, moisture, and rough edges undermine adhesion.
- Overheating or underheating: Too little heat causes weak bonds; too much burns the bitumen and damages reinforcement.
- Aligned joints between layers: Stagger to avoid pathways for water.
- Neglecting penetrations: Posts and outlets need pre‑formed collars and reinforcement patches, not ad‑hoc torching.
- No fire safety: Skipping hot‑work controls invites disaster.
Integrating Finishes: Tiles, Decking, and Greenery
A torch‑applied membrane is a great base for various terrace finishes. Choose carefully to preserve waterproofing.
- Tiles on pedestals: Excellent for drainage and maintenance. Ensure pedestal pads are compatible and include a slip sheet or protection layer to avoid abrasion.
- Timber or composite decking: Use adjustable pedestals or a floating frame that does not puncture the membrane. Add walkway pads under feet.
- Green areas: If planning planters or a green roof section, use a root barrier membrane or a cap sheet with built‑in root resistance and incorporate drainage composites.
- Ballast: On inverted roofs, washed gravel or pavers provide UV protection and wind resistance.
Whatever the finish, maintain access to outlets for cleaning, include inspection chambers where needed, and avoid fixings that penetrate the waterproof layer.
Maintenance: Keep It Performing for Decades
One reason torch‑on systems are popular is their long service life, often 20–30 years when properly maintained. A simple maintenance plan preserves that lifespan.
- Seasonal checks: Inspect in spring and autumn. Clear debris, leaves, and silt from surfaces and outlets.
- After storms: Look for displaced tiles, loose flashings, or damage from flying debris.
- Minor repairs: Small blisters or nicks can often be patched with compatible torch‑on or cold‑applied repair compounds following the manufacturer’s method.
- Sealants: Renew mastic at termination bars and counter‑flashings as needed.
- Document: Keep a log with photos for warranty and future reference.
Costs, Timelines, and When to Hire a Pro
Costs vary by region, system thickness, insulation, complexity of details, and access. Expect higher costs for tight sites, extensive upstands, or multiple penetrations. A straightforward terrace might take 2–4 days for a small crew, including prep, membrane installation, and testing (not counting screed drying or complex finishes).
- DIY vs. professional: If you are new to hot works, hire a certified installer. Professional crews bring hot‑work controls, experience at detailing, and access to manufacturer warranties.
- Warranties: Manufacturers often offer enhanced warranties when approved installers follow their full system specification.
- Permits and codes: Check local requirements for hot‑work permits, fire watches, and guardrail or balustrade standards at terrace edges.
Environmental and Performance Considerations
- Energy efficiency: Warm roofs with continuous insulation reduce thermal bridging and improve interior comfort.
- Reflectivity: Light‑colored cap sheets can lower heat gain in hot climates; in cold regions, darker membranes may be advantageous.
- Recyclability: Some manufacturers provide take‑back programs or produce membranes with recycled content.
- Acoustics: Additional mass from bituminous layers can improve sound damping against rain impact compared to thin coatings.
Troubleshooting: Symptoms, Causes, and Fixes
- Fishmouths at laps: Usually due to trapped tension or underheating. Carefully re‑open, warm, and re‑bond; add a cover patch if needed.
- Blisters: Often from trapped moisture or solvent. If small and stable, monitor; otherwise, cut, dry the area, prime, and patch with a torch‑on repair piece.
- Ponding: Caused by insufficient falls. Add tapered overlays or adjust outlets; avoid puncturing the membrane.
- Granule loss: Normal weathering over time; protect with walkway pads in high‑traffic zones and schedule cap sheet renewal if widespread.
Frequently Asked Questions
Is torch‑on felt suitable for all terraces?
It suits most concrete and timber decks when properly detailed. On combustible substrates, use torch‑safe build‑ups (self‑adhesive bases or overlay boards) and adhere to hot‑work controls. For complex geometries or very low thresholds, consult the manufacturer for specific detailing.
How long does a torch‑on system last?
With correct design, installation, and maintenance, 20–30 years is common. Redundancy (two‑layer systems), quality cap sheets, and good drainage extend life.
Can I install tiles or decking on top?
Yes. Use pedestals for tiles, and floating frames or pedestals for decking. Always add protection layers and maintain access to outlets. Avoid direct fixings through the membrane whenever possible.
What weather conditions are acceptable for installation?
Dry weather with moderate temperatures and light wind is ideal. Avoid rain, snow, and strong winds. Follow the product data sheet for minimum substrate temperatures.
What is the difference between SBS and APP membranes?
SBS‑modified bitumen remains more flexible at lower temperatures, ideal for climates with freeze‑thaw cycles. APP‑modified membranes offer better UV and heat resistance, favored in hotter regions. Many terraces use SBS for adaptability and ease of detailing.
A Practical Recap: Keys to Doing It Right
- Design with drainage: Provide sufficient falls, outlets, and overflow scuppers.
- Respect upstands: Aim for 150 mm above the finished terrace level.
- Prepare meticulously: Clean, repair, prime, and use fillets at transitions.
- Layer smartly: VCL (if warm roof), insulation, base sheet, then a robust cap sheet.
- Detail carefully: Corners, penetrations, and perimeters deserve extra attention.
- Control hot works: Follow safety protocols and consider torch‑safe alternatives where needed.
- Test and maintain: Verify watertightness and inspect regularly.
Putting It All Together
Learning how to waterproof a terrace with torch‑on felt is about more than just mastering a torch. It starts with smart design—adequate falls, correct build‑ups, and robust details—continues through disciplined substrate preparation and safe, consistent installation, and ends with inspections, testing, and maintenance. When done right, a torch‑applied membrane provides a resilient, long‑lasting shield against the elements, turning your terrace into a reliable, rainproof extension of your living space.
If you are taking a DIY route, consider a hybrid approach: hire a certified crew for the critical membrane work and handle the finishes yourself. If you are a professional, align with manufacturer specifications and document each step for warranty confidence. Either way, by following the principles above, you will not only understand how to waterproof a terrace with torch‑on felt—you will be equipped to deliver watertight results that stand the test of time.
Pro tip: For SEO clarity and user intent, remember that "torch‑on felt" may also be called "torch‑applied bituminous membrane" or "roofing felt torch‑on system." Whatever the term, the best results always come from design‑led thinking, meticulous prep, and professional safety standards.
Ready to make your terrace truly weather‑tight? Gather your materials, plan your details, and take the systematic approach outlined here to achieve a durable, dependable waterproofing solution with torch‑applied felt.